最近需要對公司內的所有服務器進行監控,當然現在有很多軟件可以進行這個功能的實現,比如說微軟的SCOM,還有就是今天的Nagios軟件了,但是前者還好說Windows 平台下的產品,還是比較好配置和安裝的,但是如果我們要安裝Nagios的話,就可能會有一小些不好搞,因為這個東東是裝在Linux平台上的,昨天晚上沒怎麼睡,搞了搞怎麼去裝,今天呢把相關的安裝方法呢發上來,分享一下,供博友們參考參考。
首先我們來看看,什麼是Nagios?,Nagios是一款用來監視系統和網絡的開源監控軟件,它一般被運行於一個主服務器上,這個服務器運行 Liunx 或 Unix 操作系統。Nagios 可以通過強大的插件功能來實現對本機和遠端服務的監控,當被監控對象出現異常,Nagios 就會及時給管理人員告警。這個功能不錯哦,呵呵,再者說它其實也可以看成是一個基於TCP/IP協議的軟件包,包含有nagios主程序和它的各個插件,配置非常靈活,可以監視的項目很多,也可以通過自定義一些shell 腳本進行監控服務,非常適合各類企業的網絡和系統平台服務監控的應用。
聽起來Nagios功能非常強大,它可以監控服務和主機,但是其實他自身並不包括這部分功能的代碼,所有的監控、檢測功能都是有插件來完成的。比如說報警功能,如果監控系統發現問題不能報警那就沒有意義了,所以報警也是nagios很重要的功能之一。但是,同樣的,nagios自身也沒有報警部分的代碼,甚至沒有插件這部分,我們也只能是找一些相關插件來搞定了,這裡我們介紹的只是nagios安裝,是指基本平台,也就是nagios軟件包的安裝。它是監控體系的框架,也是所有監控的基礎,後期我也會根據配置的進度不定期地把後邊的東東也發上來補充給大家,一同學習,一同進步。
接下來,我們就一起來看看如何在Linux平台上安Nagios這個東東吧,在這裡,我個人認為Centos還是比較不錯的平台,如果大家要去安裝的話Centos這個是不錯的選擇哦,而且大家還可以通過在Linux命令行下運行yum Update來實現系統的升級,我個人感覺相關方便好用。好了,接下來我們言歸正傳吧,談談怎麼安裝:
1) 安裝apache,並設置開機啟動
? 安裝Apache程序
[root@localhost nagios-3.2.3]# yum install httpd
Total download size:1.6M
IS this OK[Y/N]:Y
Importing GPG key 0xE8562897 "CentOS-5 Key (CentOS 5 Official Signing Key) <[email protected]>" from /etc/pki/rpm-gpg/RPM-GPG-KEY-CentOS-5 Is this ok [y/N]:Y
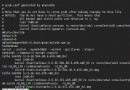
安裝成功後將顯示如下圖所示內容:

[root@localhost nagios-3.2.3]# chkconfig --levels 35 httpd on
[root@localhost nagios-3.2.3]# service httpd start
啟動 httpd:[確定]
2) 安裝配置PHP
安裝PHP程序
[root@localhost nagios-3.2.3]# yum install php
Total download size: 4.9 M
Is this ok [y/N]:y
安裝完成後顯示下圖所示內容

3)安裝mysql,並設置mysql開機自啟動,同時啟動mysql
安裝Mysql
[root@localhost ~]# yum install mysql
Total download size: 10 M
Is this ok [y/N]: Y
安裝成功後,將顯示下圖所示內容

[root@localhost ~]# yum install mysql-server
Total download size: 10 M
Is this ok [y/N]:Y
[root@localhost ~]# chkconfig --levels 35 mysqld on
[root@localhost ~]# service mysqld start
配置MySql的root密碼
[root@localhost ~]# mysql_secure_installation
Enter current password for root (enter for none): ( 回車)
OK, successfully used password, moving on...
Setting the root password ensures that nobody can log into the MySQL
root user without the proper authorisation.
Set root password? [Y/n] :Y
New password: (這裡輸入密碼,注意輸入內容是不會顯示出來的哦)
Re-enter new password: (這裡再次輸入密碼,注意輸入內容是不會顯示出來的哦)
Password updated successfully!
Reloading privilege tables..
... Success!
By default, a MySQL installation has an anonymous user, allowing anyone
to log into MySQL without having to have a user account created for
them. This is intended only for testing, and to make the installation
go a bit smoother. You should remove them before moving into a
production environment.
Remove anonymous users? [Y/n]:Y
Normally, root should only be allowed to connect from 'localhost'. This
ensures that someone cannot guess at the root password from the network.
Disallow root login remotely(是否禁止root的遠程登錄)? [Y/n]:Y
By default, MySQL comes with a database named 'test' that anyone can
access. This is also intended only for testing, and should be removed
before moving into a production environment.
Remove test database and access to it? [Y/n]: Y
Reload privilege tables now? [Y/n] :Y
Cleaning up...
All done! If you've completed all of the above steps, your MySQL
installation should now be secure.
Thanks for using MySQL!
4)Nagions安裝
下載Nagions-3.2.3安裝包
[root@localhost ~]# wget http://ncu.dl.sourceforge.net/project/nagios/nagios-3.x/nagios-3.2.3/nagios-3.2.3.tar.gz
解壓Nagions-3.2.3安裝包
[root@localhost ~]# tar -zxvf nagios-3.2.3.tar.gz
安裝GCC
注意:不裝這個,後邊的make all就沒辦法執行了,會報錯的哦~
[root@localhost ~]# cd nagios-3.2.3
[root@localhost ~]# yum instll gcc
[root@localhost ~]# ./configure --prefix=/usr/local/nagios
[root@localhost nagios-3.2.3]# ./configure
為nagions增加用戶,此步必需做,否則無法mak all編譯
[root@localhost nagios-3.2.3]# useradd nagios
[root@localhost nagios-3.2.3]# mkdir /usr/local/nagios
[root@localhost nagios-3.2.3]# chown nagios.nagios /usr/local/nagios
[root@localhost nagios-3.2.3]# make all
[root@localhost nagios-3.2.3]# make install; make install-init;make install-commandmode;make install-config;make install-webconf
驗證程序是否被正確安裝
[root@localhost nagios-3.2.3]# cd ~
[root@localhost ~]# cd /usr/local/nagios
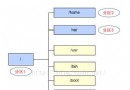
[root@localhost nagios]# ls
bin etc libexec sbin share var
如果有上述6個文件,說明就是安裝成功了
修改nagios頁面文件
[root@localhost nagios]# more /etc/httpd/conf.d/nagios.conf
[root@localhost nagios]# cp /etc/httpd/conf.d/nagios.conf /var/www/html/
生成nagios頁面訪問賬號
[root@localhost nagios]# touch /usr/local/nagios/etc/htpasswd.users
[root@localhost nagios]# /usr/bin/htpasswd -c /usr/local/nagios/etc/htpasswd.users root
New password: (這裡輸入密碼,注意輸入內容是不會顯示出來的哦)
Re-type new password:(這裡再次輸入密碼,注意輸入內容是不會顯示出來的哦)
[root@localhost nagios]# cat /usr/local/nagios/etc/htpasswd.users
root:TTiPq0FKlL0iw
修改nagios主配置文件
[root@localhost nagios]# vi /usr/local/nagios/etc/nagios.cfg
輸完上邊的命令後,將會出現一個編輯區域,你可以移動方向鍵到你想要添加的位置,按下字母I鍵進行編輯,編輯完成後,按ESC鍵,現按下右shift+;鍵,在出來的輸入點處,輸入WQ鍵,回車即可,如果你改錯了,想不保存想重新進入編輯,也好辦,只需要在輸入點處,輸入Q!回車,就退出來了,要是什麼都沒做要退出的話,只要在輸入點處,輸入Q鍵即可退出,好了,在下邊的內容後換行增加對應的信息。
command_check_interval=15s
#command_check_interval=-1
[root@localhost nagios]# touch /usr/local/nagios/var/nagios.log
[root@localhost nagios]# chown nagios.nagios /usr/local/nagios/var/nagios.log
測試nagios是否成功
[root@localhost nagios]# chkconfig nagios on
[root@localhost nagios]# service nagios start
[root@localhost nagios]# service httpd restart
測試nagios是否成功啟動
在IE輸入 http:// 這裡輸入承擔Nagios服務的Linux服務器IP地址/nagios/ ,在彈出的對話框中,輸入“生成nagios頁面訪問賬號”裡新建的尋附上帳號及密碼,如果輸入密碼正確的話就進入了Nagios的Web頁面了。

總得來說,通過裝Nagios學習了Linux下的命令,收獲很大,嘻嘻~,分享一下。
出處:http://tingdongwang.blog.51cto.com/1056852/699279