今天剛裝的ubuntu server7.10 去nagios看到有新版本,就決定裝一下`第一次在ubuntu裡面裝`便把 他記錄下來,nagios很強大的,可以與很多軟件整合的,以後這篇文章慢慢修改!在這裡謝謝 http://nagios-cn.sourceforge.net/的作者,讓很多菜鳥飛起了!廢話不多說!開始操作
1。首先到 www.nagios.org下載
nagios-3.0.3.tar.gz
nagios-plugins-1.4.12.tar.gz
2。安裝所需要的庫
apt-get install apache2 php5-gd build-essential libgd2-xpm-dev php5 mysql-server libmysqlclient15-dev libssl-dev perl
3.useradd nagios
passwd nagios
groupadd nagcmd
usermod -G nagcmd nagios
usermod -G nagcmd www-data
4。tar zxvf nagios-3.0.3.tar.gz
cd nagios-3.0.3
./configure --with-command-group=nagcmd
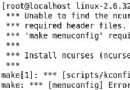
make all
make install
make install-init
make install-config
make install-commandmode
vi /usr/local/nagios/etc/objects/contacts.cfg
make install-webconf
htpasswd -c /usr/local/nagios/etc/htpasswd.users nagiosadmin
/etc/init.d/apache2 reload
5.tar zxvf nagios-plugins-1.4.12.tar.gz
cd nagios-plugins-1.4.12
./configure --with-nagios-user=nagios --with-nagios-group=nagios
make
make install
ln -s /etc/init.d/nagios /etc/rcS.d/S99nagios
/usr/local/nagios/bin/nagios -v /usr/local/nagios/etc/nagios.cfg
/etc/init.d/nagios start
apt-get install mailx
6.打開IE訪問http://localhost/nagios
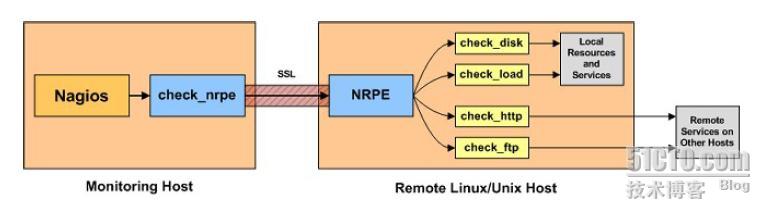
安裝nrpe-2.12.
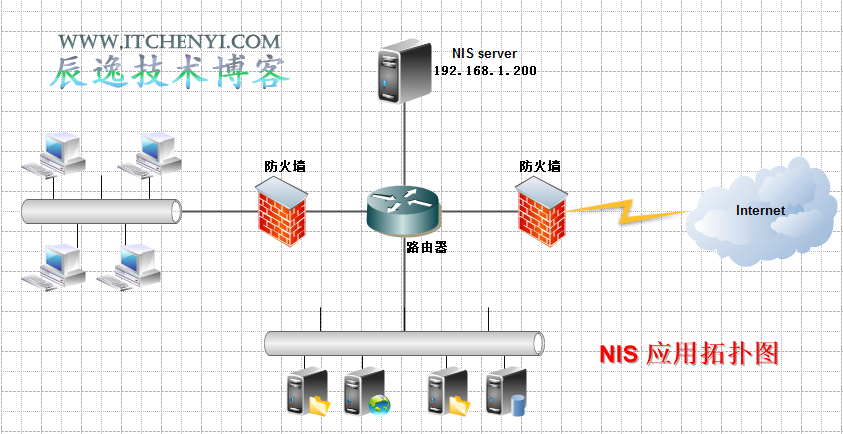
在安裝之前,先發一張圖來說明它的設計概括圖:
1. 被監控端安裝
apt-get install xinetd
tar zxvf nrpe-2.12.tar.gz
cd nrpe-2.12
./configure
make all
make install-plugin
make install-daemon
make install-daemon-config
make install-xinetd
vim /etc/xinetd.d/nrpe
修改 only_from = 127.0.0.1 <nagios-ip-address>
vim /etc/services
再最後添加
nrpe 5666/tcp #NRPE
重啟 xinetd 服務
/etc/init.d/xinetd restart
查看服務是否啟動
netstat -an | grep nrpe
tcp 0 0 *:nrpe *:* LISTEN
執行/usr/local/nagios/libexec/check_nrpe -H localhost
NRPE v2.12
返回版本信息說明OK!
vim /usr/local/nagios/etc/nrpe.cfg
可以添加你需要監控的服務!
2。安裝nagios服務端
tar zxvf nrpe-2.12
cd nrpe-2.12
./configure
make all
make install-plugin
/usr/local/nagios/libexec/check_nrpe -H 192.168.0.1
返回版本信息
NRPE v2.12
vim /usr/local/nagios/etc/objects/commands.cfg
在最後添加
define command{
command_name check_nrpe
command_line $USER1$/check_nrpe -H $HOSTADDRESS$ -c $ARG1$
}
然後就可以在service.cfg裡面添加 check_nrpe!check_load了。
安裝PNP+RRDTOOL
安裝PNP是一個很小的開源包,他基於PHP和PERL,利用rrdtool將Nagios采集的數據繪制成圖表。如果 你要安裝PNP,那麼准備工作有如下3項:
1、整合Apache和PHP(本文使用版本:Apache 2.2.3 PHP 5.1.6)
2、安裝rrdtools (本文使用版本:RRDTools 1.2.23)
3、安裝Perl (本文使用版本: Perl5 )
因為我是ubuntu系統所以我就用懶人安裝。全是apt-get 安裝的牛人可以編譯源代碼安裝
要介紹PNP工作原理,首先要說明一下Nagios提供的數據接口,也就是PNP的數據來源。在前面的文章 中,我提到過,在定義host或service中都有一個定義項,名為process_perf_data,其值可以定義為0或1 ,其作用是是否啟用Nagios的數據輸出功能。如果你將此項賦值為1,那麼Nagios就會將收集的數據寫入 到某個文件中,以備提取。所以,如果你想讓Nagios將數據輸出的話,首先要將Nagios的主配置文件 nagios.cfg中相關的配置修改:
process_performance_data= 1
service_perfdata_command=process-service-perfdata
如果想要對某個監控對象做數據圖表,則需要在所對應的service定義:
process_perf_data 1
這樣,Nagios就會調用相應的命令來輸出數據了。Nagios的command定義中默認有一項“process- service-perfdata”,該命令聲明了Nagios輸出哪些值到輸出的文件中。不過其定義相對簡單,PNP提供 了一個perl腳本,更詳盡的定義了一個輸出數據的方法。如果要使用PNP的話,我們需要在command的定義 中,將“process-service-perfdata”命令對應的執行命令行的內容替換成該腳本:
define command{
command_name process-service-perfdata
command_line /usr/local/nagios/libexec/process_perfdata.pl
}
這樣設置了之後,Nagios就會利用PNP提供的腳本進行相關的工作了。
設置完後,我們還沒有process_perfdata.pl腳本。開始安裝pnp包。
./configure --with-rrdtool=/usr/bin/rrdtool --with-perfdata- dir=/usr/local/nagios/share/perfdata/
make all
make install
make install-config
然後進到 /usr/local/nagios/etc/pnp
mv rra.cfg-sample rra.cfg
mv process_perfdata.cfg-sample process_perfdata.cfg
mv npcd.cfg-sample npcd.cfg
/usr/local/nagios/bin/nagios -v /usr/local/nagios/etc/nagios.cfg
如果沒有什麼錯誤,就從起一下nagios
/etc/init.d/nagios restart
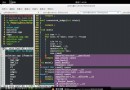
驗證下成果,在浏覽器輸入:
http://IP/nagios/pnp/
如果出現
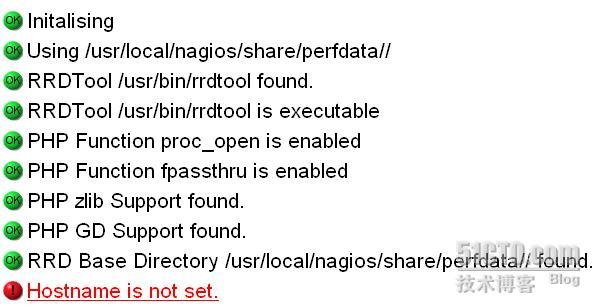
說明你在service.cfg裡面還沒有設置監控主機`
好了先寫這麼多,等以後加載什麼插件繼續添加。
本文出自 “linuxer” 博客,請務必保留此出處http://deidara.blog.51cto.com/400447/88449