1介紹
1.1 PXE
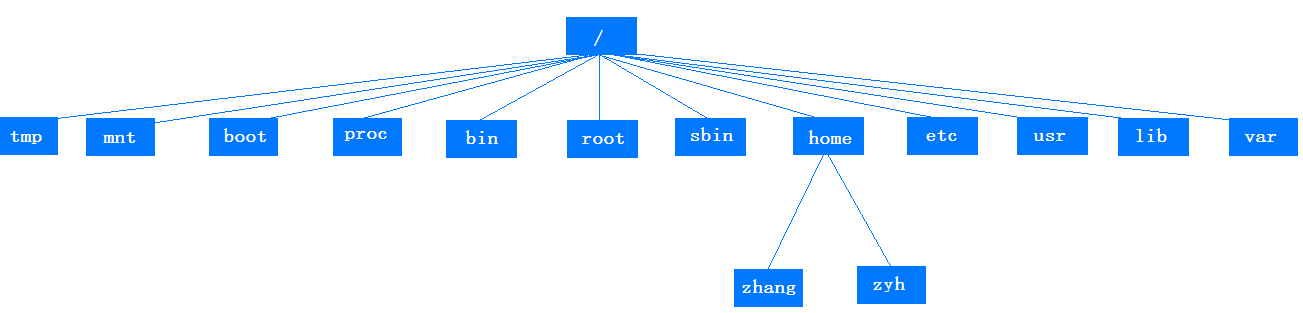
PXE技術與RPL技術不同之處為RPL是靜態路由,PXE是動態路由。RPL是根據網卡上的ID號加上其他記錄組成的一個Frame(幀)向服務器發出請求。而服務器中已有這個ID數據,匹配成功則進行遠程啟動。PXE則是根據服務器端收到的工件站MAC地址,使用DHCP服務為這個MAC地址指定個IP地址。每次啟動可能同一台工作站有與上次啟動有不同的IP,即動態分配地址。下以客戶端引導過程說明PXE的原理:客戶端開機後,PXE BootROM(自啟動芯片)獲得控制權之前執行自我測試,然後以廣播形式發出一個請求FIND幀。如果服務器收到客戶端所送出的要求,就會送回DHCP回應,包括用戶端的IP地址、預設通信通道,以及開機映像文件;否則服務器會忽略這個要求。客戶端收到服務器發回的響應後則會回應一個幀,以請求傳送啟動所需文件,並把自己的MAC地址寫到服務器端的Netnames.db文件中。將有更多的消息在客戶端與服務器之間應答,用於決定啟動參數。BootROM由TFTP通信協議從服務器下載開機映像文檔。客戶端使用TFTP協議接收啟動文件後,將控制權轉交啟動塊以引導操作系統,完成遠程啟動。
1.2 KickStart
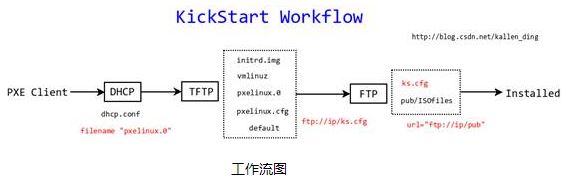
KickStart是一種無人職守安裝方式。KickStart的工作原理是通過記錄典型的安裝過程中所需人工干預填寫的各種參數,並生成一個名為ks.cfg的文件;在其後的安裝過程中(不只局限於生成KickStart安裝文件的機器)當出現要求填寫參數的情況時,安裝程序會首先去查找KickStart生成的文件,當找到合適的參數時,就采用找到的參數,當沒有找到合適的參數時,才需要安裝者手工干預。這樣,如果KickStart文件涵蓋了安裝過程中出現的所有需要填寫的參數時,安裝者完全可以只告訴安裝程序從何處取ks.cfg文件,然後去忙自己的事情。等安裝完畢,安裝程序會根據ks.cfg中設置的重啟選項來重啟系統,並結束安裝。
1.3 Cobbler
Cobbler是一個快速網絡安裝linux的服務,而且在經過調整也可以支持網絡安裝windows。該工具使用python開發,小巧輕便(才15k行python代碼),使用簡單的命令即可完成PXE網絡安裝環境的配置,同時還可以管理DHCP、DNS、以及yum倉庫、構造系統ISO鏡像。Cobbler支持命令行管理,web界面管理,還提供了API接口,可以方便二次開發使用。Cobbler客戶端Koan支持虛擬機安裝和操作系統重新安裝,使重裝系統更便捷。 Cobbler提供以下服務集成:* PXE服務支持* DHCP服務管理* DNS服務管理* 電源管理* Kickstart服務支持* yum倉庫管理
2 安裝部署
2.1相關文件
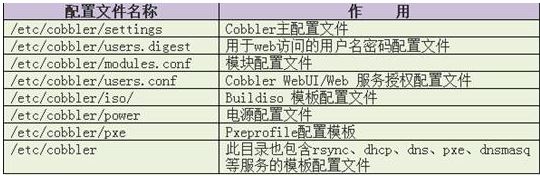
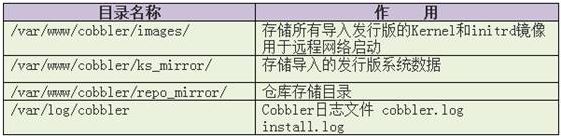
1.Cobbler配置文件目錄:/etc/cobbler/etc/cobbler/settings #cobbler主配置文件/etc/cobbler/dhcp.template #DHCP服務的配置模板/etc/cobbler/tftpd.template #tftp服務的配置模板/etc/cobbler/rsync.template #rsync服務的配置模板/etc/cobbler/iso #iso模板配置文件/etc/cobbler/pxe #pxe模板文件/etc/cobbler/power #電源的配置文件/etc/cobbler/users.conf #Web服務授權配置文件/etc/cobbler/users.digest #用於web訪問的用戶名密碼配置文件/etc/cobbler/dnsmasq.template #DNS服務的配置模板/etc/cobbler/modules.conf #Cobbler模塊配置文件2.Cobbler數據目錄:/var/lib/cobbler/var/lib/cobbler/config #配置文件/var/lib/cobbler/triggers #Cobbler命令/var/lib/cobbler/kickstarts #默認存放kickstart文件/var/lib/cobbler/loaders #存放的各種引導程序3.系統安裝鏡像目錄:/var/www/cobbler/var/www/cobbler/ks_mirror #導入的系統鏡像列表/var/www/cobbler/images #導入的系統鏡像啟動文件/var/www/cobbler/repo_mirror #yum源存儲目錄4.日志目錄:/var/log/cobbler/var/log/cobbler/install.log #客戶端系統安裝日志/var/log/cobbler/cobbler.log #cobbler日志
2.2 Cobbler安裝
2.2.1安裝EPEL源
yum install epel-release
2.2.2安裝cobbler
yum install cobbler httpd rsync tftp-server xinetd dhcp python-ctypes cman pykickstart –y
2.2.3配置cobbler
vim /etc/cobbler/settings #Cobbler主配置文件sed -i 's/manage_dhcp: 0/manage_dhcp: 1/g' /etc/cobbler/settings sed -i 's/manage_rsync: 0/manage_rsync: 1/g' /etc/cobbler/settings# set to 1 to enable Cobbler's DHCP management features.# the choice of DHCP management engine is in /etc/cobbler/modules.confmanage_dhcp: 1# set to 1 to enable Cobbler's RSYNC management features.manage_rsync: 1# if using cobbler with manage_dhcp, put the IP address# of the cobbler server here so that PXE booting guests can find it# if you do not set this correctly, this will be manifested in TFTP open timeouts.next_server: 192.168.56.6# this is the address of the cobbler server -- as it is used# by systems during the install process, it must be the address# or hostname of the system as those systems can see the server.# if you have a server that appears differently to different subnets# (dual homed, etc), you need to read the --server-override section# of the manpage for how that works.server: 192.168.56.6
2.2.4關閉SELinux、iptables
getseboolservice iptables stop chkconfig iptables off
2.2.5配置tftp、rsync
設置 'disable' 為 'no' sed -i '/disable/c\\tdisable\t\t\t= no' /etc/xinetd.d/tftp sed -i 's/\=\ yes/\=\ no/g' /etc/xinetd.d/rsync
2.2.6啟用wsgi模塊
sed -i 's@#LoadModule@LoadModule@g' /etc/httpd/conf.d/wsgi.conf
2.2.7生成密碼
這裡生成密鑰和配置默認密鑰,ks文件引用openssl passwd -1 -salt 'random-phrase-here' 'wq'$1$random-p$29HCOY0msGT.4xVuIl6Gp. 加入cobbler配置 vim /etc/cobbler/settings grep default_password_crypted /etc/cobbler/settings#修改為如下配置default_password_crypted: "$1$random-p$29HCOY0msGT.4xVuIl6Gp."
2.2.8配置DHCP
vim /etc/cobbler/dhcp.templateallow booting;allow bootp;ddns-update-style interim;ignore client-updates;subnet 192.168.56.0 netmask 255.255.255.0 { range dynamic-bootp 192.168.56.100 192.168.56.254; option domain-name-servers 192.168.0.1; option routers 192.168.56.1; option subnet-mask 255.255.255.0; default-lease-time 1800; max-lease-time 3600; next-server 192.168.56.6; filename "pxelinux.0";}
2.2.9配置服務
/sbin/service httpd start /sbin/service dhcpd start /sbin/service xinetd start /sbin/service cobblerd start /sbin/chkconfig httpd on/sbin/chkconfig dhcpd on/sbin/chkconfig xinetd on/sbin/chkconfig tftp on/sbin/chkconfig cobblerd on
2.2.10引導系統文件
cobbler get-loaders
2.2.11配置debmiror(可選)
yum -y install debmirror 修改 /etc/debmirror.conf 配置文件,注釋掉 @dists 和 @arches 兩行sed -i 's|@dists=.*|#@dists=|' /etc/debmirror.conf sed -i 's|@arches=.*|#@arches=|' /etc/debmirror.conf
2.2.12檢查配置
cobbler checkThe following are potential configuration items that you may want to fix:無需處理1 : reposync is not installed, need for cobbler reposync, install/upgrade yum-utils?2 : debmirror package is not installed, it will be required to manage debian deployments and repositoriesRestart cobblerd and then run 'cobbler sync' to apply changes.
2.2.13同步配置
cobbler sync
2.3 Cobbler管理
2.3.1命令說明
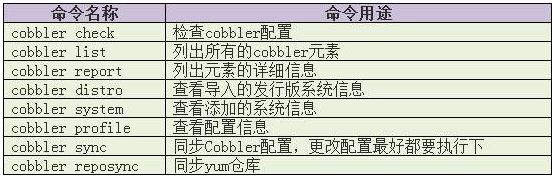
命令參考cobbler --helpcobbler distro --help cobbler distro add --help
2.3.2配置文件說明
Cobbler配置文件存放在/etc/cobbler下
2.3.3鏡像數據目錄
導入的系統發行版,repos鏡像和kickstart文件都放置在/var/www/cobbler目錄下。確保/var目錄有足夠的空間來存儲這些文件。
2.3.4數據目錄
此目錄存儲和Cobbler profiles、systems、distros相關的配置。

2.3.5日志文件
web日志存放點:/var/log/httpd/access_log/var/log/httpd/error_log/var/log/httpd/ssl_access_log/var/log/httpd/ssl_error_logCobbler日志:/var/log/cobbler/cobbler.log/var/log/cobbler/install.log通過Cobbler日志可以獲取系統的安裝狀態
2.3.6導入鏡像
1. 注意下載的ISO文件要核對文件的md5值,確保數據完整性 md5sum xx.iso2.創建目錄mkdir -p /var/os/Linux/Centos/x86_64/Centos6.7/dvd3.掛載mount -o loop/var/iso/Linux/Centos/x86_64/xx.iso /var/os/Linux/Centos/x86_64/Centos6.7/dvd
2.3.7導入數據
cobbler import --path=/xx --name=centos6.7 --arch=x86_64cobbler list 列出配置cobbler report 詳細cobbler profile find --distro=centos6.7-x86_64 #查看配置是否存在cobbler profile remove --name=centos6.7-x86_64 #刪除配置文件cobbler distro remove --name=centos6.7-x86_64 #刪除distrocobbler profile find --distro=centos6.7-x86_64 #再查看配置已無
2.3.8自定義ks
ks目錄位置/var/lib/cobbler/kickstarts/默認的ks位置/var/lib/cobbler/kickstarts/sample.ks更改指定系統版本對應的ks配置文件cp /var/lib/cobbler/kickstarts/ sample.ks centos6.7-x86_64.kscobbler profile add --name=centos6.7 --distro= centos6.7-x86_64 --kickstart=/var/lib/cobbler/kickstarts/centos6.7-x86_64.kscobbler checkcobbler syncKS示例:#platform=x86, AMD64, or Intel EM64T# Firewall configurationfirewall --disabled# Install OS instead of upgradeinstall# Use network installationurl --url=$tree#Root passwordrootpw root# System authorization informationauth --useshadow--enablemd5# Use graphical mode installgraphical# Run the Setup Agent on first bootfirstboot --disable# System keyboardkeyboard us# System languagelang en_US# SELinux configurationselinux --disabled# Installation logging levellogging --level=info# System timezonetimezone Asia/Shanghai# Network informationnetwork --bootproto=static --device=eth0 --gateway=192.168.56.1 --ip=192.168.56.99 --nameserver=192.168.56.99 --netmask=255.255.255.0 --hostname=host99 --onboot=on# System bootloader configurationbootloader --location=mbr# Partition clearing informationclearpart --all --initlabel# Disk partitioning informationpart / --fstype="ext4" --ondisk=sda --size=8000part /boot --fstype="ext4" --ondisk=sda --size=200part swap --fstype="swap" --size=1000# Reboot after installationreboot# Clear the Master Boot Recordzerombr%packages@ X Window System@ Desktop@ Development toolsgcc*%end
3 Web管理
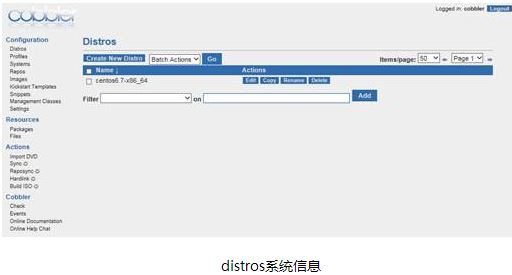
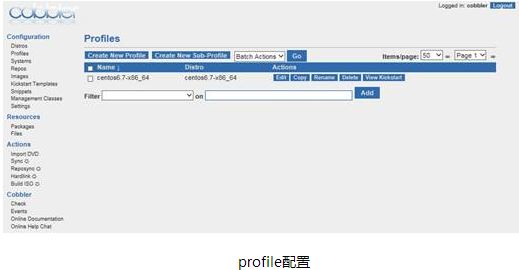
Cobbler web界面是一個很好的前端,非常容易管理Cobbler。可以添加和刪除system、distro、profile,可以查看、編輯distros、profiles、subprofiles、systems、repos、kickstart文件。
3.1cobbler web管理
3.1.1安裝
yum -y install cobbler-web
3.1.2設置用戶密碼
為已存在的用戶cobbler重置密碼:htdigest /etc/cobbler/users.digest "Cobbler" cobbler添加新用戶:htdigest /etc/cobbler/users.digest "Cobbler" newname
3.1.3配置登錄
sed -i 's/authn_denyall/authn_configfile/g' /etc/cobbler/modules.conf/etc/init.d/cobblerd restart /etc/init.d/httpd restart
3.1.4訪問web
浏覽器訪問登錄頁面https://192.168.xx.xx/cobbler_web
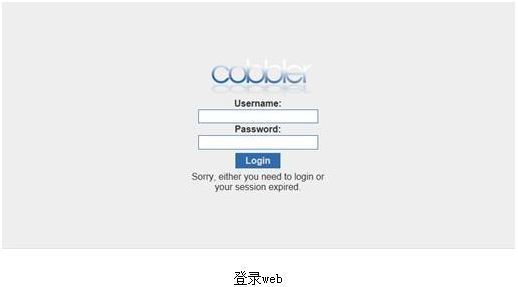
3.1.5登錄web
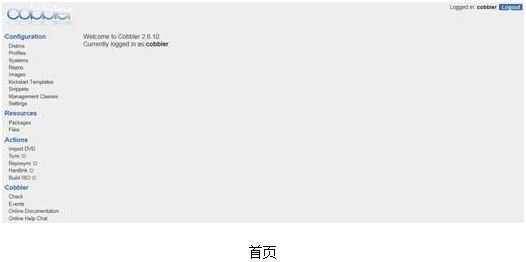
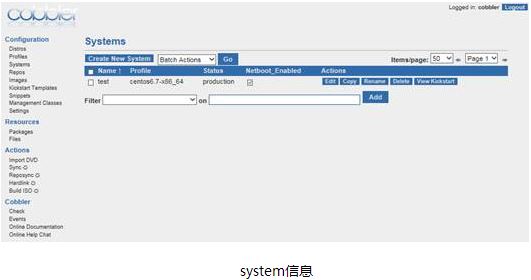
3.1.6管理web
cobbler system add --name=xx --hostname=xx --mac=xx --interface=ethx --ip-address=xx --subnet=xx --gateway=xx --static=1 --profile=xxyum install cman ipmitool -y 電源管理(需要硬件支持)
原文地址:http://www.cnblogs.com/dongdongwq/p/5377593.html
更詳細的安裝過程在http://dreamway.blog.51cto.com/blog/1281816/1166589
詳細文檔:《運維自動化裝機篇之Cobbler部署指南》,下載地址:http://down.51cto.com/data/745895