


1. 通過 yum 安裝icinga2 核心包
a) Package Repositories
# rpm --import http://packages.icinga.org/icinga.key
# curl -o/etc/yum.repos.d/ICINGA-release.repohttp://packages.icinga.org/fedora/ICINGA-release.repo
# yum makecache
b) Installing Icinga 2
# yum install icinga2
# systemctl enable icinga2
# systemctl start icinga2
c) Enabled Features during Installation
# icinga2 feature list
顯示內容分為Disabled和Eabled 2個部分
Disabledfeatures: api command compatlog debuglog graphite icingastatus ido-mysqlido-pgsql livestatus notification perfdata statusdata syslog
Enabled features: checker mainlognotification
2. 安裝nagios-plugins-all
a) 安裝EPEL
EPEL,即Extra Packages for Enterprise Linux的簡稱,是為企業級Linux提供的一組高質量的額外軟件包,包括但不限於Red Hat EnterpriseLinux (RHEL),
# yum -y install epel-release
# yum clean all && yum makecache
# yum install nagios-plugins-all –y
檢查 /usr/lib/nagios/plugins or/usr/lib64/nagios/plugins 目錄下,是否有相應的 plugin文件
3. 運行icinga2
$ systemctl status icinga2
$ systemctl enable icinga2
$ systemctl restart icinga2
COMMAND
DESCRIPTION
start
The start action starts the Icinga 2 daemon.
stop
The stop action stops the Icinga 2 daemon.
restart
The restart action is a shortcut for running the stop action followed by start.
reload
The reload action sends the HUP signal to Icinga 2 which causes it to restart. Unlike the restart action reload does not wait until Icinga 2 has restarted.
checkconfig
The checkconfig action checks if the /etc/icinga2/icinga2.conf configuration file contains any errors.
status
The status action checks if Icinga 2 is running.
4. Setting up Icinga Web 2
a) Configuring DB IDO MySQL
The DB IDO(Database Icinga Data Output) modules for Icinga 2 take care of exporting allconfiguration and status information into a database. The IDO database is usedby a number of projects including Icinga Web 2, Icinga Reporting or Icinga Web 1.x
i. InstallingMySQL database server
# yum install mariadb-server mariadb
# systemctl enable mariadb
# systemctl start mariadb
# mysql_secure_installation
ii. Installingthe IDO modules for MySQL
# yum install icinga2-ido-mysql
iii. Settingup the MySQL database
# mysql -u root -p
mysql> CREATE DATABASE icinga;
GRANT SELECT, INSERT, UPDATE, DELETE, DROP, CREATE VIEW, INDEX, EXECUTEON icinga.* TO 'icinga'@'localhost' IDENTIFIED BY 'icinga';
Aftercreating the database you can import the Icinga 2 IDO schema using thefollowing command:
# mysql -u root -p icinga
The package provides a new configuration filethat is installed in/etc/icinga2/features-available/ido-mysql.conf. You will need to update the databasecredentials in this file.
iv. Enablingthe IDO MySQL module
# icinga2 feature enable ido-mysql
Module 'ido-mysql' was enabled.
Make sure to restart Icinga 2 for thesechanges to take effect.
# systemctl restart icinga2
b) 安裝Webserver
# yum install httpd
# systemctl enable httpd
# systemctl start httpd
i. FirewallRules
# firewall-cmd --add-service=http
# firewall-cmd --permanent --add-service=http
ii. 配置額外的命令通道
Web接口和一些其它模塊通過額外的命令通道來向Icinga2發送命令,你可以使用下面的命令啟用它:
# icinga2 feature enable command
# systemctl restart icinga2
默認情況下,icingacmd用戶組擁有讀寫命令通道文件的權限,因此需要使用下面的命令將Web服務的用戶加入到該組:
$ usermod -a -G icingacmd apache
以使用以下命令來檢測是否成功將用戶加入到icingacmd用戶組:
$ id apache
顯示 uid=48(apache) gid=48(apache) 組=48(apache),989(icingacmd)
c) 安裝icinga Web2
# yum installicingaweb2 icingacli
d) 配置icinga Web2
你可以通過IcingaWeb2配置向導,或者直接通過執行命令來完成配置,本文僅介紹通過配置向導來完成配置,如果需要使用命令行來完成,請查看 Icinga Web 2官方文檔。
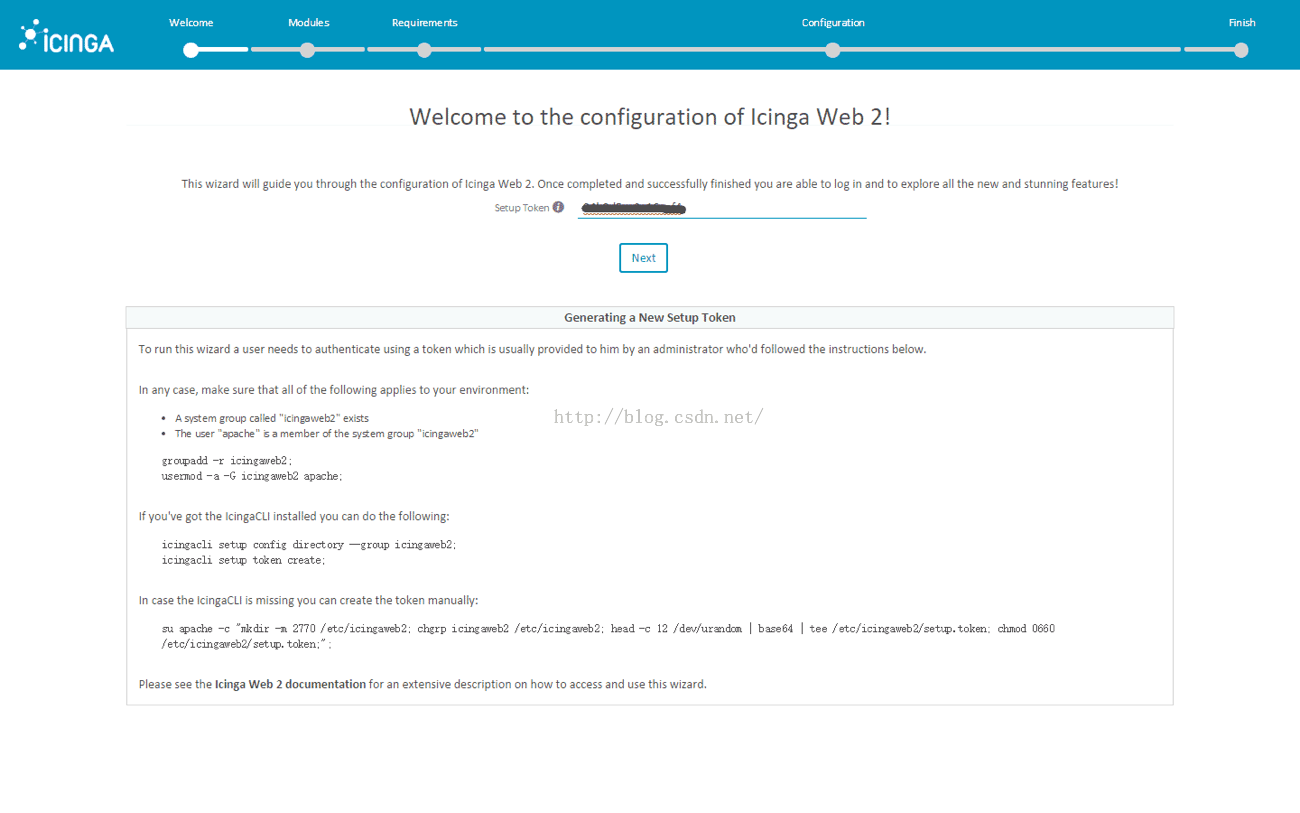
STEP1: 通過icingacli創建一個token,用來安裝IcingaWeb2:
icingacli setup token create
icingacli setup token show
STEP 2: 使用浏覽器訪問 http://127.0.0.1/icingaweb2/setup (將IP替換為實際IP或域名),將上一步命令行得到的token輸入到Steup Token的輸入框中,繼續下一步。
Image
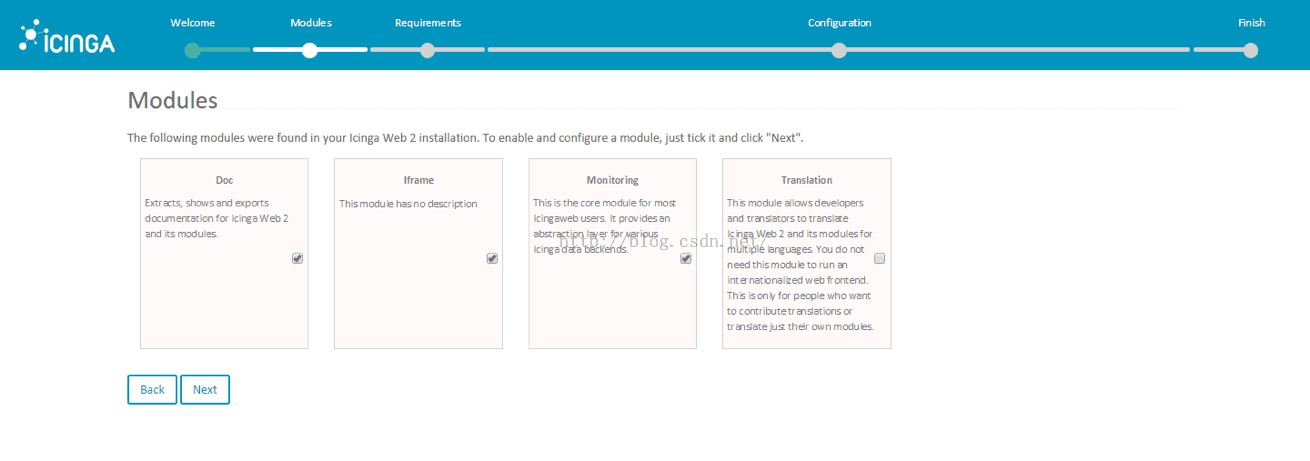
STEP 3: 根據需要選擇需要安裝的模塊,我這邊選擇了除翻譯外的所有模塊。
Image
STEP 4: 根據系統檢查結果,解決需要修改的項,全部完成後刷新確認。
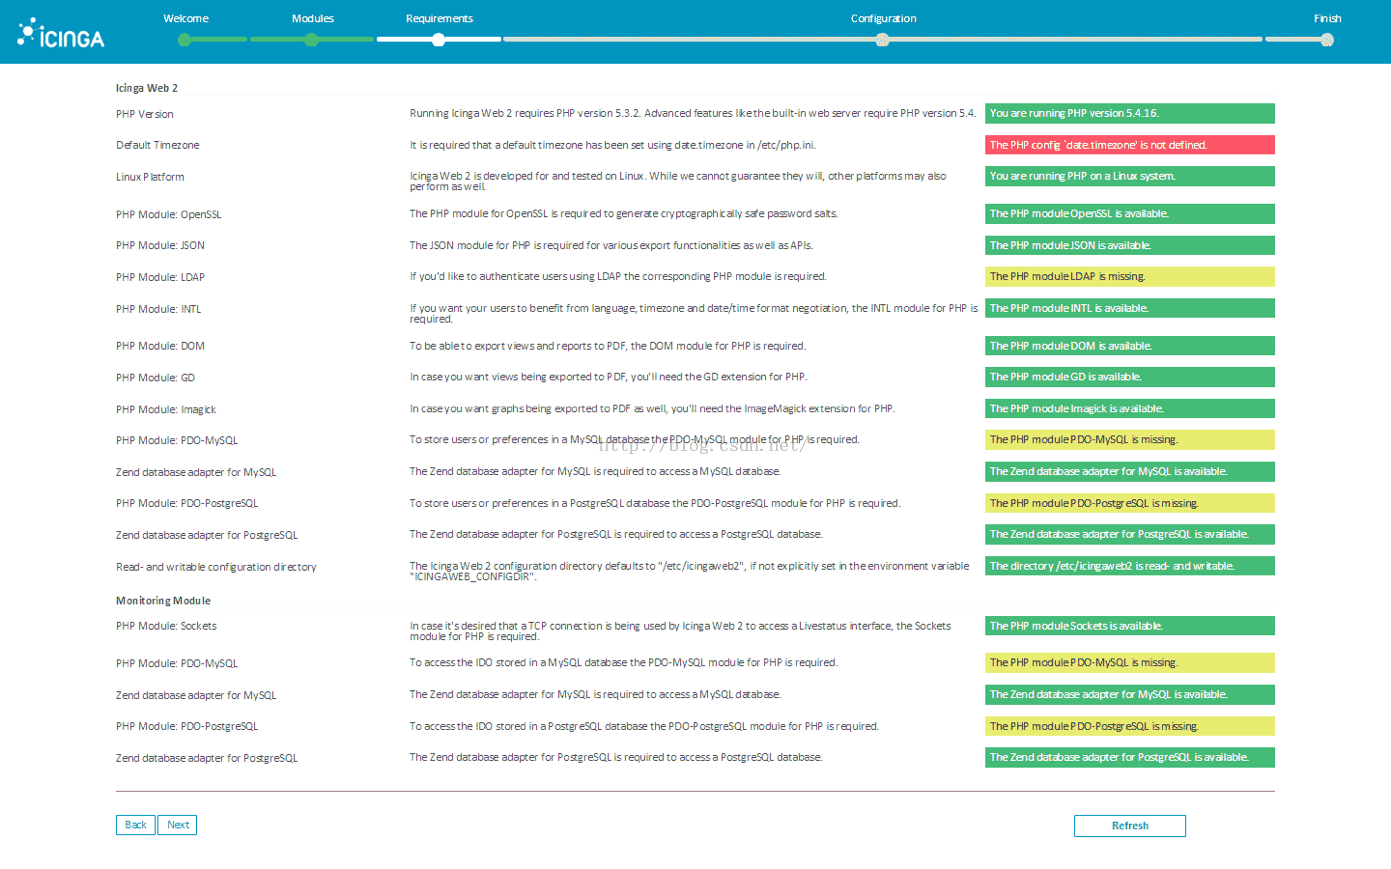
Image
本例中,需要解決的有PHP時區,LDAP,PDO-MySQL,PDO-PostgreSQL問題。PDO-MySQL,PDO-PostgreSQL只需要重啟Web服務器即可解決。
修改PHP時區:
使用 vi打開 /etc/php.ini;查找date.timezone,刪除最前面的分號,在結尾增加時區標簽,這裡使用: Asia/Shanghai 。
啟用LDAP:
yum install php-ldap
重啟Web服務器,CentOS7直接使用systemctl restart httpd 重啟。
如果出現 The directory /etc/icingaweb2 is not writable.就關閉SELINUX
現在界面上所有的狀態應該都已經變成了綠色,繼續下一步吧,後面沒有特別講到的步驟都是直接點擊下一步的!
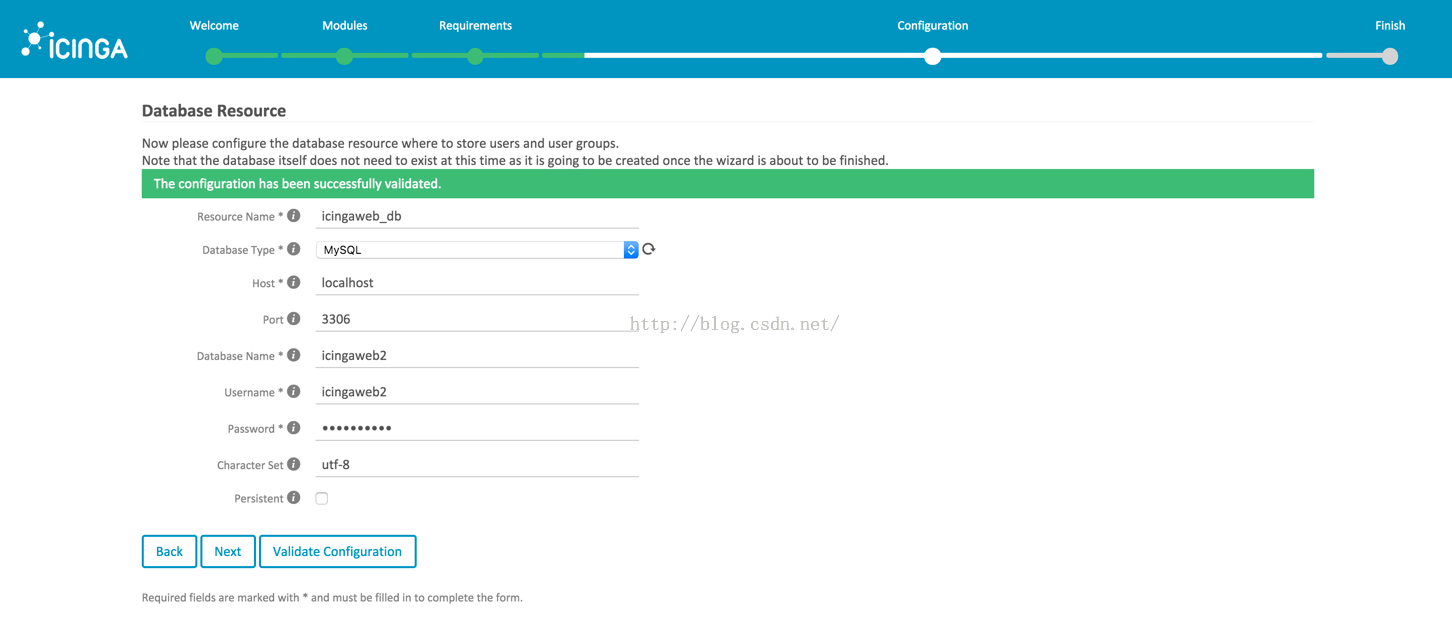
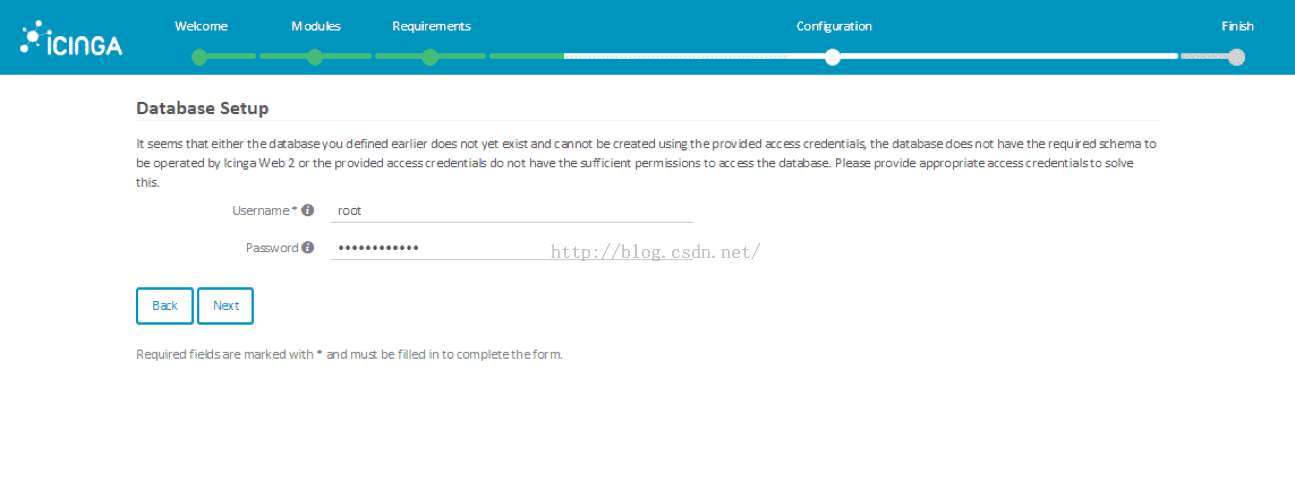
STEP 5: 配置Icinga Web2數據庫
Image
此處直接填寫我們創建的icingaweb2數據庫的信息,默認情況下用戶名和密碼都是icingaweb2。由於我們並沒有給予icingaweb2用戶創建表的權限,因此你還需要給一個有創建數據庫和表權限的用戶。
Image
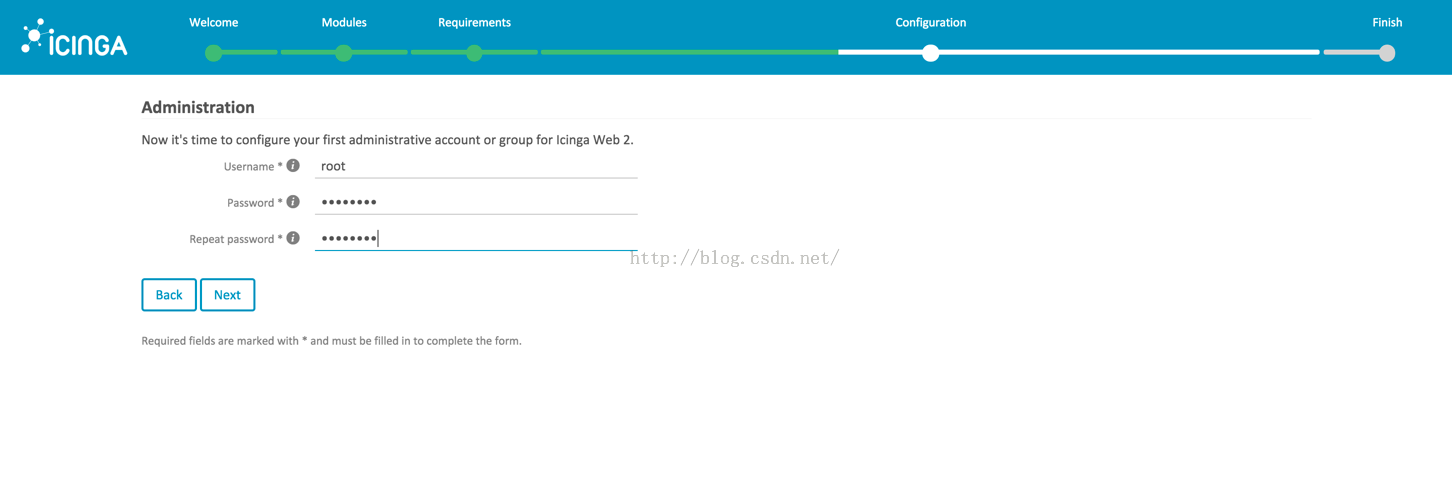
STEP 6: 創建一個Icinga Web2的管理員賬號
Image
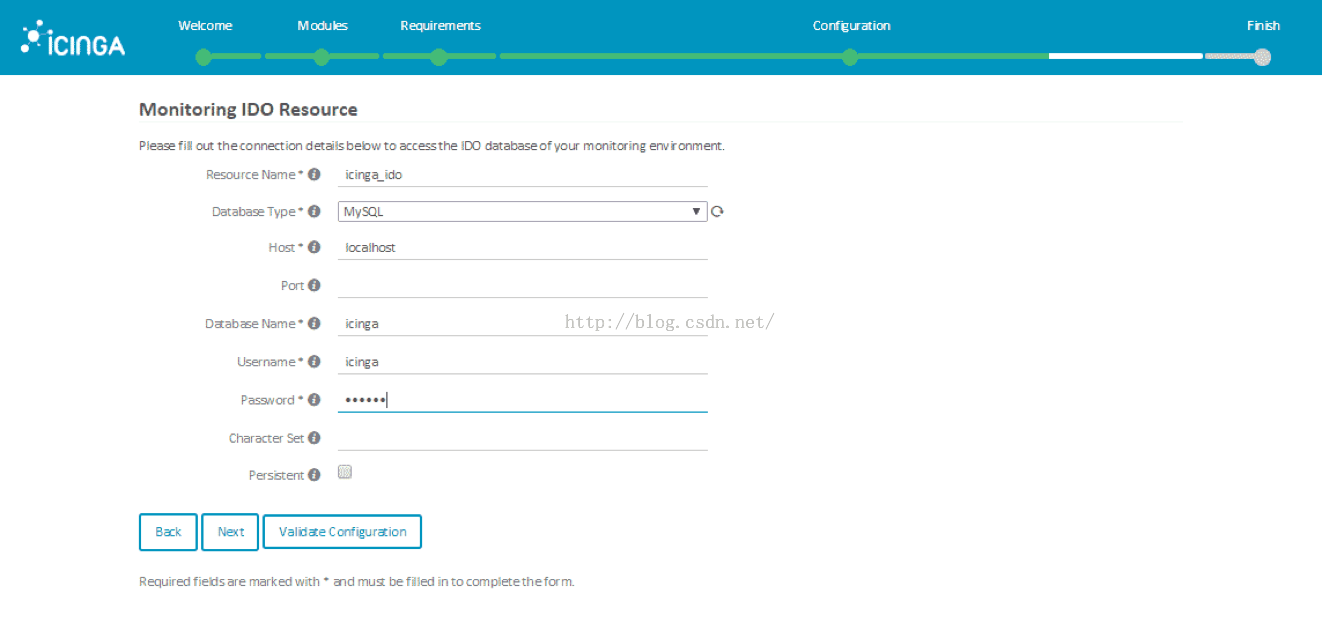
STEP 7: 配置IcingaIDO數據庫信息
Image
此處直接填寫我們創建的icinga數據庫的信息,默認情況下用戶名和密碼都是icinga。(這些信息是和設置mysql數據庫的操作步驟的時候填寫的信息所對應)
如果出現 /usr/share/icingaweb2/etc/schema/mysql.schema.sql文件沒有發現的錯誤,就運行
# cp /usr/share/doc/icingaweb2/schema/mysql.schema.sql /usr/share/icingaweb2/etc/schema/
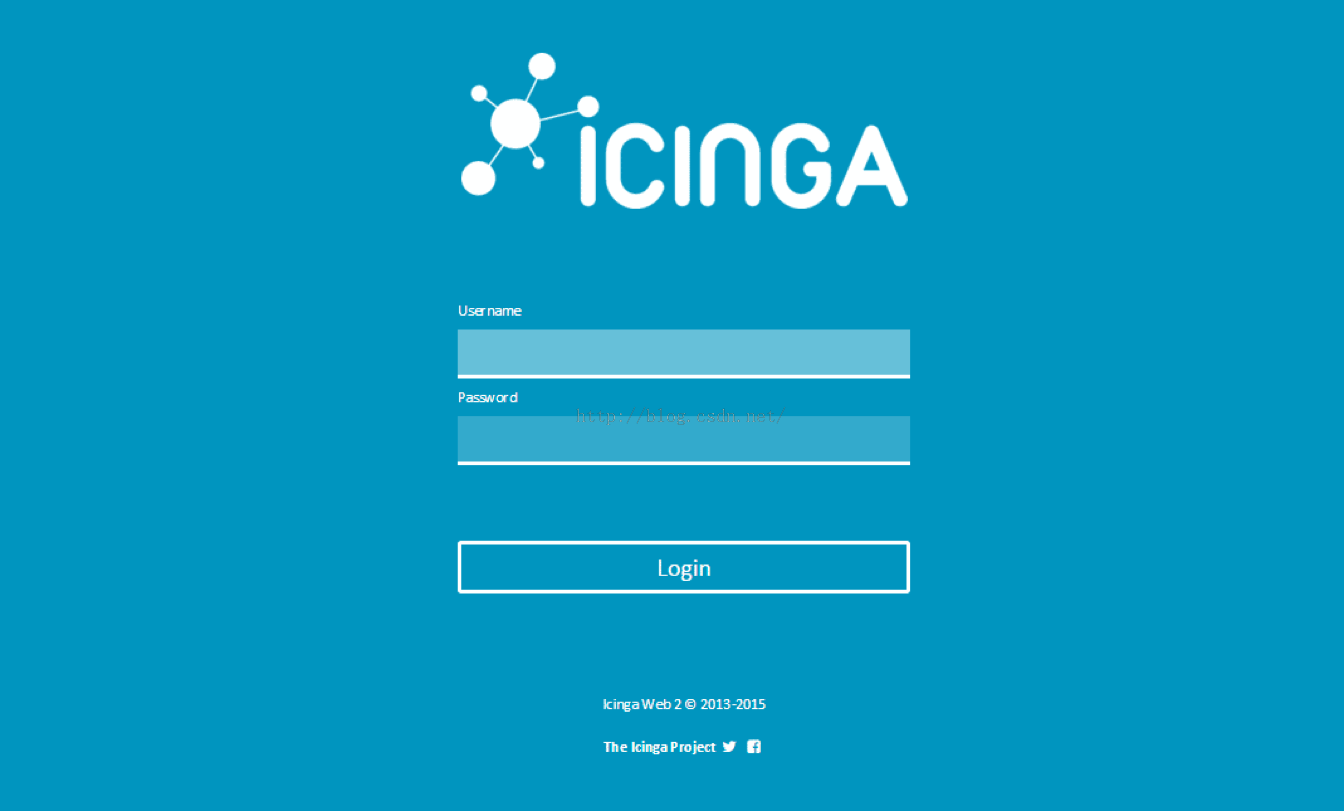
登錄!
Image