一、前言
Linux操作系統至1991.10.5號誕生以來,就源其開源性和自由性得到了很多技術大牛的青睐,每個Linux愛好者都為其貢獻了自己的一份力,不管是在Linux內核還是開源軟件等方面,都為我們後來人提供了一個良好的學習和研究環境。做為一個Linuxer,感謝各位前輩們為我們提供一個自由的空間,讓我們也能夠在學習的同時去研究Linux。
本文主要通過裁剪現有Linux系統,打造一個屬於自己的Linux小系統,讓其能夠裝載網卡驅動,並配置IP地址,實現網絡功能。
二、原理
啟動流程介紹
制作linux小系統之前,我們有必要再了解一下linux的啟動流程:
1、首先linux要通過POST自檢,檢查硬件設備有沒有故障
2、如果有多塊啟動盤的話,需要在BIOS中選擇啟動磁盤
3、啟動MBR中的bootloader引導程序
4、加載內核文件
5、執行所有進程的父進程、老祖宗init
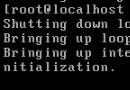
6、打印歡迎界面
在linux的啟動流程中,加載內核文件時還需要借助別外兩個文件:
1)initrd,是CentOS5上用內存模擬的磁盤設備
2)initramfs,是CentOS6上用內存模擬的文件系統
在啟程的流程中,init主要是用來做哪些操作的呢?
init通過調用/etc/inittab這個配置文件,然後再去執行/etc/rc.d/rc.sysinit的系統初始化腳本
啟發
到linux打印歡迎界面後,就說明系統已經啟動成功,如果我們要制作一個linux小系統,我們只需要把它在開機流程中用到的各文件都裝載到一起,就可以點亮屬於我們自己的系統了,而linux是一個模塊化的操作系統,好多功能組件都是通過模塊化的工具來實現的,而且支持動態裝載和卸載,我們要是想實現某種功能,只需加載相應的模塊即可,就可以實現我們的linux操作系統大瘦身了。
三、操作步驟
1、目標磁盤分區
在宿主機上掛一塊新磁盤,命名為soft-linux,此塊磁盤是宿主機上的第二塊磁盤,所以這裡是/dev/sdb,而到時候掛載到目標主機的時候,因為那裡只有這一塊磁盤,所以在目標主機上的名稱應該是/dev/sda,這個不能搞混了。首先,我們要在目標磁盤上分兩個區,並進行格式化。第一個分區500M,用來裝引導程序;第二個分區10G,用來裝根文件系統。然後再進行掛載操作,將/dev/sdb1掛載到/mnt/boot下,將/dev/sdb2掛載到/mnt/sysroot下。
[root@changsheng ~]# mount /dev/sdb1 /mnt/boot
mount: mount point /mnt/boot does not exist
[root@changsheng ~]# mkdir -p /mnt/boot /mnt/sysroot
[root@changsheng ~]# mount /dev/sdb1 /mnt/boot
[root@changsheng ~]# mount /dev/sdb2 /mnt/sysroot/
[root@changsheng ~]#
2、安裝grub至目標磁盤
一個系統能啟動,就需要引導,所以我們首先要安裝一個grub引導程序到我們的新磁盤上,安裝grub引導程序主要有兩個命令,一個是grub-install,另一個是setup,這裡最好使用grub-install來安裝。因為:
①grub-install會安裝grub引導第二階段的文件
②setup不會安裝第二階段的引導程序,是安裝引導信息到MBR
第二個需要注意的地方就是--root-directory=後面接的路徑應該是boot目錄所在的地方,而不是/mnt/boot,因為boot目錄在mnt下;目標磁盤是/dev/sdb
[root@changsheng ~]# grub-install --root-directory=/mnt /dev/sdb
Probing devices to guess BIOS drives. This may take a long time.
Installation finished. No error reported.
This is the contents of the device map /mnt/boot/grub/device.map.
Check if this is correct or not. If any of the lines is incorrect,
fix it and re-run the script `grub-install'.
(fd0) /dev/fd0
(hd0) /dev/sda
(hd1) /dev/sdb
[root@changsheng ~]# cd /mnt/boot/
[root@changsheng boot]# ls
grub lost+found
[root@changsheng boot]# cd grub/
[root@changsheng grub]# ls
device.map e2fs_stage1_5 fat_stage1_5 ffs_stage1_5 iso9660_stage1_5 jfs_stage1_5 minix_stage1_5 reiserfs_stage1_5 stage1 stage2 ufs2_stage1_5 vstafs_stage1_5 xfs_stage1_5
[root@changsheng grub]#
安裝完grub後,進入grub目錄,會發現沒有grub.conf配置文件,這樣就導致我們的引導程序是不健全的,所以我們需要手動寫一個配置文件在裡邊,不過這得需要知道內核的版本,等移植完內核版本,再回過頭來補充此步。
3、復制內核文件和initrd文件
init是系統中用來產生其它所有進程的程序。它以守護進程的方式存在,其進程號為1,init是所有進程的父進程,老祖宗,所以不移植是不行的。它通過調用/etc/inittab這個配置文件,然後再去執行/etc/rc.d/rc.sysinit的系統初始化腳本。
將內核文件和initrd文件復制到/dev/sdb下的boot目錄中。
[root@changsheng grub]# cp /boot/vmlinuz-2.6.32-358.el6.x86_64 /mnt/boot/vmlinuz-soft
[root@changsheng grub]# cp /boot/initramfs-2.6.32-358.el6.x86_64.img /mnt/boot/initramfs-soft.img
[root@changsheng grub]#
4、創建目標主機根文件系統
①使用命令行展開創建文件系統
[root@changsheng sysroot]# mkdir -pv /mnt/sysroot/{etc/rc.d,usr,var,proc,sys,dev,lib,lib64,bin,sbin,boot,srv,mnt,media,home,root}
mkdir: created directory `/mnt/sysroot/etc'
mkdir: created directory `/mnt/sysroot/etc/rc.d'
mkdir: created directory `/mnt/sysroot/usr'
mkdir: created directory `/mnt/sysroot/var'
mkdir: created directory `/mnt/sysroot/proc'
mkdir: created directory `/mnt/sysroot/sys'
mkdir: created directory `/mnt/sysroot/dev'
mkdir: created directory `/mnt/sysroot/lib'
mkdir: created directory `/mnt/sysroot/lib64'
mkdir: created directory `/mnt/sysroot/bin'
mkdir: created directory `/mnt/sysroot/sbin'
mkdir: created directory `/mnt/sysroot/boot'
mkdir: created directory `/mnt/sysroot/srv'
mkdir: created directory `/mnt/sysroot/mnt'
mkdir: created directory `/mnt/sysroot/media'
mkdir: created directory `/mnt/sysroot/home'
mkdir: created directory `/mnt/sysroot/root'
[root@changsheng sysroot]# ls
bin boot dev etc home lib lib64 lost+found media mnt proc root sbin srv sys usr var
[root@changsheng sysroot]#
②移植bash命令和其庫文件到根文件系統
[root@changsheng mnt]# sh ~/scripts/cporder.sh
Enter a command: bash
Enter a command: shutdown
Enter a command: reboot
Enter a command: vim
Enter a command: touch
Enter a command: mkdir
Enter a command: rm
Enter a command: ls
Enter a command: cat
Enter a command: less
Enter a command: ifconfig
Enter a command: ip
Enter a command: route
Enter a command: quit
quit
[root@changsheng mnt]# sync
[root@changsheng mnt]# sync
[root@changsheng mnt]# ls
boot sysroot
[root@changsheng mnt]# cd sysroot/
[root@changsheng sysroot]# ls
bin lib64 sbin usr
[root@changsheng sysroot]# cd bin/
[root@changsheng bin]# ls
bash cat ls mkdir rm touch
[root@changsheng bin]# ln -sv bash sh
`sh' -> `bash'
[root@changsheng bin]# sync
[root@changsheng bin]#
附:命令移植腳本
#!/bin/bash
#
target=/mnt/sysroot
clearCmd() {
if which $cmd &> /dev/null; then
cmdPath=`which --skip-alias $cmd`
else
echo "No such command"
return 5
fi
}
cmdCopy() {
cmdDir=`dirname $1`
[ -d ${target}${cmdDir} ] || mkdir -p ${target}${cmdDir}
[ -f ${target}${1} ] || cp $1 ${target}${cmdDir}
}
libCopy() {
for lib in `ldd $1 | grep -o "/[^[:space:]]\{1,\}"`; do
libDir=`dirname $lib`
[ -d ${target}${libDir} ] || mkdir -p ${target}${libDir}
[ -f ${target}${lib} ]
|| cp $lib ${target}${libDir}
done
}
while true; do
read -p "Enter a command: " cmd
if [ "$cmd" == 'quit' ] ;then
echo "quit"
exit 0
fi
clearCmd $cmd
[ $? -eq 5 ] && continue
cmdCopy $cmdPath
libCopy $cmdPath
done
5、為grub提供配置文件
上面移植了內核和initrd文件,我們就可以根據內核版本和initrd版本來編寫grub.conf配置文件了
[root@changsheng grub]# vim grub.conf
default=0
timeout=5
title changsheng soft-linux
root (hd0,0)
kernel /vmlinuz-soft ro root=/dev/sda2 quiet selinux=0 init=/bin/bash
initrd /initramfs-soft.img
~
quiet是靜默安裝,不再顯示安裝時的一大堆信息。後面要把selinux關掉,而且init要使用/bin/bash,告訴內核不要再去找init程序了。如果不指定這一步,在啟動過程中就會報kernel panic(內核恐慌),以為系統就它一個了,沒有init進程,恐慌的不行。
6、啟動測試
7、特別提醒
如果在vmvare上做此實驗,在新建虛擬機創建新磁盤的時候,一定要選"Store virtual disk as a single file",否則,也會出現內核恐慌kennel panic。
更多詳情見請繼續閱讀下一頁的精彩內容: http://www.linuxidc.com/Linux/2015-02/112825p2.htm