說一下我的網絡拓撲結構,
192.168.3.1 是RHEV-M端,系統是RHEL6.2 x86_64,並且兼職DNS服務器和存儲的服務端
192.168.3.101 是RHEV-H端,系統是RHEV hypervisor 6.2 beta版本
192.168.3.201 是浏覽器端,安裝的是Windows XP,浏覽器是IE 8
相關閱讀:
嘗鮮RHEV 3.0——概念篇(附RHEV3.0下載) http://www.linuxidc.com/Linux/2011-12/50589.htm
嘗鮮RHEV 3.0——RHEV-H安裝篇 http://www.linuxidc.com/Linux/2011-12/50591.htm
嘗鮮RHEV 3.0——浏覽器登錄管理中心 http://www.linuxidc.com/Linux/2011-12/50592.htm
由於我只有兩台機器,其中RHEV-H端還必須安裝在真機上,所以,我只能吧RHEV-M和Windows XP這兩個操作系統安裝到虛擬機裡面了。
其中,我的RHEV-H的真機是16G的內存,我在另外一台機器上給RHEV-M分了4G 內存,Windows XP分了512M內存。
紅帽的官方的最低要求是:
RHEV-M:最低4G內存,25G的磁盤可用空間,千兆網卡
(推薦是 雙路/四核的CPU,16G內存,50G的可用磁盤,千兆網卡)
RHEV-H:最低是雙核的CPU,10G內存,10G的存儲,千兆網卡
(推薦是雙路的CPU,16G內存,50G的存儲,兩塊千兆網卡)
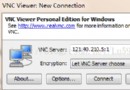
浏覽器端:操作系統是Windows (XP,2003,Vista,7,2008),浏覽器的版本必須是IE 7.0以上版本(包含IE 7.0),並且要安裝Microsoft .NET Framework 4(下載地址是http://www.microsoft.com/download/en/details.aspx?id=17718)
安裝RHEV-M
如果你注冊了紅帽的RHN,並且訂閱了RHEVM相關的頻道,你只需要敲一條命令即可:
yum -y install rhevm
我這裡已經將所有的依賴包都做成了一個ISO文件,下載地址見上一篇博客,安裝的
時候,只需要將這個ISO鏡像拷進系統裡面,mount到一個目錄,然後sh目錄中的
install.sh這個腳本即可。
mount -o loop rhevm-for-rhel6.2.iso 任意目錄,然後sh 目錄中的install.sh
這個ISO鏡像適合RHEL6.2及其衍生版本,比如CentOS 6.2 Scientific Linux 6.2
等,我測試過CentOS 6.2沒什麼問題。
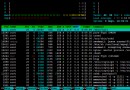
執行完腳本之後,執行rhevm-setup這個命令來進行安裝配置:
我的安裝過程如下。
[root@rhevm named]# rhevm-setup
Welcome to RHEV Manager setup utility
HTTP Port [8080] :
HTTPS Port [8443] :
Host fully qualified domain name, note that this name should be fully resolvable [rhevm.linuxidc.com] :
Password for Administrator (admin@internal) :
Warning: Weak Password.
Confirm password :
Database password (required for secure authentication with the locally created database) :
Warning: Weak Password.
Confirm password :
Organization Name for the Certificate: linuxidc-lab
The default storage type you will be using ['NFS'| 'FC'| 'ISCSI'] [NFS] : ISCSI
Should the installer configure NFS share on this server to be used as an ISO Domain? ['yes'| 'no'] [yes] : yes
Mount point path: /var/iso
Display name for the ISO Domain: linuxidc-iso
Firewall ports need to be opened.
You can let the installer configure iptables automatically overriding the current configuration. The old configuration will be backed up.
Alternately you can configure the firewall later using an example iptables file found under /usr/share/rhevm/conf/iptables.example
Configure iptables ? ['yes'| 'no']: yes
RHEV Manager will be installed using the following configuration:
=================================================================
http-port: 8080
https-port: 8443
host-fqdn: rhevm.linuxidc.com
auth-pass: ********
db-pass: ********
org-name: linuxidc-lab
default-dc-type: ISCSI
nfs-mp: /var/iso
iso-domain-name: linuxidc-iso
override-iptables: yes
Proceed with the configuration listed above? (yes|no): yes
Installing:
Creating JBoss Profile... [ DONE ]
Creating CA... [ DONE ]
Setting Database Security... [ DONE ]
Creating Database... [ DONE ]
Updating the Default Data Center Storage Type... [ DONE ]
Editing JBoss Configuration... [ DONE ]
Editing RHEV Manager Configuration... [ DONE ]
Configuring the Default ISO Domain... [ DONE ]
Configuring Firewall (iptables)... [ DONE ]
Starting JBoss Service... [ DONE ]
**** Installation completed successfully ******
(Please allow RHEV Manager a few moments to start up.....)
Additional information:
* There is less than 4 GB available free memory on the Host.
It is recommended to have at least 4 GB available memory to run the RHEV Manager.
* SSL Certificate fingerprint: 52:45:63:A7:65:DD:65:77:19:6C:0B:E2:4C:E5:A8:E7:EA:C2:A7:61
* SSH Public key fingerprint: 64:42:77:09:56:1d:5b:15:db:9e:66:d5:76:34:57:e9
* A default ISO share has been created on this host.
If IP based access restrictions are required, please edit /var/iso entry in /etc/exports
* The firewall has been updated, the old iptables configuration file was saved to /usr/share/rhevm/conf/iptables.backup.030533-12102011_5150
* The installation log file is available at: /var/log/rhevm/rhevm-setup_2011_12_10_03_03_30.log
* Please use the user "admin" and password specified in order to login into RHEV Manager
* To configure additional users, first configure authentication domains using the 'rhevm-manage-domains' utility
* To access RHEV Manager please go to the following URL: http://rhevm.linuxidc.com:8080
解釋一下安裝過程,首先是提示相關的端口,然後是主機名,管理員登陸的密碼,數據庫的密碼,存儲的類型,我這裡選擇的是iSCSI,然後又設置了NFS來存儲系統的安裝鏡像。
最後系統生成了SSH和SSL的信息。
最後是提示你,可以通過http://rhevm.linuxidc.com:8080這個路徑來訪問。