第一步:去官方下載最新的內核源碼包
官方網址:www.kernel.org
當前最新版本:2.6.31,下載網址:http://www.kernel.org/pub/linux/kernel/v2.6/linux-2.6.31.tar.bz2
您可以使用 wget http://www.kernel.org/pub/linux/kernel/v2.6/linux-2.6.31.tar.bz2 下載
第二步:解壓源碼包(這裡有些人說要將源碼解壓到/usr/src目錄下,其實是不正確的,你可以解壓到任何目錄)
cd ~wget http://www.kernel.org/pub/linux/kernel/v2.6/linux-2.6.31.tar.bz2
tar -jxvf linux-2.6.31.tar.bz2
第三步:配置選項
Code highlighting produced by Actipro CodeHighlighter (freeware)
http://www.linuxidc.com
cd linux-2.6.31
cp /boot/config-`uname -r` .config
make mrproper (刪除上次編譯產生的垃圾,初次編譯不需要)
make menuconfig (啟動內核選項配置界面)
說明一下,make menuconfig會尋找linux-2.6.31目錄下的.config配置文件,如果找不到,則使用與CPU相關的config文件作為默認的配置。當然,我們也可以拷貝當前系統的配置作為對照,如cp /boot/config-`uname -r` .config (.config是隱藏文件 ls -a查看)
注意:如果是同版本的內核編譯,還需要備份下當前模塊
cd /lib/modules
mv 2.6.31 2.6.31_old
指定內核識別碼
vim Makefile
EXTRAVERSION = .custom-1 (第4行)
第四步(1):傳統方式編譯
make all (2.6以前版本需要手工運行如下命令)
Code highlighting produced by Actipro CodeHighlighter (freeware)
http://www.CodeHighlighter.com/
(
# make dep <==建立相依的屬性關系!
# make clean <==將舊的資料去除掉!
# make bzImage <==開始編譯核心!這個核心是經過壓縮的 (30分鐘左右)
# make modules <==開始編譯模塊!這個動作視您剛剛編譯的模塊數量!(1小時左右)
)
make modules_install (安裝模塊到/lib/modules/2.6.31),make install (系統將會把vmlinuz和System.map復制到/boot目錄下同時修改grub/boot/grub/menu.lst,2.6以前版本需要手動拷貝vmlinuz和System.map)
第四步(2):RPM方式編譯,會產生RPM包,方便提供給別人使用make rpm,編譯完成之後,在~/rpmbuild /SRPMS/目錄發現一個新的src.rpm包, 比如.SRPMS/kernel-2.6.31.custom-1.src.rpm, 內核rpm包位於~/rpmbuild/RPMS/i386/ (或RPMS/i586/, RPMS/i686/, 等. 看你的平台類型). 比如.RPMS/i386/kernel-2.6.31.custom-1.i386.rpm. 可以看到內核識別碼已添加到軟件包的名字中.
安裝新內核
現在去新的rpm內核包存在的目錄(基於你的平台類型, 比如. ~/rpmbuild/RPMS/i386/)安裝rpm包,cd ~/rpmbuild/RPMS/i386
rpm -ivh kernel-2.6.31.custom-1.i386.rpm(現在你甚至能夠拷貝到其它的Fedora系統, 通過上面的方式安裝. 你將不再需要編譯內核.)
接下來我們為新內核創建一個ramdisk, 否則系統將不能引導新內核:
mkinitrd /boot/initrd-2.6.31.custom-1.img 2.6.31.custom-1
然後編輯/boot/grub/menu.lst文件, 看一下你系統上已經存在(正在工作的)引導內核信息, 拷貝其中的一個實例, 替換為你新的內核和ramdisk:vim /boot/grub/menu.lst
比如, 我的menu.lst, 在我添加新的內核信息前的情況:
Code highlighting produced by Actipro CodeHighlighter (freeware)
http://www.CodeHighlighter.com/
# grub.conf generated by anaconda
#
# Note that you do not have to rerun grub after making changes to this file
# NOTICE: You have a /boot partition. This means that
# all kernel and initrd paths are relative to /boot/, eg.
# root (hd0,0)
# kernel /vmlinuz-version ro root=/dev/VolGroup00/LogVol00
# initrd /initrd-version.img
#boot=/dev/sda
default=0
timeout=5
splashimage=(hd0,0)/grub/splash.xpm.gz
hiddenmenu
title Fedora Core (2.6.18-1.2798.fc6)
root (hd0,0)
kernel /vmlinuz-2.6.18-1.2798.fc6 ro root=/dev/VolGroup00/LogVol00
initrd /initrd-2.6.18-1.2798.fc6.img
修改後的情況:
Code highlighting produced by Actipro CodeHighlighter (freeware)
http://www.CodeHighlighter.com/
# grub.conf generated by anaconda
#
# Note that you do not have to rerun grub after making changes to this file
# NOTICE: You have a /boot partition. This means that
# all kernel and initrd paths are relative to /boot/, eg.
# root (hd0,0)
# kernel /vmlinuz-version ro root=/dev/VolGroup00/LogVol00
# initrd /initrd-version.img
#boot=/dev/sda
default=0
timeout=5
splashimage=(hd0,0)/grub/splash.xpm.gz
hiddenmenu
title Fedora Core (2.6.18-custom-2.6.18.2)
root (hd0,0)
kernel /vmlinuz-2.6.18-custom-2.6.18.2 ro root=/dev/VolGroup00/LogVol00
initrd /initrd-2.6.18-custom-2.6.18.2.img
title Fedora Core (2.6.31.custom-1)
root (hd0,0)
kernel /vmlinuz-2.6.31.custom-1 ro root=/dev/VolGroup00/LogVol00
initrd /initrd-2.6.31.custom-1.img
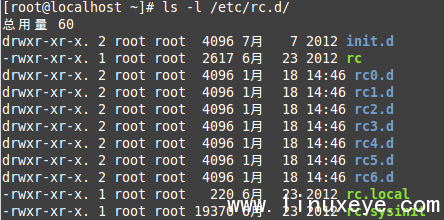
(你可以通過下面命令發現正確的vmlinuz和initrd文件:ls -l /boot)
第五步:重啟系統,在Grub引導菜單中,選擇linux-2.6.31.custom-1。
Reboot,重啟之後,大功告成,你的新內核已經安裝好了。