


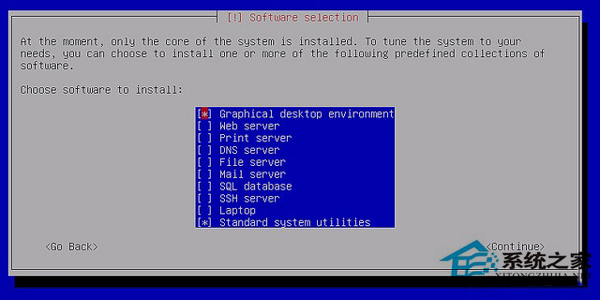
在Linux中可以使用命令來形成對話框,Linux命令行形成的對話框就是以代碼的形式出現。whiptail就是一個Linux可以形成對話框的命令行,本文就來介紹一下Linux使用whiptail形成對話框的方法。
分享一個寫好的東西。
#!/bin/bash
trap “” 2
while true
do
OPTION=$(whiptail --title “Email Manager” --nocancel --menu “Choose your option” 15 60 4 \
“1” “Add Email User” \
“2” “Delete Email User” \
“3” “List Email User” \
“4” “EXIT” 3》&1 1》&2 2》&3)
case $OPTION in
1)
EmailAddress=$(whiptail --title “EmailAddress-form Input Box” --inputbox “What is your add EmailAddress?” 10 60 @shenxu.com 3》&1 1》&2 2》&3)
exitstatus=$?
if [ $exitstatus = 0 ]; then
grep $EmailAddress /etc/postfix/virtual_mailbox_maps》/dev/nul
exitstatus=$?
if [ $exitstatus = 0 ]; then
whiptail --msgbox “The Email Address is a existed” 10 40
elif (whiptail --title “Add Yes/No Box” --yesno “Are you sure add $EmailAddress.” 10 60) then
/etc/postfix/mailadd.sh $EmailAddress
whiptail --msgbox “The Email Address $EmailAddress is a added.” 10 40
fi
else
whiptail --msgbox “You chose Cancel.” 10 40
fi
;;
2)
EmailAddress=$(whiptail --title “EmailAddress-form Input Box” --inputbox “What is your Delete EmailAddress?” 10 60 @shenxu.com 3》&1 1》&2 2》&3)
exitstatus=$?
if [ $exitstatus = 0 ]; then
grep $EmailAddress /etc/postfix/virtual_mailbox_maps》/dev/nul
exitstatus=$?
if [ $exitstatus != 0 ]; then
whiptail --msgbox “The Email Address $EmailAddress is a not exist.” 10 40
elif (whiptail --title “Add Yes/No Box” --yesno “Are you sure delete $EmailAddress.” 10 60) then
/etc/postfix/maildel.sh $EmailAddress
whiptail --msgbox “The Email Address $EmailAddress is a deleted.” 10 40
fi
else
whiptail --msgbox “You chose Cancel.” 10 40
fi
;;
3)
EmailAddress=$(cat /etc/postfix/virtual_mailbox_maps | awk ‘{print $1}’)
whiptail --msgbox “The Email User list are $EmailAddress.” --scrolltext 20 40
;;
4)
echo “EXIT”
break
;;
esac
done
trap : 2
whiptail --title “Email Manager” --nocancel --menu “Choose your option” 15 60 4 \
“1” “Add Email User” \
“2” “Delete Email User” \
“3” “List Email User” \
“4” “EXIT” 3》&1 1》&2 2》&3
--title “Email Manager” 是標題,雙引號裡是自己填的提示信息
--nocancel 是在這個圖文裡面不顯示取消,只顯示OK
--menu “Choose your option” 15 60 4 是表示菜單提示,雙引號裡是自己填的提示信息,15是高度,60是長度,4是有個選擇項目
下面的1-4是自己的提示
最後比較關鍵,3》&1 1》&2 2》&3是為了把選擇的內容填進變量OPTION
whiptail --title “EmailAddress-form Input Box” --inputbox “What is your add EmailAddress?” 10 60 @shenxu.com 3》&1 1》&2 2》&3
--inputbox “What is your add EmailAddress?” 是可以形成一個讓用戶輸入的提示框
@shenxu.com 是默認輸入text裡的值
whiptail --msgbox “You chose Cancel.” 10 40 是顯示一行你的提示
其實還有--infobox,似乎和msgbox很像,其實不同,它基本上用不上,是在shell運行完後,可以往前翻頁能看見的東西
--scrolltext 20 40是為了顯示多行的時候可以上下滾動
另外還有--passwordbox和text一樣輸入,就是以***顯示
whiptail --checklist “choose” 15 60 2 “1” “aa” ON “2” “bb” ON
15 60還是高和寬,2是有幾個選項,和menu一樣,後面多了一個ON或者OFF表示狀態,就是菜單出來後默認是不是選,On是選,OFF不選,用空格鍵來選擇。可以多選。
--radiolist,不可以多選了。ON就只能有一個,其它必須是OFF
還有一個顯示進度條的--gauge,我覺得沒啥用處。
#!/bin/bash
{
for n in `seq 100`
do
sleep 1
echo $n
done
} | whiptail --gauge “Please wait while installing” 6 60 0
以上就是Linux使用whiptail形成對話框的方法,把寫好的代碼復制到whiptail裡面就可以形成對話框了。