


注:以下所有操作均在CentOS 6.5 x86_64位系統下完成。
#准備工作#
在安裝Nginx之前,請確保已經使用yum安裝了pcre等基礎組件,具體見《CentOS安裝LNMP環境的基礎組件》。
然後創建www的用戶組和用戶,並且不允許登錄權限:
# id www
id: www:無此用戶
# groupadd www
# useradd -g www -s /sbin/nologin www
# id www
uid=501(www) gid=501(www) 組=501(www)
#Nginx的安裝#
開始下載Nginx並進行編譯安裝:
# cd /usr/local/src
# wget http://nginx.org/download/nginx-1.6.2.tar.gz
# tar zxf nginx-1.6.2.tar.gz
# cd nginx-1.6.2
# ./configure --prefix=/usr/local/nginx-1.6.2 --group=www --user=www --with-http_ssl_module --with-pcre --with-http_stub_status_module --with-http_gzip_static_module

Configuration summary
  + using system PCRE library
  + using system OpenSSL library
  + md5: using OpenSSL library
  + sha1: using OpenSSL library
  + using system zlib library

  nginx path prefix: "/usr/local/nginx-1.6.2"
  nginx binary file: "/usr/local/nginx-1.6.2/sbin/nginx"
  nginx configuration prefix: "/usr/local/nginx-1.6.2/conf"
  nginx configuration file: "/usr/local/nginx-1.6.2/conf/nginx.conf"
  nginx pid file: "/usr/local/nginx-1.6.2/logs/nginx.pid"
  nginx error log file: "/usr/local/nginx-1.6.2/logs/error.log"
  nginx http access log file: "/usr/local/nginx-1.6.2/logs/access.log"
  nginx http client request body temporary files: "client_body_temp"
  nginx http proxy temporary files: "proxy_temp"
  nginx http fastcgi temporary files: "fastcgi_temp"
  nginx http uwsgi temporary files: "uwsgi_temp"
  nginx http scgi temporary files: "scgi_temp"

# make && make install
# ln -s /usr/local/nginx-1.6.2/ /usr/local/nginx
# chown -R www:www /usr/local/nginx
# chown -R www:www /usr/local/nginx-1.6.2
把Nginx的sbin目錄加入PATH:
# vim /etc/profile

export PATH=$PATH:/usr/local/mysql/bin:$JAVA_HOME/bin:/usr/local/nginx/sbin

# source /etc/profile
查看Nginx的版本信息,並且檢驗上一步驟是否成功:
# nginx -V
nginx version: nginx/1.6.2
built by gcc 4.4.7 20120313 (Red Hat 4.4.7-4) (GCC)
TLS SNI support enabled
configure arguments: --prefix=/usr/local/nginx-1.6.2 --group=www --user=www --with-http_ssl_module --with-pcre --with-http_stub_status_module
至此,Nginx已經安裝完畢。
#Nginx的啟動/重啟/關閉#
給Nginx的webapp配置相關路徑(這裡是為了後面運維管理方便,可以把不同的Web項目放到該目錄下):
# mkdir -p /data/www
簡單修改下配置文件:
# vim /usr/local/nginx/conf/nginx.conf

user  www;
worker_processes  1;
events {
    worker_connections  1024;
}
http {
    include       mime.types;
    default_type  application/octet-stream;
    sendfile      on;
    keepalive_timeout  65;
    gzip  on;
    server {
        listen       80;
        server_name  localhost;
        location / {
            root   html;
            index  index.html index.htm;
        }
    }
}
開始啟動Nginx:
# nginx
這個時候打開浏覽器訪問地址http://youripaddress應該可以看到:
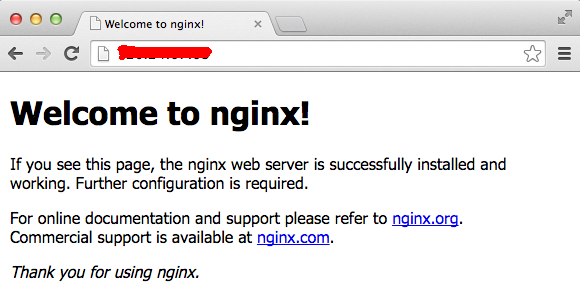
至此,Nginx已經啟動成功。
一般來說,當修改了nginx.conf配置文件後,可以直接重啟讓配置生效,重啟之前一般檢測下配置文件是否正確:
# nginx -t
nginx: the configuration file /usr/local/nginx-1.6.2/conf/nginx.conf syntax is ok
nginx: configuration file /usr/local/nginx-1.6.2/conf/nginx.conf test is successful
# nginx -s reload
另外,重啟也可以通過發信號的方式:
# kill -HUP ${master_pid}
關閉的命令如下:
# nginx -s quit
# nginx -s stop
注:quit表示等請求結束後再關閉,stop表示立刻關閉。
也可以通過發信號的方式來關閉:
# kill -QUIT ${nginx_master}
# kill -TERM ${nginx_master}
# kill -9 ${nginx_master}
注:-QUIT表示從容停止,等所有請求結束後再關閉進程;TERM則表示立刻關閉進程;-9表示強制關閉。
為了以後管理上的方便, 我們這裡寫個啟動腳本,以後就可以用service命令來啟動,如下:
# vim /etc/init.d/nginxd

#!/bin/sh
# chkconfig: 2345 85 15
# description:Nginx Server

NGINX_HOME=/usr/local/nginx-1.6.2
NGINX_SBIN=$NGINX_HOME/sbin/nginx
NGINX_CONF=$NGINX_HOME/conf/nginx.conf
NGINX_PID=$NGINX_HOME/logs/nginx.pid

NGINX_NAME="Nginx"

. /etc/rc.d/init.d/functions

if [ ! -f $NGINX_SBIN ]
then
    echo "$NGINX_NAME startup: $NGINX_SBIN not exists! "
    exit
fi

start() {
    $NGINX_SBIN -c $NGINX_CONF
    ret=$?
    if [ $ret -eq 0 ]; then
        action $"Starting $NGINX_NAME: " /bin/true
    else
        action $"Starting $NGINX_NAME: " /bin/false
    fi
}

stop() {
    kill `cat $NGINX_PID`
    ret=$?
    if [ $ret -eq 0 ]; then
        action $"Stopping $NGINX_NAME: " /bin/true
    else
        action $"Stopping $NGINX_NAME: " /bin/false
    fi
}

restart() {
    stop
    start
}

check() {
    $NGINX_SBIN -c $NGINX_CONF -t
}


reload() {
    kill -HUP `cat $NGINX_PID` && echo "reload success!"
}

relog() {
    kill -USR1 `cat $NGINX_PID` && echo "relog success!"
}

case "$1" in
    start)
        start
        ;;
    stop)
        stop
        ;;
    restart)
        restart
        ;;
    check|chk)
        check
        ;;
    status)
        status -p $NGINX_PID
        ;;
    reload)
        reload
        ;;
    relog)
        relog
        ;;
    *)
        echo $"Usage: $0 {start|stop|restart|reload|status|check|relog}"
        exit 1
esac

# chmod +x /etc/init.d/nginxd
# chkconfig nginxd on
這樣子就可以通過service來啟動:
# service nginxd start
#Nginx的安全配置#
1、 首先設置不允許目錄浏覽,默認配置即為不允許。
autoindex off
2、開啟訪問日志,nginx中默認已開啟,這裡我們後續為了運維管理上的方便最好把日志單獨放到/data目錄下。
access_log /data/www/logs/localhost.access.log
3、確保目錄的安全,由於Nginx使用的是www用戶啟動,黑客入侵服務器成功後將獲得www用戶的權限,所以需要確保網站Web目錄和文件的屬主與啟動用戶不同,防止網站被黑客惡意篡改和刪除。網站Web目錄和文件的屬主可以設置為root,其中Web目錄權限統一設置為755,Web文件權限統一設置為644。只有上傳目錄等可讀寫權限的目錄可以被設置為777,為了防止黑客上傳木馬到777權限目錄中,還必須保證該777權限的目錄沒有執行腳本的權限。這裡有兩種情況處理:
1)對於使用PHP的業務,配置如下:
location ~* ^/data/www/logs/.*\.(php|php5)$ {
    deny all;
}
注:當然最安全的還是給PHP的可執行目錄采用白名單的方式,這個我們在PHP的安裝一節中再詳細介紹。
2)對於非使用PHP的業務(如python、cgi等),則需要禁止外部訪問777目錄,配置如下:
location ~ ^/data/www/logs/ {
    deny all;
}
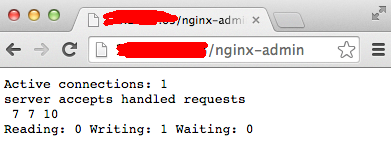
4、對於管理目錄,需要限制訪問的IP地址,比如這裡限制訪問nginx狀態的:
server {
    location /nginx-admin {
        stub_status on;
        access_log logs/nginx-admin.log;
        allow 11.12.23.0/24;
        deny all;
    }

    location /admin {
        ...
    }
}
注:上面配置的11.12.23.0/24指的就是當前運維客戶端的IP地址段。
在允許IP的機器上輸入地址應該可以看到:
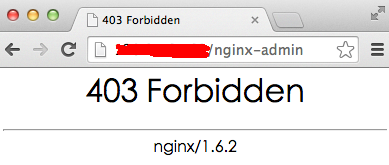
而不允許的用戶訪問應該是不可以的,會顯示403錯誤,比如:
5、把Nginx默認的首頁等頁面刪除,使用業務自己的首頁來頂替。
6、不允許IP直接訪問服務器,這樣的好處是怕當IP地址洩漏出去之後,被人用別的域名來指向了這個IP地址,可以設置讓其返回500等錯誤碼。比如:
server {
    listen        80 default;
    return 500;
}
server {
    listen        80;
    server_name   www.tencent.com tencent.com;
    root          /data/www/tencent;

    access_log    /data/logs/nginx/tencent.access.log;
    error_log     /data/logs/nginx/tencent.error.log;
}
注:上面的配置表示當使用IP地址直接訪問時將出錯,而使用域名訪問時(比如請求tencent.com則正常)。
http://xxxxxx/Linuxjc/1178064.html TechArticle