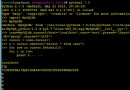
apt-get和apt-cache是Ubuntu Linux中的命令行下的包管理工具。 apt-get的GUI版本是Synaptic包管理器。本篇中我們會展示apt-get和apt-cache命令的15個不同例子。
示例:1 列出所有可用包
- linuxidc@localhost:~$ apt-cache pkgnames
- account-plugin-yahoojp
- ceph-fuse
- dvd+rw-tools
- e3
- gnome-commander-data
- grub-gfxpayload-lists
- gweled
- .......................................
示例:2 用關鍵字搜索包
這個命令在你不確定包名時很有用,只要在apt-cache(LCTT 譯注:這裡原文是apt-get,應為筆誤)後面輸入與包相關的關鍵字即可。
- linuxidc@localhost:~$ apt-cache search "web server"
- apache2 -Apache HTTP Server
- apache2-bin -Apache HTTP Server(binary files and modules)
- apache2-data -Apache HTTP Server(common files)
- apache2-dbg -Apache debugging symbols
- apache2-dev -Apache HTTP Server(development headers)
- apache2-doc -Apache HTTP Server(on-site documentation)
- apache2-utils -Apache HTTP Server(utility programs for web servers)
- ......................................................................
注意: 如果你安裝了“apt-file”包,我們就可以像下面那樣用配置文件搜索包。
- linuxidc@localhost:~$ apt-file search nagios.cfg
- ganglia-nagios-bridge:/usr/share/doc/ganglia-nagios-bridge/nagios.cfg
- nagios3-common:/etc/nagios3/nagios.cfg
- nagios3-common:/usr/share/doc/nagios3-common/examples/nagios.cfg.gz
- pnp4nagios-bin:/etc/pnp4nagios/nagios.cfg
- pnp4nagios-bin:/usr/share/doc/pnp4nagios/examples/nagios.cfg
示例:3 顯示特定包的基本信息
- linuxidc@localhost:~$ apt-cache show postfix
- Package: postfix
- Priority: optional
- Section: mail
- Installed-Size:3524
- Maintainer:LaMontJones<[email protected]>
- Architecture: amd64
- Version:2.11.1-1
- Replaces: mail-transport-agent
- Provides:default-mta, mail-transport-agent
- .....................................................
示例:4 列出包的依賴
- linuxidc@localhost:~$ apt-cache depends postfix
- postfix
- Depends: libc6
- Depends: libdb5.3
- Depends: libsasl2-2
- Depends: libsqlite3-0
- Depends: libssl1.0.0
- |Depends: debconf
- Depends:<debconf-2.0>
- cdebconf
- debconf
- Depends: netbase
- Depends: adduser
- Depends: dpkg
- ............................................
示例:5 使用apt-cache顯示緩存統計
- linuxidc@localhost:~$ apt-cache stats
- Totalpackage names:60877(1,218 k)
- Totalpackage structures:102824(5,758 k)
- Normal packages:71285
- Purevirtual packages:1102
- Singlevirtual packages:9151
- Mixedvirtual packages:1827
- Missing:19459
- Total distinct versions:74913(5,394 k)
- Total distinct descriptions:93792(2,251 k)
- Total dependencies:573443(16.1 M)
- Total ver/file relations:78007(1,872 k)
- TotalDesc/File relations:93792(2,251 k)
- TotalProvides mappings:16583(332 k)
- Total globbed strings:171(2,263)
- Total dependency version space:2,665 k
- Total slack space:37.3 k
- Total space accounted for:29.5 M
示例:6 使用 “apt-get update” 更新倉庫
使用命令“apt-get update”, 我們可以重新從源倉庫中同步文件索引。包的索引從“/etc/apt/sources.list”中檢索。
- linuxidc@localhost:~$ sudo apt-get update
- Ign http://extras.ubuntu.com utopic InRelease
- Hit http://extras.ubuntu.com utopic Release.gpg
- Hit http://extras.ubuntu.com utopic Release
- Hit http://extras.ubuntu.com utopic/main Sources
- Hit http://extras.ubuntu.com utopic/main amd64 Packages
- Hit http://extras.ubuntu.com utopic/main i386 Packages
- Ign http://in.archive.ubuntu.com utopic InRelease
- Ign http://in.archive.ubuntu.com utopic-updates InRelease
- Ign http://in.archive.ubuntu.com utopic-backports InRelease
- ................................................................
示例:7 使用apt-get安裝包
- linuxidc@localhost:~$ sudo apt-get install icinga
上面的命令會安裝叫“icinga”的包。
示例:8 升級所有已安裝的包
- linuxidc@localhost:~$ sudo apt-get upgrade
示例:9 更新特定的包
在apt-get命令中的“install”選項後面接上“-only-upgrade”用來更新一個特定的包,如下所示:
- linuxidc@localhost:~$ sudo apt-get install filezilla --only-upgrade
示例:10 使用apt-get卸載包
- linuxidc@localhost:~$ sudo apt-get remove skype
上面的命令只會刪除skype包,如果你想要刪除它的配置文件,在apt-get命令中使用“purge”選項。如下所示:
- linuxidc@localhost:~$ sudo apt-get purge skype
我們可以結合使用上面的兩個命令:
- linuxidc@localhost:~$ sudo apt-get remove --purge skype
示例:11 在當前的目錄中下載包
- linuxidc@localhost:~$ sudo apt-get download icinga
- Get:1 http://in.archive.ubuntu.com/ubuntu/ utopic/universe icinga amd64 1.11.6-1build1 [1,474 B]
- Fetched1,474 B in1s(1,363 B/s)
上面的目錄會把icinga包下載到你的當前工作目錄。
示例:12 清理本地包占用的磁盤空間
- linuxidc@localhost:~$ sudo apt-get clean
上面的命令會清空apt-get所下載的包占用的磁盤空間。
我們也可以使用“autoclean”選項來代替“clean”,兩者之間主要的區別是autoclean清理不再使用且沒用的下載。
- linuxidc@localhost:~$ sudo apt-get autoclean
- Readingpackage lists...Done
- Building dependency tree
- Reading state information...Done
示例:13 使用“autoremove”刪除包
當在apt-get命令中使用“autoremove”時,它會刪除為了滿足依賴而安裝且現在沒用的包。
- linuxidc@localhost:~$ sudo apt-get autoremove icinga
示例:14 顯示包的更新日志
- linuxidc@localhost:~$ sudo apt-get changelog apache2
- Get:1Changelogfor apache2 (http://changelogs.ubuntu.com/changelogs/pool/main/a/apache2/apache2_2.4.10-1ubuntu1/changelog) [195 kB]
- Fetched195 kB in3s(60.9 kB/s)
上面的命令會下載apache2的更新日志,並在你屏幕上分頁顯示。
示例:15 使用 “check” 選項顯示損壞的依賴關系
- linuxidc@localhost:~$ sudo apt-get check
- Readingpackage lists...Done
- Building dependency tree
- Reading state information...Done