1.到Bochs官方下載源碼包,因為用到了調試功能。 Bochs 2.4.5下載地址 http://sourceforge.net/projects/bochs/
2.安裝G++編譯器
sudo apt-get install g++
如果不安裝G++編譯器, 在執行configure時就會出現一些錯誤。
3.執行配置,開啟調試和反匯編
./configure --enable-debugger --enable-disasm
4.ERROR: X windows gui was selected, but X windows libraries were not found.
出現這個錯誤時,請安裝xorg-dev包
sudo apt-get install xorg-dev5.Package gtk+-2.0 was not found in the pkg-config search path.Perhaps you should add the directory containing `gtk+-2.0.pc'to the PKG_CONFIG_PATH environment variableNo package 'gtk+-2.0' foundERROR: pkg-config was not found, or unable to access the gtk+-2.0 package.Install pkg-config and the gtk+ development package,or disable the gui debugger, or the wxWidgets display library (whichever is being used).
出現這個錯誤時,請運行:
sudo apt-get install libgtk2.0-dev6.重新執行配置(出錯處理如上)
./configure --enable-debugger --enable-disasm然後運行make
make再install
sudo make install我試過不用sudo來直接執行,會出錯的,出錯提示不明確,應該是權限不夠
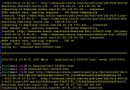
make: *** [install_bin] 錯誤 17.完成,執行bochs,嘻嘻,來個截圖
配置bochs:
安裝好bochs之後,我們需要對bochs進行配置,其實就是對文件bochrsc進行修改!
《orange's :一個操作系統的實現》的附帶光盤裡有一個已經配置好的bochrsc,但
是它是針對bochs2.3版本的,所以不能用!!!我們需要重新修改bochrsc!
首先將附帶光盤裡的chapter1子目錄下的文件夾a 移動到/home/roothoo/,(主要是為
是讓a.img 和 bochsrc在同一文件夾下),然後對bochrc進行修改如下:
注意,#是注釋符號!即#之後的語句是無效的,其實#就相當於C+語言中的//
###############################################################
# Configuration file for Bochs
###############################################################
# how much memory the emulated machine will have
megs: 32
# filename of ROM images
romimage: file=/usr/local/share/bochs/BIOS-bochs-latest
#romimage: file=$BXSHARE/BIOS-bochs-latest (適用於bochs安裝在windows下)
vgaromimage: /usr/local/share/vgabios/vgabios.bin
#vgaromimage: file=$BXSHARE/VGABIOS-lgpl-latest(適用bochs安裝在windows下)
# what disk images will be used
floppya: 1_44=a.img, status=inserted
# choose the boot disk.
boot: floppy
# where do we send log messages?
# log: bochsout.txt
# disable the mouse
mouse: enabled=0
# enable key mapping, using US layout as default.
keyboard_mapping: enabled=1, map=/usr/local/share/bochs/keymaps/x11-pc-us.map
修改好之後, 【 Linux公社 www.Linuxidc.com 】 別忘了保存!
最後,我們運行bochs
cd
bochs
然後選擇6,
然後再按c鍵,
OK!!!
ENJOY! -_-
問題一、安裝bochs在terminal下輸入下列代碼
sudo apt-get install bochs
這樣安裝結束後,在我使用bochs的時候出現了下列錯誤:
Event type: PANIC
Device: [
Message: dlopen failed for module 'x': file not found
這是由於在安裝的時候,少安裝了個bochs-x包
這個包可以在http://packages.Ubuntu.com/dapper/misc/bochs-x找到
也可以在terminal下面輸入
sudo apt-get install bochs-x
這樣才算安裝完畢了。
點進入系統後控制台出現下面的提示:
Please choose one: [6] 6
00000000000i[ ] installing win32 module as the Bochs GUI
00000000000i[ ] using log file bochsout.txt
========================================================================
Event type: PANIC
Device: [MEM0 ]
Message: ROM: System BIOS must end at 0xfffff
A PANIC has occurred. Do you want to:
cont - continue execution
alwayscont - continue execution, and don't ask again.
This affects only PANIC events from device [MEM0 ]
die - stop execution now
abort - dump core
Choose one of the actions above: [die]
問題原因:
在2.3.5以前的bochs使用的BIOS-bochs-latest是64k的,那個時候需要加上
romimage: file=BIOS-bochs-latest,address=0xf0000(舉例)
在2.3.5中的BIOS-bochs-latest更新了,變成了128k的,這個時候配置需要改為
romimage: file=$BXSHARE/BIOS-bochs-latest (舉例,也就是要去掉address=0xf000)
解決方法:
去掉配置文件中的address那個
問題三、bochs的啟動配置文件bochsrc
一般網上的資料都會提示你安裝好後會有如下工具:
/usr/bin/bochs
/usr/bin/bximage
/usr/bin/bxcommit
/usr/share/doc/bochs/bochsrc-sample.txt
/usr/share/bochs/BIOS-bochs-*
/usr/share/bochs/VGABIOS-*
/usr/bin/bochs-dlx
/usr/share/bochs/dlxlinux/
/usr/share/bochs/keymaps/*.map
其實在終端安裝的卻沒有第四、第七和第八項,就連第二第三項也要另外安裝:
所以,網上那些bochsrx在Ubuntu是運行不了的,就因為這點,我搞近一個下午,開始我老以為是配置文件不對呢。
普通的bochsrc:
romimage: file=$BXSHARE/BIOS-bochs-latest,
vgaromimage: file=$BXSHARE/VGABIOS-lgpl-latest
但是在Ubuntu下壓根就沒有VGABIOS-lgpl-latest
例如:
www.linuxidc.com@linuxidc-desktop:/usr/share/bochs$ ls
BIOS-bochs-latest
www.linuxidc.com@linuxidc-desktop:/usr/share/bochs$
後來我才發現,從終端下安裝bochs時它把VGA專門作為了一個程序安裝在了/usr/share/vgabios/中了。
www.linuxidc.com@linuxidc-desktop:/usr/share/bochs$ ls /usr/share/vgabios/
vgabios.bin
www.linuxidc.com@linuxidc-desktop:/usr/share/bochs$
這樣配置文件就要改為: