筆記:
cmake -G 查看支持的makefile文件
1、進入目錄:
cmake .
2、window下會生成vs工程。首先需要安裝有vs環境。
打開Visual Studio 命令行提示窗口,它會執行加載一些VS的環境變量。
然後才執行下面。
cmake . -G"NMake Makefiles"
會生成window make工程。 下面編譯。
nmake
或者
cmake . -G"MinGW Makefiles"
make
3、linux:
cmake . 生成makefile工後編譯。
make
附上demo:
CMakeLists.txt
#Generated by VisualGDB project wizard.
#Note: VisualGDB will automatically update this file when you add new sources to the project.

cmake_minimum_required(VERSION 2.7)
project(CMakeDemo)
set(LIBRARIES_FROM_REFERENCES "")
add_executable(CMakeDemo CMakeDemo.cpp)
target_link_libraries(CMakeDemo "${LIBRARIES_FROM_REFERENCES}")
CMakeDemo.cpp
#include <iostream>

using namespace std;

int main(int argc, char *argv[])
{
	char sz[] = "Hello, World!";	//Hover mouse over "sz" while debugging to see its contents
	cout << sz << endl;	//<================= Put a breakpoint here
	return 0;
}
http://visualgdb.com/tutorials/linux/cmake/
Creating CMake Linux projects with Visual Studio
Before you begin, make sure that VisualGDB
4.3 or later is installed.
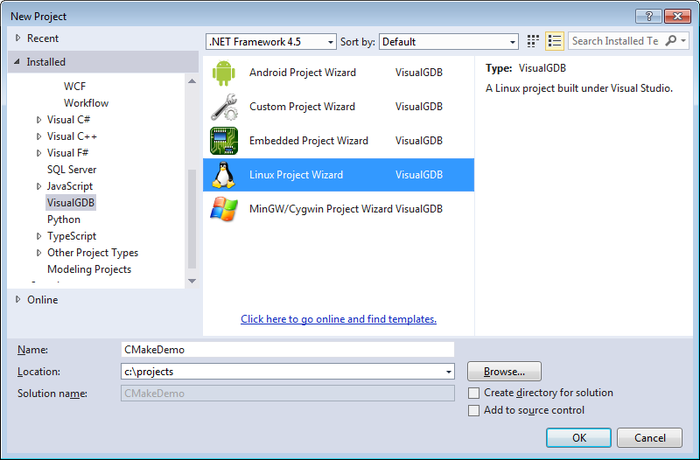
Start Visual Studio and open the “New Project” dialog. Select the Linux Project Wizard from VisualGDB folder:
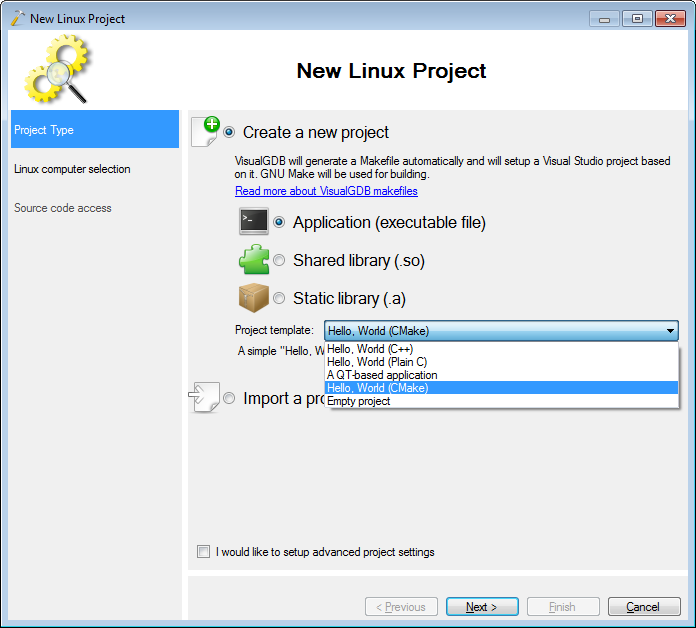
On the first wizard page ensure that “new project” is selected and then select the “Hello, World (CMake)” sample:
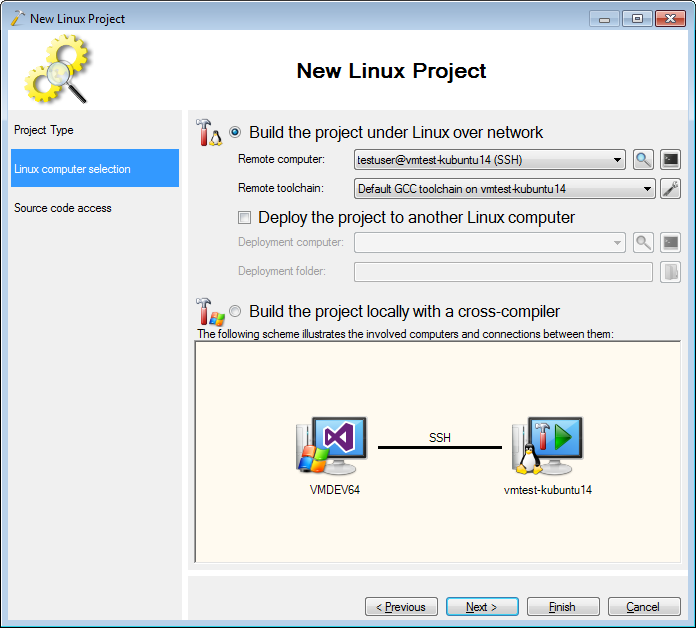
On the next page select the Linux computer you want to target and press “Next”. If you have not configured the connection to that computer with VisualGDB yet, follow the generic
Linux tutorial to set it up.
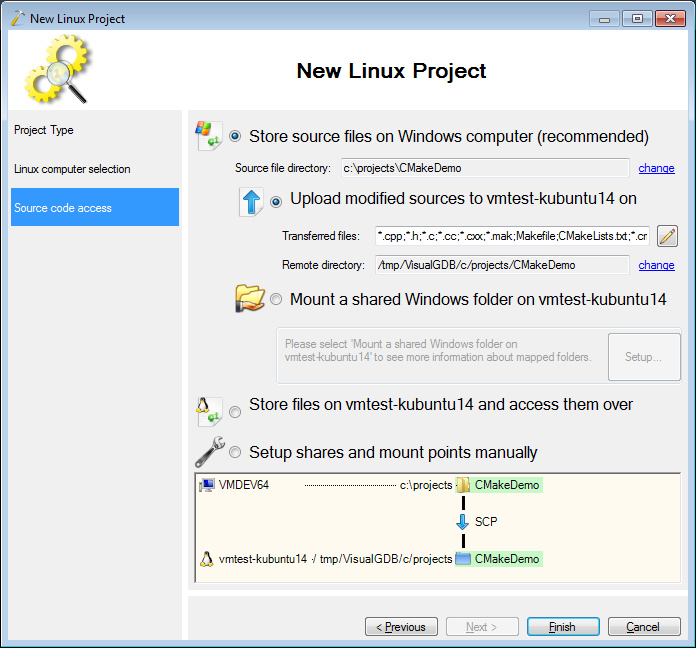
On the next page specify how should the Linux machine access the source code. The easiest way would be to proceed with the default settings of uploading the modified sources to the Linux machine:
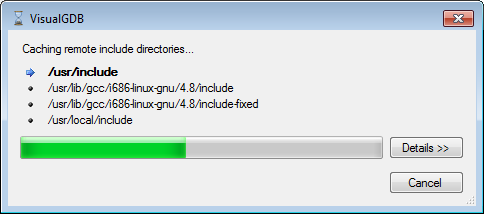
Press “Finish” to complete the wizard. If this is the first project created on this machine, VisualGDB will cache the include directories from it so that IntelliSense can find all the headers:
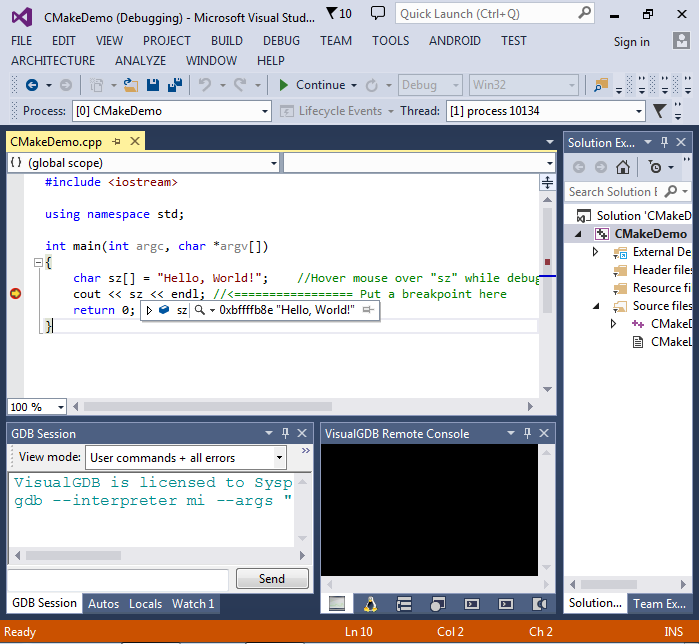
Once the project is created, press Ctrl-Shift-B to build your solution:
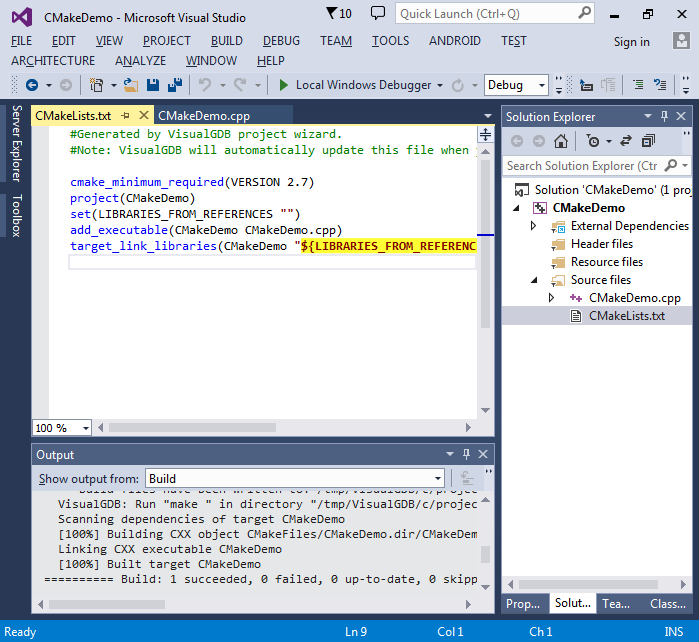
You can customize various project settings using one of two ways. First of all, you can edit the CMakeLists.txt file directly. VisualGDB will provide syntax highlighting and basic IntelliSense:
Second of all you can right-click on the project, select “VisualGDB Project Properties” and go to the CMake page:
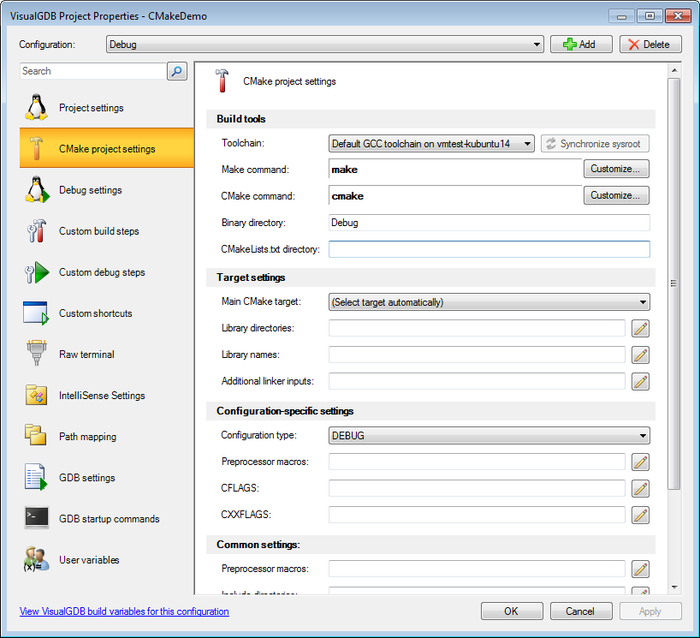
Note
that the settings editing GUI will only work for the settings defined in CMakeLists.txt itself, but not in any of the included files.
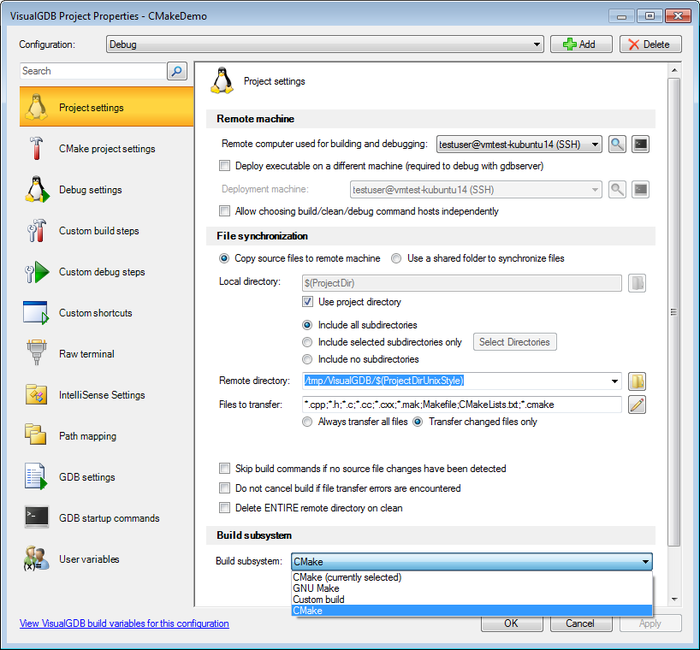
You can also switch an existing project to CMake by selecting it on the “Project settings” page:
When you are done changing your settings, press F5 or F10 to begin debugging your project: