服務器系統環境:CentOS 6.3
客戶端系統環境:Windows 7 ultimate(x86)sp1 簡體中文旗艦版
※本文檔描述了如何在Linux服務器配置Apache、Mysql、PHP5
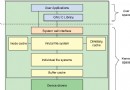
LAMP(Linux-Apache-MySQL-PHP)網站架構是目前國際流行的Web框架,該框架包括:Linux操作系統,Apache網絡服務器,MySQL數據庫,Perl、PHP或者Python編程語言,所有組成產品均是開源軟件,是國際上成熟的架構框架,很多流行的商業應用都是采取這個架構,和Java/J2EE架構相比,LAMP具有Web資源豐富、輕量、快速開發等特點,微軟的.NET架構相比,LAMP具有通用、跨平台、高性能、低價格的優勢,因此LAMP無論是性能、質量還是價格都是企業搭建網站的首選平台。
安裝前准備:
1、檢查防火牆iptables狀態
[root@server ~]# service iptables status
注意:用法:iptables {start|stop|restart|condrestart|status|panic|save}
表格:filter
Chain INPUT (policy ACCEPT)
num  target     prot opt source             destination
1    ACCEPT     all  --  0.0.0.0/0           0.0.0.0/0           state RELATED,ESTABLISHED
2    ACCEPT     icmp --  0.0.0.0/0           0.0.0.0/0
3    ACCEPT     all  --  0.0.0.0/0            0.0.0.0/0
4    ACCEPT     tcp  --  0.0.0.0/0           0.0.0.0/0           state NEW tcp dpt:22
5    REJECT     all  --  0.0.0.0/0            0.0.0.0/0           reject-with icmp-host-prohibited
Chain FORWARD (policy ACCEPT)
num  target     prot opt source               destination
1    REJECT     all  --  0.0.0.0/0            0.0.0.0/0           reject-with icmp-host-prohibited
Chain OUTPUT (policy ACCEPT)
num  target     prot opt source               destination
查看本機關於 IPTABLES的配置前情況
[root@server ~]# iptables -L
Chain INPUT (policy ACCEPT)
target     prot opt source               destination
ACCEPT     all  --  anywhere           anywhere            state RELATED,ESTABLISHED
ACCEPT     icmp --  anywhere           anywhere
ACCEPT     all  --  anywhere           anywhere
ACCEPT     tcp  --  anywhere           anywhere            state NEW tcp dpt:ssh
REJECT     all  --  anywhere            anywhere            reject-with icmp-host-prohibited
Chain FORWARD (policy ACCEPT)
target     prot opt source               destination
REJECT     all  --  anywhere             anywhere            reject-with icmp-host-prohibited
Chain OUTPUT (policy ACCEPT)
target     prot opt source               destination
2、配置防火牆,開啟80端口、3306端口
[root@server ~]# vim /etc/sysconfig/iptables
添加:
-A INPUT -m state --state NEW -m tcp -p tcp --dport 80 -j ACCEPT #允許80(http)端口通過防火牆
-A INPUT -m state --state NEW -m tcp -p tcp --dport 3306 -j ACCEPT #允許3306(mysql)端口通過防火牆
備注:
很多網友把這兩條規則添加到防火牆配置的最後一行,導致防火牆啟動失敗,正確的應該是添加到默認的22端口這條規則的下面。
如下所示:
# Firewall configuration written by system-config-firewall
# Manual customization of this file is not recommended.
*filter
:INPUT ACCEPT [0:0]
:FORWARD ACCEPT [0:0]
:OUTPUT ACCEPT [0:0]
-A INPUT -m state --state ESTABLISHED,RELATED -j ACCEPT
-A INPUT -p icmp -j ACCEPT
-A INPUT -i lo -j ACCEPT
-A INPUT -m state --state NEW -m tcp -p tcp --dport 22 -j ACCEPT
-A INPUT -m state --state NEW -m tcp -p tcp --dport 80 -j ACCEPT #允許80(http)端口通過防火牆
-A INPUT -m state --state NEW -m tcp -p tcp --dport 3306 -j ACCEPT #允許3306(mysql)端口通過防火牆
-A INPUT -j REJECT --reject-with icmp-host-prohibited
-A FORWARD -j REJECT --reject-with icmp-host-prohibited
COMMIT
:wq #保存退出
重啟防火牆使配置生效
[root@server ~]# service iptables restart
iptables:清除防火牆規則:                               [確定]
iptables:將鏈設置為政策 ACCEPT:filter                    [確定]
iptables:正在卸載模塊:                                 [確定]
iptables:應用防火牆規則:                               [確定]
最後,檢查防火牆iptables狀態是否生效
[root@server ~]# service iptables status
表格:filter
Chain INPUT (policy ACCEPT)
num  target     prot opt source               destination
1    ACCEPT     all  --  0.0.0.0/0            0.0.0.0/0           state RELATED,ESTABLISHED
2    ACCEPT     icmp --  0.0.0.0/0            0.0.0.0/0
3    ACCEPT     all  --  0.0.0.0/0            0.0.0.0/0
4    ACCEPT     tcp  --  0.0.0.0/0            0.0.0.0/0           state NEW tcp dpt:22
5    ACCEPT     tcp  --  0.0.0.0/0            0.0.0.0/0           state NEW tcp dpt:80
6    ACCEPT     tcp  --  0.0.0.0/0            0.0.0.0/0           state NEW tcp dpt:3306
7    REJECT     all  --  0.0.0.0/0            0.0.0.0/0           reject-with icmp-host-prohibited
Chain FORWARD (policy ACCEPT)
num  target     prot opt source               destination
1    REJECT     all  --  0.0.0.0/0            0.0.0.0/0           reject-with icmp-host-prohibited
Chain OUTPUT (policy ACCEPT)
num  target     prot opt source               destination
3、關閉SELINUX
[root@server ~]# vim /etc/selinux/config
# This file controls the state of SELinux on the system.
# SELINUX= can take one of these three values:
# enforcing - SELinux security policy is enforced.
# permissive - SELinux prints warnings instead of enforcing.
# disabled - No SELinux policy is loaded.
#SELINUX=enforcing #注釋掉強制
SELINUX=disabled #關閉
# SELINUXTYPE= can take one of these two values:
# targeted - Targeted processes are protected,
# mls - Multi Level Security protection.
#SELINUXTYPE=targeted #注釋掉
:wq #保存退出
重啟系統
[root@server ~]# reboot
安裝軟件包:
4、安裝Apache
檢查是否安裝httpd,使用YUM 自動安裝:
[root@server ~]# rpm -qa |grep httpd
[root@server ~]# yum -y install httpd #根據提示,輸入Y安裝即可成功安裝
啟動Apache
[root@server ~]# service httpd start
正在啟動 httpd:httpd: apr_sockaddr_info_get() failed for server
httpd: Could not reliably determine the server's fully qualified domain name, using 127.0.0.1 for ServerName
[確定]
設為開機啟動
[root@server ~]# chkconfig httpd on
重啟Apache
[root@server ~]# service httpd restart
停止 httpd: [確定]
正在啟動 httpd:httpd: apr_sockaddr_info_get() failed for server
httpd: Could not reliably determine the server's fully qualified domain name, using 127.0.0.1 for ServerName
[確定]
查看啟動Apache運行狀態
[root@server ~]# service httpd status
httpd (pid 1290) 正在運行...
浏覽器訪問:http://10.1.4.44

5、安裝MySQL
檢查是否安裝mysql,使用YUM 自動安裝:
[root@server ~]# rpm –qa |grep mysql
[root@server ~]# yum -y install mysql mysql-server #是否要安裝,輸入Y即可自動安裝,直到安裝完成
啟動MySQL
[root@server ~]# service mysqld start
[確定]
正在啟動 mysqld: [確定]
設為開機啟動
[root@server ~]# chkconfig mysqld on
[root@server ~]# cp /etc/my.cnf /etc/my.cnfbak
[root@server ~]# cp /usr/share/mysql/my-medium.cnf /etc/my.cnf
cp:是否覆蓋"/etc/my.cnf"? y #拷貝配置文件(注意:如果/etc目錄下面默認有一個my.cnf,直接覆蓋即可)
為root賬戶設置密碼
[root@server ~]# mysql_secure_installation
NOTE: RUNNING ALL PARTS OF THIS SCRIPT IS RECOMMENDED FOR ALL MySQL
SERVERS IN PRODUCTION USE! PLEASE READ EACH STEP CAREFULLY!
In order to log into MySQL to secure it, we'll need the current
password for the root user. If you've just installed MySQL, and
you haven't set the root password yet, the password will be blank,
so you should just press enter here.
Enter current password for root (enter for none): #按回車鍵
OK, successfully used password, moving on...
Setting the root password ensures that nobody can log into the MySQL
root user without the proper authorisation.
Set root password? [Y/n] y #輸入y
New password: #輸入新密碼
Re-enter new password: #重輸入新密碼
Password updated successfully!
Reloading privilege tables..
... Success!
By default, a MySQL installation has an anonymous user, allowing anyone
to log into MySQL without having to have a user account created for
them. This is intended only for testing, and to make the installation
go a bit smoother. You should remove them before moving into a
production environment.
Remove anonymous users? [Y/n] y #輸入y
... Success!
Normally, root should only be allowed to connect from 'localhost'. This
ensures that someone cannot guess at the root password from the network.
Disallow root login remotely? [Y/n] y #輸入y
... Success!
By default, MySQL comes with a database named 'test' that anyone can
access. This is also intended only for testing, and should be removed
before moving into a production environment.
Remove test database and access to it? [Y/n] y #輸入y
- Dropping test database...
... Success!
- Removing privileges on test database...
... Success!
Reloading the privilege tables will ensure that all changes made so far
will take effect immediately.
Reload privilege tables now? [Y/n] y #輸入y
... Success!
Cleaning up...
All done! If you've completed all of the above steps, your MySQL
installation should now be secure.
Thanks for using MySQL! #最後出現:Thanks for using MySQL!
MySql密碼設置完成,重新啟動 MySQL:
[root@server ~]# service mysqld restart
停止 mysqld:                                              [確定]
正在啟動 mysqld:                                          [確定]
[root@server ~]# service mysqld stop
停止 mysqld:                                              [確定]
[root@server ~]# service mysqld start
正在啟動 mysqld:                                          [確定]
[root@server ~]#
6、安裝PHP5
檢查是否安裝php,使用YUM 自動安裝:
[root@server ~]# rpm –qa |grep php
[root@server ~]# yum -y install php #根據提示輸入Y直到安裝完成
安裝PHP組件,使 PHP5 支持 MySQL
[root@server ~]# yum install php-mysql php-gd libjpeg* php-imap php-ldap php-odbc php-pear php-xml php-xmlrpc php-mbstring php-mcrypt php-bcmath php-mhash libmcrypt
#這裡選擇以上安裝包進行安裝,根據提示輸入Y回車
重啟MySql
[root@server ~]# service mysqld restart
停止 mysqld:                                              [確定]
正在啟動 mysqld:                                          [確定]
重啟Apche
[root@server ~]# service httpd restart
停止 httpd:                                               [確定]
正在啟動 httpd:httpd: apr_sockaddr_info_get() failed for server
httpd: Could not reliably determine the server's fully qualified domain name, using 127.0.0.1 for ServerName
                                                           [確定]
配置編輯文件:
7、Apache配置
個人習慣,修改配置文件首先要備份。
[root@server ~]# cp /etc/httpd/conf/httpd.conf /etc/httpd/conf/httpd.confbak #備份
[root@server ~]# vim /etc/httpd/conf/httpd.conf #編輯文件
小提示:
:set nu #顯示行號
:set nonu #取消行號
pgUp #上一頁
pgDn #下一頁
44 ServerTokens OS #在44行 修改為:ServerTokens Prod (在出現錯誤頁的時候不顯示服務器操作系統的名稱)
536 ServerSignature On #在536行 修改為:ServerSignature Off (在錯誤頁中不顯示Apache的版本)
331 Options Indexes FollowSymLinks #在331行 修改為:Options Includes ExecCGI FollowSymLinks(允許服務器執行CGI及SSI,禁止列出目錄)
796 #AddHandler cgi-script .cgi #在796行 取消“#” 修改為:AddHandler cgi-script .cgi .pl (允許擴展名為.pl的CGI腳本運行)
338 AllowOverride None #在338行 修改為:AllowOverride All (允許.htaccess)
759 AddDefaultCharset UTF-8 #在759行 修改為:AddDefaultCharset GB2312 (添加GB2312為默認編碼)
554 Options Indexes MultiViews FollowSymLinks #在554行 修改為 Options MultiViews FollowSymLinks(不在浏覽器上顯示樹狀目錄結構)
402 DirectoryIndex index.html index.html.var #在402行 修改為:DirectoryIndex index.html index.htm Default.html Default.htm index.php Default.php index.html.var (設置默認首頁文件,增加index.php)
76 KeepAlive Off #在76行 修改為:KeepAlive On (允許程序性聯機)
83 MaxKeepAliveRequests 100 #在83行 修改為:MaxKeepAliveRequests 1000 (增加同時連接數)
:wq #保存退出
重啟
[root@server ~]# service httpd restart
停止 httpd:[確定]
正在啟動 httpd:httpd: apr_sockaddr_info_get() failed for server
httpd: Could not reliably determine the server's fully qualified domain name, using 127.0.0.1 for ServerName
[確定]
[root@server ~]# cp /etc/httpd/conf.d/welcome.conf /etc/httpd/conf.d/welcome.confbak #備份
[root@server ~]# cp /var/www/error/noindex.html /var/www/error/noindex.htmlbak #備份
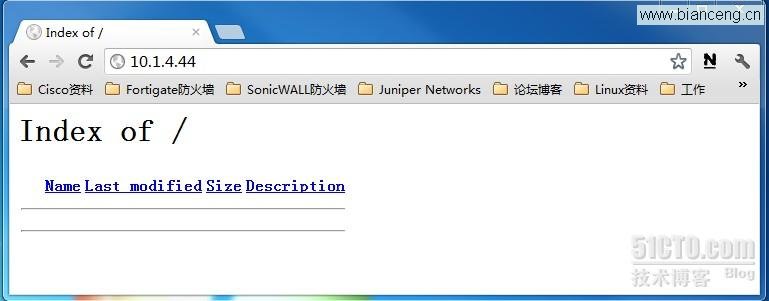
[root@server ~]# rm -f /etc/httpd/conf.d/welcome.conf /var/www/error/noindex.html #刪除默認2個測試頁
重啟
[root@server ~]# service httpd restart
停止 httpd: [確定]
正在啟動 httpd:httpd: apr_sockaddr_info_get() failed for server
httpd: Could not reliably determine the server's fully qualified domain name, using 127.0.0.1 for ServerName
[確定]
浏覽器訪問:http://10.1.4.44
8、php配置
個人習慣,修改配置文件首先要備份。
[root@server ~]# cp /etc/php.ini /etc/php.inibak #備份
[root@server ~]# vim /etc/php.ini #編輯
小提示:
:set nu #顯示行號
:set nonu #取消行號
pgUp #上一頁
pgDn #下一頁
946 ;date.timezone = PRC #在946行 把前面的分號去掉,改為date.timezone = PRC
386 disable_functions = #在386行 添加disable_functions = passthru,exec,system,chroot,scandir,chgrp,chown,shell_exec,proc_open,proc_get_status,ini_alter,ini_alter,ini_restore,dl,openlog,syslog,readlink,symlink,popepassthru,stream_socket_server,escapeshellcmd,dll,popen,disk_free_space,checkdnsrr,checkdnsrr,getservbyname,getservbyport,disk_total_space,posix_ctermid,posix_get_last_error,posix_getcwd, posix_getegid,posix_geteuid,posix_getgid, posix_getgrgid,posix_getgrnam,posix_getgroups,posix_getlogin,posix_getpgid,posix_getpgrp,posix_getpid, posix_getppid,posix_getpwnam,posix_getpwuid, posix_getrlimit, posix_getsid,posix_getuid,posix_isatty, posix_kill,posix_mkfifo,posix_setegid,posix_seteuid,posix_setgid, posix_setpgid,posix_setsid,posix_setuid,posix_strerror,posix_times,posix_ttyname,posix_uname列出PHP可以禁用的函數,如果某些程序需要用到這個函數,可以刪除,取消禁用。
432 expose_php = On #在432行 修改為:expose_php = Off禁止顯示php版本的信息
745 magic_quotes_gpc = Off #在745行 修改為:magic_quotes_gpc = On打開magic_quotes_gpc來防止SQL注入
229 short_open_tag = Off #在229行 修改為short_open_tag = On,支持php短標簽
380 ;open_basedir = #在380行 把前面的分號去掉,改為open_basedir = .:/tmp/ 設置表示允許訪問當前目錄(即PHP腳本文件所在之目錄)和/tmp/目錄,可以防止php木馬跨站,如果改了之後安裝程序有問題,可以注銷此行,或者直接寫上程序的目錄/data/www.osyunwei.com/:/tmp/
:wq #保存退出
重啟MySql
[root@server ~]# service mysqld restart
停止 mysqld:                                              [確定]
正在啟動 mysqld:                                          [確定]
重啟Apche
[root@server ~]# service httpd restart
停止 httpd:                                               [確定]
正在啟動 httpd:httpd: apr_sockaddr_info_get() failed for server
httpd: Could not reliably determine the server's fully qualified domain name, using 127.0.0.1 for ServerName
                                                           [確定]
在/var/www/html/目錄下,創建一個index.php文件,並且編輯,如下:
[root@server ~]# cd /var/www/html/
[root@server html]# ll
總用量 0
[root@server html]# touch index.php
[root@server html]# vim index.php #編輯輸入下面內容
<?php
phpinfo();
?>
:wq #保存退出
在客戶端浏覽器輸入服務器:http://10.1.4.44地址,可以看到相關的配置信息!

注意:
apache默認的程序目錄是/var/www/html
權限設置:
[root@server ~]# chown apache.apache -R /var/www/html
至此,CentOS 6.3安裝配置LAMP服務器(Linux+Apache+PHP5+MySQL)完成!
本文出自 “運維工作奮斗” 博客,請務必保留此出處http://yanghuawu.blog.51cto.com/2638960/1062949