說明:雖然這篇文章存在若干謬誤,但是仍不失一篇好文,如果有時間的話,我會寫一篇關於SMF的東西。
先說一下安裝
准備
Solaris 10我下載的是DVD正式版,包含6個>=420M的zip分包。
安裝媒體的DVD iso需要先把6個zip包解包,然後合並成一個單獨的ISO文件,然後刻錄為DVD
或使用虛擬光驅安裝。
C:> unzip *.zip
C:> copy /B sxxxxx-a+sxxxxx-b+......e solaris10.iso
在windows下可以用copy /B a+b+c...e solaris.iso的命令把各部分合並;如果在
Unix下則是cat *[a-e] >>solaris.iso 。
注意這個過程必須在支持>2G文件的文件系統分區上執行,例如大多數的現代Unix,以及使用
NTFS的Windows 2000等。
安裝
我是在Vmware GSX 3.1下測試安裝的,和以前一樣,選定Guest OS: Solaris 10(exp),
設定網絡為Bridge模式,12G IDE VirtualDisk。
安裝引導過程和以前基本類似,在進入安裝程序加載時多了幾個選擇,除了Interactive之外
還有Text模式的Interactive安裝,這避免了以前很可能遇到的一個變態問題--就是假如你的
顯卡不在Solaris支持之列的話,將無法或很難完成安裝過程,或者只能忍受640x480分辨率的
折磨。
選擇Interactive繼續,之後系統會自動開始硬件檢測;在Solaris 10種不但能夠檢測單獨的
硬件信息,還根據廠商的OEM體系,內置了一系列的硬件profile,這就意味著,假如你的服務
器是某大廠的暢銷產品的話,那麼一整套硬件都會得到系統完整的支持,這其中也包含Vmware
虛擬的硬件體系。
檢測完成後,按照現在默認的Interactive模式將會進入圖形界面,之後的安裝過程都會在一個
X-Window終端窗口中完成,當然,步驟和以前還是一樣的。依次是:
網絡設定
主機信息設定
軟件發布選擇
分區
開始安裝。
安裝進行時
現在,Solaris 10內置了一大堆亂七八糟的東西,Sun的,Gnu的,Linux的支持環境的,以及
各種老的新的兼容的雜燴軟件,所以完全安裝已經膨脹到了3.8G左右,加上components組件將
更大;最小化安裝也有800M之多;大家自己看著辦吧。
一點Tips: Solaris 10是越來越大,包含的東西也越來越多,很多命令都放在了不同的目錄中,
為了方便使用,安裝完成後可以先進行一下系統命令查找路徑的初始化設定,修改/etc/profile
文件,在最後添加上如下兩行,例如我的:
PATH=/sbin:/usr/sbin:/usr/bin:/opt/SUNWspro/bin:/usr/ccs/bin:/usr/X11/bin:\\
/usr/X11R6/bin:/usr/dt/bin:/usr/openwin/bin:/usr/sfw/bin:/usr/net/bin:\\
/usr/proc/bin:/usr/local/sbin:/usr/local/bin
export PATH
也算是包含了大多數常用命令的路徑吧。
初始化設定
接下來就讓我進入了好半天摸不著頭腦的部分了。
Solaris 10中系統管理部分引入了最變態的新特性之一 -- SVC管理模式。Solaris 10幾乎
完全摒棄了原來傳統的SVR4 Runlevel進程服務模式,而使用了新的SVC模式進行管理,有點
類似AIX的Sub-System和Sub-Service。在SMF中,把各項系統服務進程分成一系列組,然後
通過一套全新的svc系列命令進行管理,用起來非常得不爽,老管理員們估計會很痛苦一段時間。
在現在的Solaris 10環境下,剛完成安裝你將什麼都看不到 -- 沒有Telnet,沒有ssh...
假如在Vmware下安裝,由於一個莫名其妙的bug?你還將沒有X-Window。我剛進入系統時,還
以為安裝過程出了什麼錯,導致系統初始化進入single-user mode,然後看了下/etc/rc*.d
東西少得可憐,連sshd都沒有...再看看/etc/inittab,竟然只有三四行內容...害得我差點
就馬上重裝一遍......
後來決定,還是先把X-Window和ssh弄好再說。
先看看SSH的問題。
先看看ssh的問題。新安裝完成進入系統之後,我還以為是到了單用戶模式下,who -r一看發現
確實是在init 3。再一看系統中,除了rpc(tcp:111)什麼服務都沒有開,沒有X-Window沒有
telnet沒有ssh沒有inetd,這是Solaris 麼?我幾乎要懷疑Sun是不是改變了他的系統初裝策
略,要培養一下廣大SA們的動手能力。沒有sshd,傳文件多不方便,於是我只好手工把sshd翻
出來啟動... 說到這裡我又想罵... btbt的Solaris 10,sshd竟然不在標准目錄下,而是放
在了/usr/lib/ssh/sshd下,害得我還find /usr -name sshd -print了一下才找到。
然後啟動sshd:
========================================================================
# svcadm enable -t svc:/network/ssh
========================================================================
竟然不成功!
我只好更原始一點:
========================================================================
# /lib/svc/method/sshd start
========================================================================
這下倒是啟動起來了,可是不久之後我發現,無論如何系統啟動時ssh是不會自動運行的!其他
的幾乎所有系統服務也一樣;問題根源在哪兒呢?我只好回到eeprom啟動模式下:
========================================================================
boot -m verbose
========================================================================
開啟內核引導過程的冗余模式,這樣會顯示出啟動過程中的更多信息;這時我發現,這些系統
服務並不是沒有啟動,而是啟動過程中失敗了。
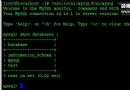
再運行一次服務診斷命令:
========================================================================
# svcs -x -v
========================================================================
導致系統dns client服務啟動失敗,而dns client則是許多服務的依賴前置服務,包括inetd、
sshd、sendmail等幾乎所有的網絡服務,如果它啟動失敗則整個服務樹中後繼的一系列服務都將
無法自動運行!然後inetd則影響則gss-api等一系列服務,而gss-api這個服務又影響了十多個
系統中的所有網絡服務啟動失敗。(Solaris 2系列歷史上遺留下來的毛病,即安裝過程中你可以
指定 DNS服務器 和 默認路由,但他不會自動保存。必須在安裝完成系統之後手工建立和設定
發現原因,問題就好解決,首先建立缺少的文件,然後依次按照dependent樹啟用一系列服務。
========================================================================
# svcadm enable -t svc:/network/dns/client
# svcadm enable -t svc:/network/inetd
# sync && reboot
========================================================================
幾條小tips:
1. Solaris 10啟動過程中不會在控制台上顯示太多信息,可以在eeprom或boot模式下輸入
boot -m verbose來開啟冗余信息模式,對於系統錯誤診斷有很大幫助。
2. 如果你的系統安裝時選擇的是中文環境的話,那麼安裝完成後,在終端(非X-Window)環境
下可能所有的命令提示和輸出信息都是亂碼,那麼可以用如下命令回到英文的環境:
$ LANG=\"\"
$ export LANG
以上為默認的ksh
% setenv LANG zh
以上為csh
$ LANG=\"\"
以上為bash
3. Solaris 10中采用了新的SMF體系來控制系統服務和守護進程,比原來的SVR4 RC要復雜
多了:_< 類似AIX和Windows NT的體系。 很多原來的rc腳本現在都由SMF/SVC來控制。
SMF的基本體系:
管理命令 svcadm(服務狀態管理,啟動、停止等)
svcs(服務信息和診斷)
svccfg(服務參數配置)
配置文件 在/etc/svc目錄下,似乎使用了sqllite數據庫格式,因此只能用svccfg命令
管理
啟動 在/etc/inittab中,啟動smf::sysinit:/lib/svc/bin/svc.startd一行
然後由svc.startd來替代原來init和rc所作的一系列工作
一些啟動腳本 在/lib/svc/method目錄下,替代了部分/etc/rc*.d中的啟動腳本作用
也可以直接手工運行這些腳本來強制啟動某個服務(不根據依賴樹關系)
關於SMF,也許過幾天再寫一篇文章來詳細講一下他的體系吧。
4. 一條有用的命令
# svcs -x -v
可以檢查當前系統中的服務狀況,並自動診斷出服務出錯的原因。
5. 一些可以代替以前/etc/rc*.d/S**的命令:
# svcs
查看當前所有的服務狀態,可以使用|管道符重定向作更個性化的查找;如
# svcs |grep online 查看當前運行服務
# svcs |grep offline 查看當前停止服務
# svcs |grep inetd 查看inetd服務狀態
# svcadmin enable svc:network/finger
#svcadm disable svc:network/ssh
僅用一個服務,本例中是禁用sshd服務,在原來的rc體系中相當於執行了
mv /etc/rc2.d/S55sshd /etc/rc2.d/x.S55sshd
如果要立刻停止或啟動服務,那麼可以使用svcadm的-t參數:
# svcadm disable -t network/ssh
停止sshd服務,相當於 /etc/init.d/sshd stop
# svcadm enable -t network/ssh
啟動sshd服務,相當於 /etc/init.d/sshd start
# svcadm restart network/ssh
重啟(停止並啟動)sshd服務,相當於 /etc/init.d/sshd stop; /etc/init.d/sshd start
# svcadm refresh network/ssh
刷新sshd(重新讀取配置文件),相當於 kill -HUP `cat /var/run/sshd.pid`
6. Solaris 10默認安裝配置下是不允許root用戶遠程通過ssh登錄的,這樣也許不太方便,那麼
可以修改 /etc/ssh/sshd_config 文件中 PermitRootLogin no 一行為yes,然後重新
啟動sshd服務。
7. 最後,現在大家安裝完成Solaris 10之後,可千萬不要在忘記手工建立:
了,現在的後果可不像以前僅僅不能解析DNS那麼簡單:_< 該死的SMF。
解決了網絡服務和sshd的問題,再來看看X-Window和Dtlogin吧。
開始安裝過程中,系統是能夠很好的識別Vmware的虛擬硬件,並且支持到1024x760x24bpp的
分辨率的,但是安裝完成之後,使用kdmconfig配置Xsun,無論如何都無法正常地運行X-window
dtlogin的窗口總是一閃而過,而手工運行X卻正常,直到現在仍然讓我困惑的問題。所幸的是,
查找資料發現Solaris 10中所帶的Xorg版本應該是可以支持Vmware的,經過一番測試,
配置過程如下:
0、執行/usr/X11/bin/xorgconfig開始字符界面的Xorg Server配置;
========================================================================
# /usr/X11/bin/xorgconfig
========================================================================
1、如下屏幕,回車確定;
========================================================================
you make. This program will ask for a pathname when it is ready to write
the file.
is present there, Xorg will probe the system to autoconfigure itself.
the results of autoconfiguration, or let this program produce a base
Before continuing with this program, make sure you know what video card
you have, and preferably also the chipset it uses and the amount of video
memory on your video card, as well as the specifications of your monitor.
Press enter to continue, or ctrl-c to abort.
========================================================================
2、選擇鼠標,1或5都可以;
========================================================================
First specify a mouse protocol type. Choose one from the following list:
1. Auto
2. VUID
3. SysMouse
4. MouseSystems
5. PS/2
6. Microsoft
7. Busmouse
8. IMPS/2
9. ExplorerPS/2
10. GlidePointPS/2
11. MouseManPlusPS/2
12. NetMousePS/2
13. NetScrollPS/2
14. ThinkingMousePS/2
The recommended protocol is Auto. If you have a very old mouse
or don\'t want OS support or auto detection, and you have a two-button
or three-button serial mouse, it is most likely of type Microsoft.
Enter a protocol number:
========================================================================
2.1、是否模擬三鍵鼠標,是;
========================================================================
If your mouse has only two buttons, it is recommended that you enable
Emulate3Buttons.
Please answer the following question with either \'y\' or \'n\'.
========================================================================
2.2、選擇鼠標設備,回車使用默認的/dev/mouse(或/dev/kdmouse);
========================================================================
Now give the full device name that the mouse is connected to, for example
/dev/tty00. Just pressing enter will use the default, /dev/mouse.
Mouse device:
========================================================================
3、選擇鍵盤設備,5678均可,建議選7;
========================================================================
description of your keyboard. If nothing really matches,
choose 1 (Generic 101-key PC)
1 Sun Type 6 USB
2 Sun Type 6 USB (European layout)
3 Sun Type 6 USB (Japanese layout)
4 Sun Type 6 USB (Unix layout)
5 Generic 101-key PC
6 Generic 102-key (Intl) PC
7 Generic 104-key PC
8 Generic 105-key (Intl) PC
9 Sun Type 4
10 Sun Type 4 (Canadian layout)
11 Sun Type 4 (Japanese layout)
12 Sun Type 4 (European layout)
13 Sun Type 5
14 Sun Type 5 (European layout)
15 Sun Type 5 (Japanese layout)
16 Sun Type 5 (Unix layout)
Enter a number to choose the keyboard.
Press enter for the next page
========================================================================
3.1、選擇鍵盤布局,選1;
========================================================================
1 U.S. English
2 U.S. English w/ ISO9995-3
3 U.S. English w/ deadkeys
4 Albanian
5 Arabic
6 Armenian
7 Azerbaijani
8 Belarusian
9 Belgian
10 Bengali
11 Bosnian
12 Brazilian
13 Bulgarian
14 Burmese
15 Canadian
16 French Canadian
17 Croatian
18 Croatian (US)
Enter a number to choose the country.
Press enter for the next page
========================================================================
3.2、回車確認;
========================================================================
Please enter a variant name for \'us\' layout. Or just press enter
for default variant
========================================================================
3.3、是否使用XKB管理鍵盤輸入,建議選是;
========================================================================
Please answer the following question with either \'y\' or \'n\'.
Do you want to select additional XKB options (group switcher,
group indicator, etc.)?
Enter your choice:
========================================================================
4、顯示器(Monitor)設置,回車繼續;
========================================================================
Now we want to set the specifications of the monitor. The two critical
parameters are the vertical refresh rate, which is the rate at which the
the whole screen is refreshed, and most importantly the horizontal sync rate,
which is the rate at which scanlines are displayed.
The valid range for horizontal sync and vertical sync should be documented
in the manual of your monitor. If in doubt, check the monitor database
/usr/X11/share/doc/Monitors to see if your monitor is there.
Press enter to continue, or ctrl-c to abort.
========================================================================
4.1、選擇顯示器類型,(800x600建議選2,1024x768建議選6-7);
========================================================================
You must indicate the horizontal sync range of your monitor. You can either
select one of the predefined ranges below that correspond to industry-
standard monitor types, or give a specific range.
It is VERY IMPORTANT that you do not specify a monitor type with a horizontal
sync range that is beyond the capabilities of your monitor. If in doubt,
choose a conservative setting.
hsync in kHz; monitor type with characteristic modes
1 31.5; Standard VGA, 640x480 @ 60 Hz
2 31.5 - 35.1; Super VGA, 800x600 @ 56 Hz
3 31.5, 35.5; 8514 Compatible, 1024x768 @ 87 Hz interlaced (no 800x600)
4 31.5, 35.15, 35.5; Super VGA, 1024x768 @ 87 Hz interlaced, 800x600 @ 56 Hz
5 31.5 - 37.9; Extended Super VGA, 800x600 @ 60 Hz, 640x480 @ 72 Hz
6 31.5 - 48.5; Non-Interlaced SVGA, 1024x768 @ 60 Hz, 800x600 @ 72 Hz
7 31.5 - 57.0; High Frequency SVGA, 1024x768 @ 70 Hz
8 31.5 - 64.3; Monitor that can do 1280x1024 @ 60 Hz
9 31.5 - 79.0; Monitor that can do 1280x1024 @ 74 Hz
10 31.5 - 82.0; Monitor that can do 1280x1024 @ 76 Hz
11 Enter your own horizontal sync range
Enter your choice:
========================================================================
4.2、選擇顯示器刷新頻率,建議選2;
========================================================================
You must indicate the vertical sync range of your monitor. You can either
select one of the predefined ranges below that correspond to industry-
standard monitor types, or give a specific range. For interlaced modes,
the number that counts is the high one (e.g. 87 Hz rather than 43 Hz).
1 50-70
2 50-90
3 50-100
4 40-150
5 Enter your own vertical sync range
Enter your choice:
========================================================================
5、選擇顯卡類型,輸入一個描述符,可以直接回車繼續;
========================================================================
You must now enter a few identification/description strings, namely an
identifier, a vendor name, and a model name. Just pressing enter will fill
in default names.
The strings are free-form, spaces are allowed.
Enter an identifier for your monitor definition:
========================================================================
5.1、是否查看顯卡模塊數據庫選擇一個合適的模塊,是(輸入yes);
========================================================================
Now we must configure video card specific settings. At this point you can
choose to make a selection out of a database of video card definitions.
Because there can be variation in Ramdacs and clock generators even
between cards of the same model, it is not sensible to blindly copy
the settings (e.g. a Device section). For this reason, after you make a
selection, you will still be asked about the components of the card, with
the settings from the chosen database entry presented as a strong hint.
The database entries include information about the chipset, what driver to
run, the Ramdac and ClockChip, and comments that will be included in the
Device section. However, a lot of definitions only hint about what driver
to run (based on the chipset the card uses) and are untested.
If you can\'t find your card in the database, there\'s nothing to worry about.
You should only choose a database entry that is exactly the same model as
your card; choosing one that looks similar is just a bad idea (e.g. a
GemStone Snail 64 may be as different from a GemStone Snail 64+ in terms of
hardware as can be).
Do you want to look at the card database?
========================================================================
5.2、回車到第二頁,找到Vmware一項,或直接輸入對應序號 \"29\" ;
========================================================================
18 ** NVIDIA (generic) [nv] -
19 ** NeoMagic (generic) [neomagic] -
20 ** Number Nine I128 (generic) [i128] -
21 ** Rendition (generic) [rendition] -
22 ** S3 (not ViRGE or Savage) (generic) [s3] -
23 ** S3 Savage (generic) [savage] -
24 ** S3 ViRGE (generic) [s3virge] -
25 ** SiS (generic) [sis] -
26 ** Silicon Motion (generic) [siliconmotion]-
27 ** Trident (generic) [trident] -
28 ** Tseng Labs (generic) [tseng] -
29 ** VMWare guest OS (generic) [vmware] -
30 2 the Max MAXColor S3 Trio64V+ -
31 2-the-Max MAXColor 6000 ET6000
32 3DLabs Oxygen GMX PERMEDIA 2
33 928Movie S3 928
34 AGX (generic) AGX-014/15/16
35 ALG-5434(E) CL-GD5434
========================================================================
5.3、確認選擇的Xorg顯示驅動模塊\"Vmware\",直接回車繼續;
========================================================================
Enter a number to choose the corresponding card definition.
Press enter for the next page, q to continue configuration.
Your selected card definition:
Identifier: ** VMWare guest OS (generic) [vmware]
Chipset: -
Driver: vmware
Press enter to continue, or ctrl-c to abort.
========================================================================
5.4、再次要求輸入顯卡描述符(將記錄在配置文件中),輸入\"vmware\";
========================================================================
You must now enter a few identification/description strings, namely an
identifier, a vendor name, and a model name. Just pressing enter will fill
in default names (possibly from a card definition).
Your card definition is ** VMWare guest OS (generic) [vmware].
The strings are free-form, spaces are allowed.
Enter an identifier for your video card definition:
========================================================================
5.5、選擇顯存大小,任意(測試1\\5\\6均可);
========================================================================
Now you must give information about your video card. This will be used for
It is probably a good idea to use the same approximate amount as that detected
by the server you intend to use. If you encounter problems that are due to the
used server not supporting the amount memory you have, specify the maximum
amount supported by the server.
How much video memory do you have on your video card:
1 256K
2 512K
3 1024K
4 2048K
5 4096K
6 8192K
7 16384K
8 32768K
9 65536K
10 131072K
11 262144K
12 Other
Enter your choice:
========================================================================
6、配置顯示分辨率模式段,Xorg允許指定一個色彩模式下的多種分辨率,並在運行時自動匹配;
默認設置如下面顯示的,如果不想使用那麼大的分辨率必須手工設定分辨率模式;例如希望使用
800x600x24bpp,則需選擇\"3\",配置24-Bit模式下的期望分辨率;
========================================================================
For each depth, a list of modes (resolutions) is defined. The default
resolution that the server will start-up with will be the first listed
mode that can be supported by the monitor and card.
Currently it is set to:
\"1280x1024\" \"1024x768\" \"800x600\" \"640x480\" for 8-bit
\"1280x1024\" \"1024x768\" \"800x600\" \"640x480\" for 16-bit
\"1280x1024\" \"1024x768\" \"800x600\" \"640x480\" for 24-bit
Modes that cannot be supported due to monitor or clock constraints will
be automatically skipped by the server.
1 Change the modes for 8-bit (256 colors)
2 Change the modes for 16-bit (32K/64K colors)
3 Change the modes for 24-bit (24-bit color)
4 The modes are OK, continue.
Enter your choice: 3
========================================================================
6.1、選擇對應色彩模式下的分辨率,可以使用多個數字一次選擇,則自動匹配分辨率時會根據
硬件情況由最前面的往後依次測試選擇最合適的分辨率;如例中選擇\"432\",則默認分辨率為
1024x768,不成功則自動匹配800x600... 推薦選擇固定值\"3\"或\"4\";
========================================================================
Select modes from the following list:
1 \"640x400\"
2 \"640x480\"
3 \"800x600\"
4 \"1024x768\"
5 \"1280x1024\"
6 \"320x200\"
7 \"320x240\"
8 \"400x300\"
9 \"1152x864\"
a \"1600x1200\"
b \"1800x1400\"
c \"512x384\"
d \"1400x1050\"
Please type the digits corresponding to the modes that you want to select.
For example, 432 selects \"1024x768\" \"800x600\" \"640x480\", with a
default mode of 1024x768.
Which modes? 3
========================================================================
6.2、X允許使用大於真實分辨率的虛擬桌面,使用鼠標在邊緣平移來滾動桌面,建議選否 \"n\";
========================================================================
You can have a virtual screen (desktop), which is screen area that is larger
than the physical screen and which is panned by moving the mouse to the edge
of the screen. If you don\'t want virtual desktop at a certain resolution,
you cannot have modes listed that are larger. Each color depth can have a
differently-sized virtual screen
Please answer the following question with either \'y\' or \'n\'.
Do you want a virtual screen that is larger than the physical screen? n
========================================================================
6.3、依次選取各顯示模式的分辨率後,選擇\"4\"確認;
========================================================================
Modes that cannot be supported due to monitor or clock constraints will
be automatically skipped by the server.
1 Change the modes for 8-bit (256 colors)
2 Change the modes for 16-bit (32K/64K colors)
3 Change the modes for 24-bit (24-bit color)
4 The modes are OK, continue.
Enter your choice: 4
========================================================================
6.4、選擇默認的色彩深度,根據我們期望的顯示模式,選擇 \"5\",24Bit顯示;
========================================================================
Please specify which color depth you want to use by default:
1 1 bit (monochrome)
2 4 bits (16 colors)
3 8 bits (256 colors)
4 16 bits (65536 colors)
5 24 bits (16 million colors)
Enter a number to choose the default depth.
========================================================================
7、\"y\"保存。(如果不想直接保存到系統配置文件,可以選擇\"n\"然後在下一步中保存到其它路徑。)
========================================================================
overwrite a previously configured one.
========================================================================
8、重新啟動系統,或直接啟動圖形界面。
========================================================================
# sync && reboot
or
# /etc/rc2.d/S99dtlogin stop && /etc/rc2.d/S99dtlogin start
========================================================================
一點Tips:
雖然Solaris 10的dtlogin換了新look--有點像gdm,但是Linux的手用萬足們一樣可以用gdm
來徹底替換掉他,比較dirty的方法,只要修改/etc/rc2.d/S99dtlogin中的如下行:
if [ -x /usr/dt/bin/dtlogin ] ; then
/usr/dt/bin/dtlogin -daemon &
fi
;;
把/usr/dt/bin/dtlogin -daemon & 改為/usr/bin/gdm & 就可以自動運行gdm了。
當然,要完全一點最好還是手工寫一個rc腳本,來替換dtlogin這個。
另外,dtlogin默認是可以遠程xdmcp登錄的,而gdm出於安全原因考慮默認則不允許遠程登錄,
#Port=177
一行,取消掉#注釋,然後重新啟動gdm即可。