首先,你得確保你的電腦是支持並且打開了CPU動態調頻功能的,方法如下:
(我用的是的DELL機)
(1)開機後進入BIOS,找到performance選項,在speedset子選項中你會看到你的CPU動態調頻是否開啟了,如果未開啟,要開啟。
(2)查看你的內核是否安裝了支持動態調頻的模塊:
$cd sys/devices/system/cpu/cpufreq
如果這個文件夾是空的,則說明你並沒有安裝相應的模塊,否則,該文件夾下應該有ondemand文件夾。
如果沒有安裝,則需要你手動安裝了:
$sudo apt-get install cpufrequtils
(3)重啟你的電腦,查看/sys/devices/system/cpu/cpufreq文件夾是否有了ondemand文件夾。
如果你還是不確定,則可以運行如下的一個systemtap腳本:
- global times
- #probe kernel.function("do_dbs_timer@drivers/cpufreq/cpufreq_conservative.c") {
- probe kernel.function("do_dbs_timer") {
- times++
- }
-
- probe timer.ms(1000) {
- if(times) {
- printf("%s %d\n", execname(), times)
- }
- }
這個腳本用來統計進入do_dbs_timer函數多少次,這個函數是負責CPU調頻的,執行這個腳本
$sudo stap -v cpuload.stp
會有如下的運行 結果:
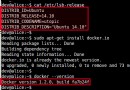
- sun@sun-pc:dbs_timer$ clear
-
- sun@sun-pc:dbs_timer$ sudo stap -v cpuload.stp
- Pass 1: parsed user script and 76 library script(s) using 24216virt/13692res/2276shr kb, in 130usr/20sys/146real ms.
- Pass 2: analyzed script: 3 probe(s), 1 function(s), 3 embed(s), 1 global(s) using 221608virt/33032res/3264shr kb, in 610usr/170sys/783real ms.
- Pass 3: using cached /home/sun/.systemtap/cache/70/stap_70945be0878032891000488a733f9b86_2071.c
- Pass 4: using cached /home/sun/.systemtap/cache/70/stap_70945be0878032891000488a733f9b86_2071.ko
- Pass 5: starting run.
- swapper/1 136
- swapper/1 272
- swapper/1 409
- swapper/1 544
- swapper/1 681
- swapper/1 816
- swapper/1 950
- swapper/1 1095
- swapper/1 1236
- Xorg 1397
- swapper/1 1543
- swapper/1 1679
- swapper/1 1815
- swapper/1 1951
- swapper/1 2087