PrestaShop is the most powerful, dynamic and fully-featured free eCommerce software enriched with innovative tools. It is used by more than 2,50,000 people around the world for making their online stores at no cost. It's been used widely across the globe due
to its simplicity and efficiency.
If you're planing to start with an online webstore, then you're on the right place. In this article, I'm providing the guidelines on how I installed PrestaShop on my CentOS 7 server to build up my online store.
Pre-requisites
Disable Selinux
Install the LAMP stack
Create a Database/User
Confirm the installation of the PHP modules GD, Mcrypt, Mbstring and PDO MySQL
1. Disable Selinux
Need to edit the selinux configuration file located at :
/etc/selinux/configModify the
SELINUX parameter to
disabled and reboot the server.
2. Install the LAMP stack
I've set a proper hostname for my server and start with the LAMP installation. Firstly, install Apache.
[root@server1 ~]# yum install httpd -y
This will install all the required Apache packages. Make sure it is enabled and working in the server.
root@server1 ~]# systemctl enable httpd
ln -s '/usr/lib/systemd/system/httpd.service' '/etc/systemd/system/multi-user.target.wants/httpd.service'
[root@server1~]# systemctl status httpd.service
httpd.service - The Apache HTTP Server
Loaded: loaded (/usr/lib/systemd/system/httpd.service; enabled)
Active: active (running) since Tue 2016-02-23 09:18:28 UTC; 2s ago
Docs: man:httpd(8)
man:apachectl(8)
Process: 15550 ExecStop=/bin/kill -WINCH ${MAINPID} (code=exited, status=0/SUCCESS)
Main PID: 15561 (httpd)
Status: "Processing requests..."
CGroup: /system.slice/httpd.service
├─15561 /usr/sbin/httpd -DFOREGROUND
├─15562 /usr/sbin/httpd -DFOREGROUND
├─15563 /usr/sbin/httpd -DFOREGROUND
├─15564 /usr/sbin/httpd -DFOREGROUND
├─15565 /usr/sbin/httpd -DFOREGROUND
└─15566 /usr/sbin/httpd -DFOREGROUND
Now create the VHOST for the domain which we're planning to install Prestashop. I'm installing
Prestashop for my domain
saheetha.com.
Here is my Vhost for the domain. Make sure you create the document root and log folders, here it is /var/www/saheetha.com/public_html/ and /var/www/saheetha.com/logs/ before restarting the Apache.
[root@server1 ~]# cat /etc/httpd/conf.d/vhost.conf
NameVirtualHost *:80
<VirtualHost 139.162.54.130:80>
ServerAdmin webmaster@saheetha.com
ServerName saheetha.com
ServerAlias www.saheetha.com
DocumentRoot /var/www/saheetha.com/public_html/
ErrorLog /var/www/saheetha.com/logs/error.log
CustomLog /var/www/saheetha.com/logs/access.log combined
</VirtualHost>
Now install MySQL, I'm installing MySQL 5.5. Download your MySQL Community Repository in your Linux distribution. I downloaded the latest MySQL repo. And installed MySQL 5.5 in my server. Please see the steps I did to choose my required version.
[root@server1 ~]#
wget' target='_blank'>http://dev.mysql.com/get/mysql57-community-release-el7-7.noarch.rpm [root@server1 ~]#
yum localinstall mysql57-community-release-el7-7.noarch.rpmroot@server1 ~]#
yum install -y yum-utils *//Install the yum-utility packages //*
[root@server1 ~]#
yum repolist enabled | grep "mysql.*-community.*" *//Checked the enabled repo before installation //*
mysql-connectors-community/x86_64 MySQL Connectors Community 17
mysql-tools-community/x86_64 MySQL Tools Community 31
mysql57-community/x86_64 MySQL 5.7 Community Server 56
[root@server1 ~]#
yum-config-manager --disable mysql57-community *//Disabling MySQL 5.7 repo from installing*//
Loaded plugins: fastestmirror
=========================================================== repo: mysql57-community ===========================================================
[mysql57-community]
async = True
bandwidth = 0
base_persistdir = /var/lib/yum/repos/x86_64/7
baseurl =http://repo.mysql.com/yum/mysql-5.7-community/el/7/x86_64/
cache = 0
cachedir = /var/cache/yum/x86_64/7/mysql57-community
check_config_file_age = True
cost = 1000
deltarpm_metadata_percentage = 100
deltarpm_percentage =
enabled = 0
enablegroups = True
exclude =
failovermethod = priority
gpgcadir = /var/lib/yum/repos/x86_64/7/mysql57-community/gpgcadir
gpgcakey =
gpgcheck = True
gpgdir = /var/lib/yum/repos/x86_64/7/mysql57-community/gpgdir
gpgkey = file:///etc/pki/rpm-gpg/RPM-GPG-KEY-mysql
hdrdir = /var/cache/yum/x86_64/7/mysql57-community/headers
http_caching = all
includepkgs =
ip_resolve =
keepalive = True
keepcache = False
mddownloadpolicy = sqlite
mdpolicy = group:small
mediaid =
metadata_expire = 21600
metadata_expire_filter = read-only:present
metalink =
minrate = 0
mirrorlist =
mirrorlist_expire = 86400
name = MySQL 5.7 Community Server
old_base_cache_dir =
password =
persistdir = /var/lib/yum/repos/x86_64/7/mysql57-community
pkgdir = /var/cache/yum/x86_64/7/mysql57-community/packages
proxy = False
proxy_dict =
proxy_password =
proxy_username =
repo_gpgcheck = False
retries = 10
skip_if_unavailable = False
ssl_check_cert_permissions = True
sslcacert =
sslclientcert =
sslclientkey =
sslverify = True
throttle = 0
timeout = 30.0
ui_id = mysql57-community/x86_64
ui_repoid_vars = releasever,
basearch
username =
[root@server1 ~]#
yum-config-manager --enable mysql55-community *//Enabling the MySQL 5.5 Repo from the Yum repository //*
Loaded plugins: fastestmirror
=========================================================== repo: mysql55-community ===========================================================
[mysql55-community]
async = True
bandwidth = 0
base_persistdir = /var/lib/yum/repos/x86_64/7
baseurl =http://repo.mysql.com/yum/mysql-5.5-community/el/7/x86_64/
cache = 0
cachedir = /var/cache/yum/x86_64/7/mysql55-community
check_config_file_age = True
cost = 1000
deltarpm_metadata_percentage = 100
deltarpm_percentage =
enabled = 1
enablegroups = True
exclude =
failovermethod = priority
gpgcadir = /var/lib/yum/repos/x86_64/7/mysql55-community/gpgcadir
gpgcakey =
gpgcheck = True
gpgdir = /var/lib/yum/repos/x86_64/7/mysql55-community/gpgdir
gpgkey = file:///etc/pki/rpm-gpg/RPM-GPG-KEY-mysql
hdrdir = /var/cache/yum/x86_64/7/mysql55-community/headers
http_caching = all
includepkgs =
ip_resolve =
keepalive = True
keepcache = False
mddownloadpolicy = sqlite
mdpolicy = group:small
mediaid =
metadata_expire = 21600
metadata_expire_filter = read-only:present
metalink =
minrate = 0
mirrorlist =
mirrorlist_expire = 86400
name = MySQL 5.5 Community Server
old_base_cache_dir =
password =
persistdir = /var/lib/yum/repos/x86_64/7/mysql55-community
pkgdir = /var/cache/yum/x86_64/7/mysql55-community/packages
proxy = False
proxy_dict =
proxy_password =
proxy_username =
repo_gpgcheck = False
retries = 10
skip_if_unavailable = False
ssl_check_cert_permissions = True
sslcacert =
sslclientcert =
sslclientkey =
sslverify = True
throttle = 0
timeout = 30.0
ui_id = mysql55-community/x86_64
ui_repoid_vars = releasever,
basearch
username =
[root@localhost ~]#
yum repolist enabled | grep "mysql.*-community.*" *//Confirm the enabled MySQL repo versions //*
mysql-connectors-community/x86_64 MySQL Connectors Community 17
mysql-tools-community/x86_64 MySQL Tools Community 31
mysql55-community/x86_64 MySQL 5.5 Community Server 199
Now install the MySQL 5.5 from the Repo.
[root@server1~]#
yum install mysql-community-serverAfter completing with the installation, start the MySQL service and confirm its status.
[root@server1 ~]# service mysqld start
Redirecting to /bin/systemctl start mysqld.service
[root@server1 ~]#
[root@server1 ~]#
[root@server1 ~]# systemctl status mysqld.service
mysqld.service - MySQL Community Server
Loaded: loaded (/usr/lib/systemd/system/mysqld.service; disabled)
Active: active (running) since Tue 2016-02-23 09:27:44 UTC; 8s ago
Process: 15717 ExecStartPost=/usr/bin/mysql-systemd-start post (code=exited, status=0/SUCCESS)
Process: 15664 ExecStartPre=/usr/bin/mysql-systemd-start pre (code=exited, status=0/SUCCESS)
Main PID: 15716 (mysqld_safe)
CGroup: /system.slice/mysqld.service
├─15716 /bin/sh /usr/bin/mysqld_safe
└─15862 /usr/sbin/mysqld --basedir=/usr --datadir=/var/lib/mysql --plugin-dir=/usr/lib64/mysql/plugin --log-error=/var/log/mysqld...
Feb 23 09:27:42 server1.centos7-test.com mysql-systemd-start[15664]: Alternatively you can run:
Feb 23 09:27:42 server1.centos7-test.com mysql-systemd-start[15664]: /usr/bin/mysql_secure_installation
Feb 23 09:27:42 server1.centos7-test.com mysql-systemd-start[15664]: which will also give you the option of removing the test
Feb 23 09:27:42 server1.centos7-test.com mysql-systemd-start[15664]: databases and anonymous user created by default. This is
Feb 23 09:27:42 server1.centos7-test.com mysql-systemd-start[15664]: strongly recommended for production servers.
Feb 23 09:27:42 server1.centos7-test.com mysql-systemd-start[15664]: See the manual for more instructions.
Feb 23 09:27:42 server1.centos7-test.com mysql-systemd-start[15664]: Please report any problems athttp://bugs.mysql.com/
Feb 23 09:27:42 server1.centos7-test.com mysqld_safe[15716]: 160223 09:27:42 mysqld_safe Logging to '/var/log/mysqld.log'.
Feb 23 09:27:42 server1.centos7-test.com mysqld_safe[15716]: 160223 09:27:42 mysqld_safe Starting mysqld daemon with databases from /v.../mysql
Feb 23 09:27:44 server1.centos7-test.com systemd[1]: Started MySQL Community Server.
Hint: Some lines were ellipsized, use -l to show in full.
[root@server1 ~]# mysql --version
mysql Ver 14.14 Distrib 5.5.48, for Linux (x86_64) using readline 5.1
Now you can run the MySQL secure installation script to secure your MySQL installation by removing remote root login, setting root password, disabling anonymous users etc as needed.
root@server1 ~]# mysql_secure_installationNOTE: RUNNING ALL PARTS OF THIS SCRIPT IS RECOMMENDED FOR ALL MySQL
SERVERS IN PRODUCTION USE! PLEASE READ EACH STEP CAREFULLY!
In order to log into MySQL to secure it, we'll need the current
password for the root user. If you've just installed MySQL, and
you haven't set the root password yet, the password will be blank,
so you should just press enter here.
Enter current password for root (enter for none):
OK, successfully used password, moving on...
Setting the root password ensures that nobody can log into the MySQL
root user without the proper authorisation.
Set root password? [Y/n] y
New password:
Re-enter new password:
Password updated successfully!
Reloading privilege tables..
... Success!
By default, a MySQL installation has an anonymous user, allowing anyone
to log into MySQL without having to have a user account created for
them. This is intended only for testing, and to make the installation
go a bit smoother. You should remove them before moving into a
production environment.
Remove anonymous users? [Y/n] y
... Success!
Normally, root should only be allowed to connect from 'localhost'. This
ensures that someone cannot guess at the root password from the network.
Disallow root login remotely? [Y/n] y
... Success!
By default, MySQL comes with a database named 'test' that anyone can
access. This is also intended only for testing, and should be removed
before moving into a production environment.
Remove test database and access to it? [Y/n] n
... skipping.
Reloading the privilege tables will ensure that all changes made so far
will take effect immediately.
Reload privilege tables now? [Y/n] y
... Success!
Cleaning up...
All done! If you've completed all of the above steps, your MySQL
installation should now be secure.
Thanks for using MySQL!
Now it's time for PHP. Install the PHP with all required modules.
[root@server1 ~]# yum install php-mcrypt php php-common php-pdo php-cli php-mysql php-gd php-xml libtool-ltdl mhash mcrypt -y
[root@server1 ~]# php -v
PHP 5.4.16 (cli) (built: Jun 23 2015 21:17:27)
Copyright (c) 1997-2013 The PHP Group
Zend Engine v2.4.0, Copyright (c) 1998-2013 Zend Technologies
3. Create a Database/User
Now create a database for Prestashop installation. I created a database namely prestashopdb and user prestashopuser prior to the installation. You can do it from MySQL CLI or you can install PhpMyadmin and manage databases using that.
[root@server1 ~]# mysql
Welcome to the MySQL monitor. Commands end with ; or \g.
Your MySQL connection id is 9
Server version: 5.5.48 MySQL Community Server (GPL)
Copyright (c) 2000, 2016, Oracle and/or its affiliates. All rights reserved.
Oracle is a registered trademark of Oracle Corporation and/or its
affiliates. Other names may be trademarks of their respective
owners.
Type 'help;' or '\h' for help. Type '\c' to clear the current input statement.
mysql> create database prestashopdb;
Query OK, 1 row affected (0.00 sec)
mysql> GRANT ALL ON prestashopdb.* TO prestashopuser@localhost IDENTIFIED BY 'prestashop123#';
Query OK, 0 rows affected (0.00 sec)
mysql> flush privileges;
Query OK, 0 rows affected (0.00 sec)
mysql> quit
Bye
4. Confirm the installation of the PHP modules GD, Mcrypt, Mbstring and PDO MySQL
PHP modules like GD and PDO MySQL are installed during the initial PHP setup. I need to enable the Mcrypt and MBstring module to complete the pre-requisites for the Prestashop installation.
Mcrypt Installation:
Install EPEL repo for YUM
yum -y install epel-release
yum install php-mcrypt -y
MBstring installation
yum install php-mbstring -y
Installing Prestashop
Download the
latest Prestashop version from the link and extract it in the home folder. Modify the permissions of the folders/files to 755.
root@server1 home]# unzip prestashop_1.6.1.2.zip
root@server1 prestashop]# chmod -R 755 *.*
[root@server1 prestashop]# ll
total 160
drwxr-xr-x 2 root root 4096 Feb 23 09:45 Adapter
drwxr-xr-x 9 root root 4096 Feb 23 09:45 admin
-rwxr-xr-x 1 root root 12320 Oct 29 16:16 architecture.md
drwxr-xr-x 8 root root 4096 Feb 23 09:45 cache
drwxr-xr-x 17 root root 4096 Feb 23 09:45 classes
drwxr-xr-x 3 root root 4096 Feb 23 09:45 config
-rwxr-xr-x 1 root root 3617 Oct 29 16:16 CONTRIBUTING.md
-rwxr-xr-x 1 root root 5847 Oct 29 16:17 CONTRIBUTORS.md
drwxr-xr-x 4 root root 4096 Feb 23 09:45 controllers
drwxr-xr-x 4 root root 4096 Feb 23 09:45 Core
drwxr-xr-x 2 root root 4096 Feb 23 09:45 css
drwxr-xr-x 4 root root 4096 Feb 23 09:45 docs
drwxr-xr-x 2 root root 4096 Feb 23 09:45 download
-rwxr-xr-x 1 root root 2454 Oct 29 16:16 error500.html
-rwxr-xr-x 1 root root 1218 Oct 29 16:16 footer.php
-rwxr-xr-x 1 root root 1247 Oct 29 16:16 header.php
-rwxr-xr-x 1 root root 4717 Oct 29 16:16 images.inc.php
drwxr-xr-x 18 root root 4096 Feb 23 09:45 img
-rwxr-xr-x 1 root root 1068 Oct 29 16:16 index.php
-rwxr-xr-x 1 root root 1154 Oct 29 16:16 init.php
drwxr-xr-x 12 root root 4096 Feb 23 09:45 install
drwxr-xr-x 7 root root 4096 Feb 23 09:45 js
drwxr-xr-x 2 root root 4096 Feb 23 09:45 localization
drwxr-xr-x 2 root root 4096 Feb 23 09:45 log
drwxr-xr-x 3 root root 4096 Feb 23 09:45 mails
drwxr-xr-x 79 root root 4096 Feb 23 09:45 modules
drwxr-xr-x 5 root root 4096 Feb 23 09:45 override
drwxr-xr-x 2 root root 4096 Feb 23 09:45 pdf
-rwxr-xr-x 1 root root 6576 Oct 29 16:16 README.md
drwxr-xr-x 3 root root 4096 Feb 23 09:45 themes
drwxr-xr-x 18 root root 4096 Feb 23 09:45 tools
drwxr-xr-x 3 root root 4096 Feb 23 09:45 translations
drwxr-xr-x 2 root root 4096 Feb 23 09:45 upload
drwxr-xr-x 2 root root 4096 Feb 23 09:45 webservice
root@server1 home]# cp -rp prestashop/* /var/www/saheetha.com/public_html/
Now copy the prestashop folder contents from /home to document root of the required domain which is meant to be our online store. It is this path "
/var/www/saheetha.com/public_html/" in my case.
Now open up in your browser the URL >>http://domain.com/install/
Please navigate through the screenshots which describes each installation stage.
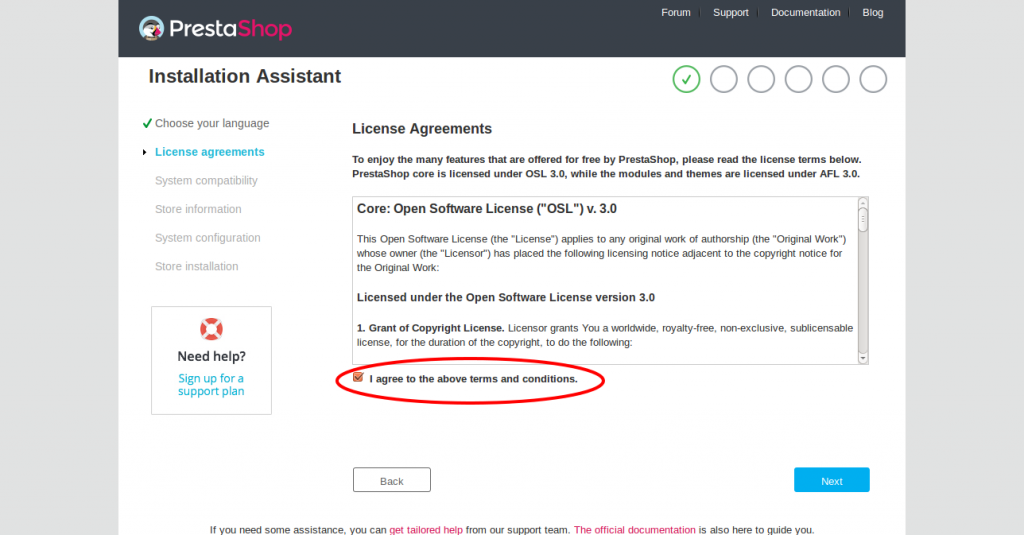
Stage 1 : Language Selection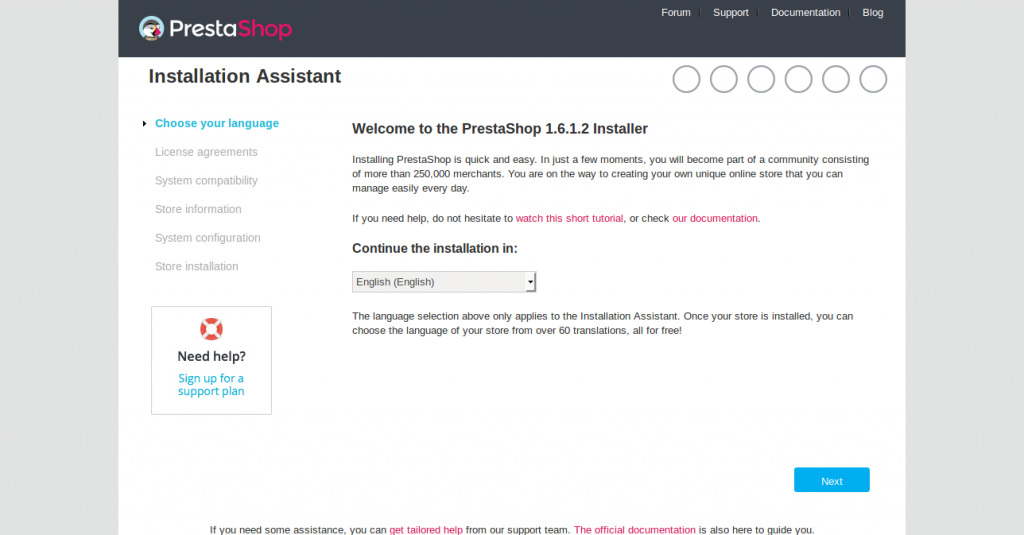 Stage 2 : License Agreement
 Agree the terms and conditions in the license agreement and click "Next" to proceed further.
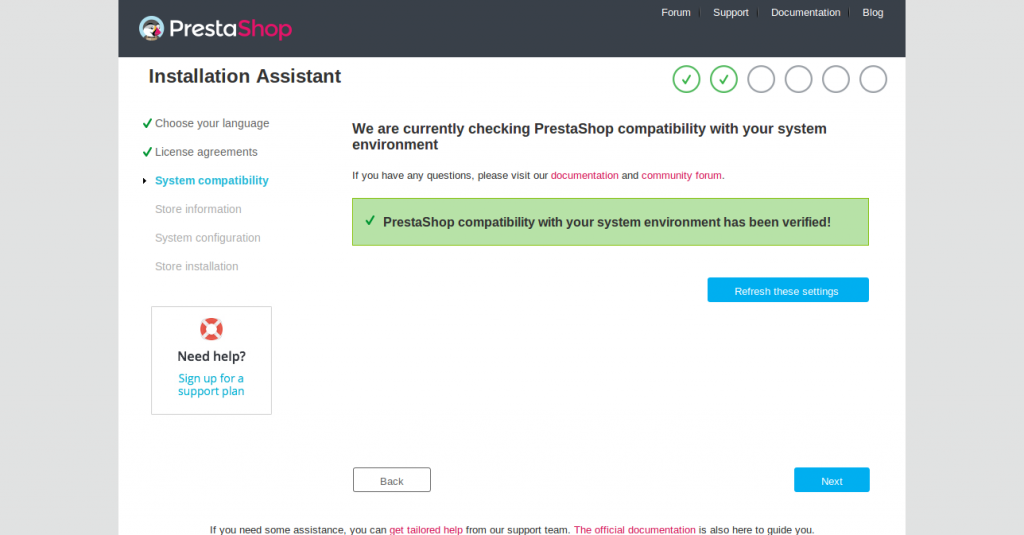
 Stage 3 : System Compatibility check
 It will check for the installation of the required PHP modules and folders/file permissions to continue with the installation.
 Stage 4: Creating your own Store information:
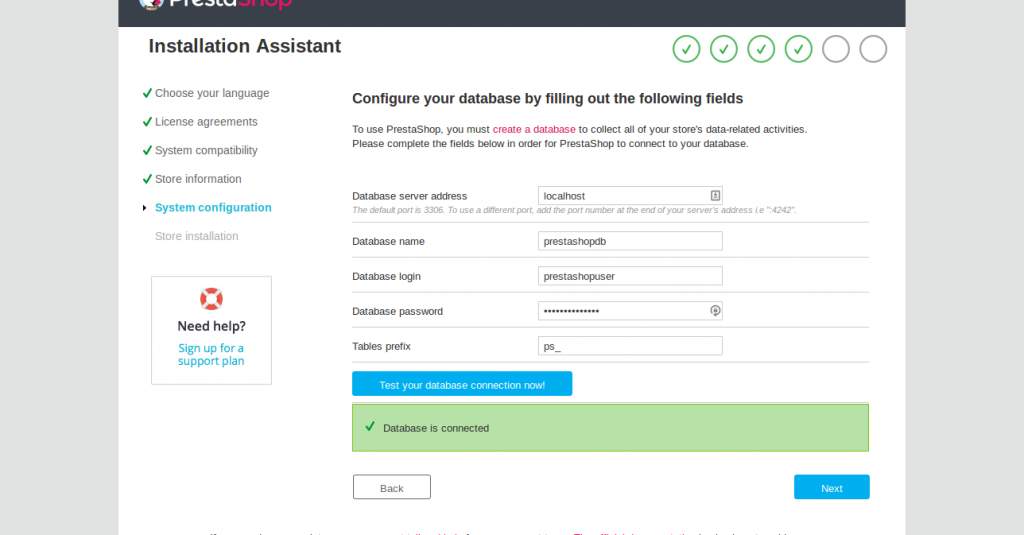 Stage 6 : Installation Stage
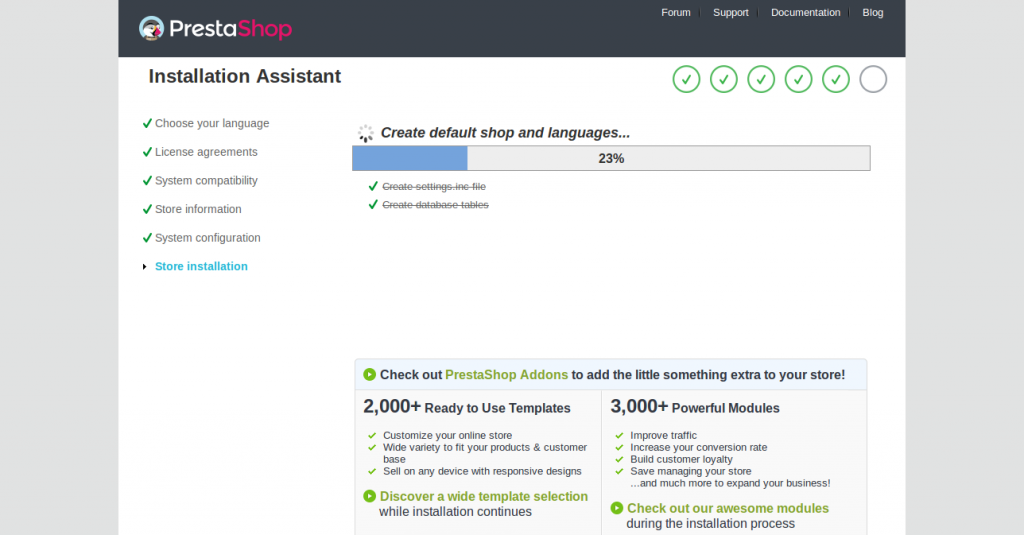 Stage 7 : Final Stage
 It will provide you with the login credentials to manages your Online store.
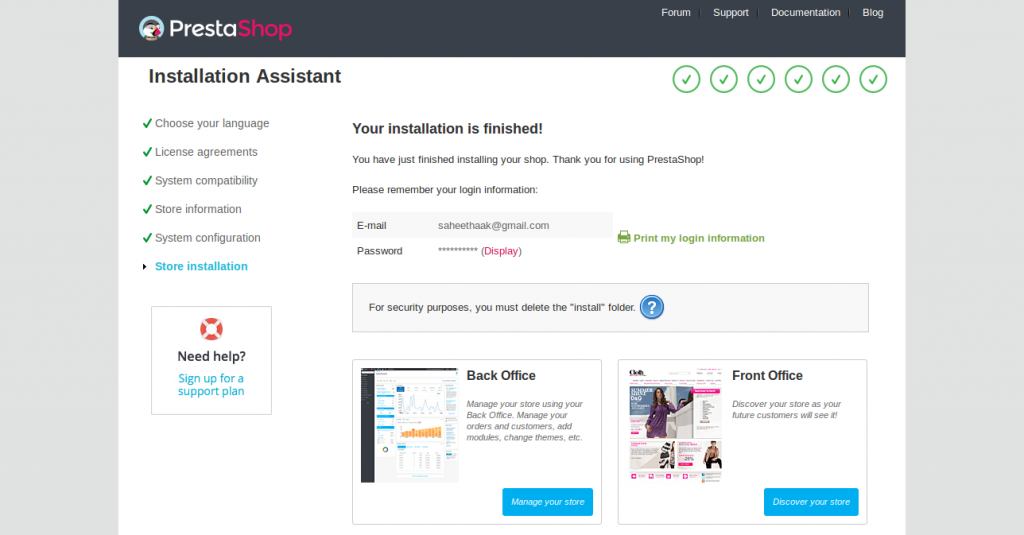
Now you're all set with your installation. Please make sure to delete your "Install" folder from your domain document root for security reasons.
How can we access the Admin Panel?
Before accessing the admin Panel for our installation, you need to rename your "admin" folder under the installation domain document root to some other name for security reasons. Or else you will get a message like this on the browser while accessing your admin
panel.
For security reasons, you cannot connect to the back office until you have
renamed the /admin folder (e.g. admin847v0u8kk/)
Please then access this page by the new URL (e.g.http://saheetha.com/admin847v0u8kk/)
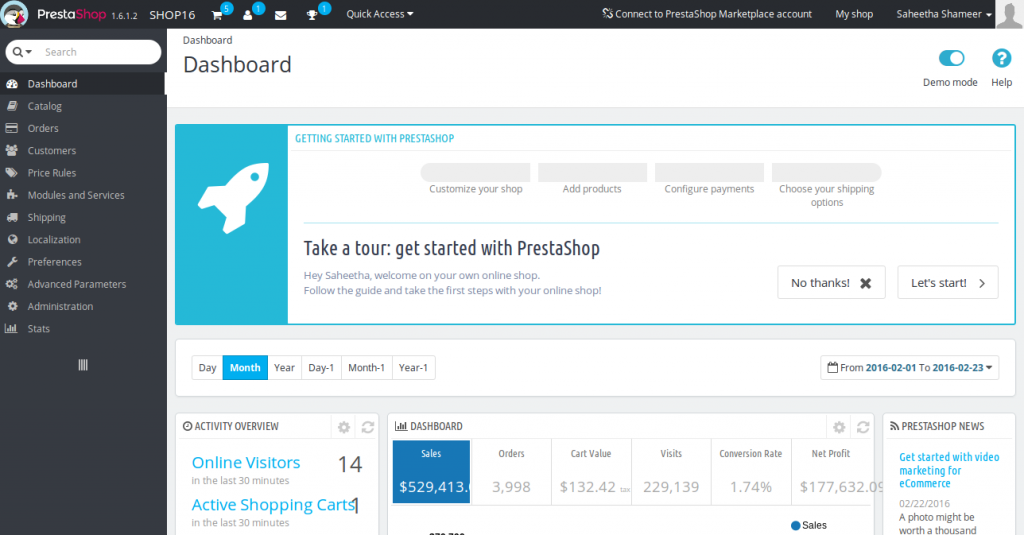
I renamed my admin folder and accessed my admin panel with the login credentials. You can manage your products, orders, customers, price details etc from this.
Now you can head over to the Prestashop user
manuals to learn more about managing your Online store.
You see how easy you can build up an online webstore using this software. Congratulation on your new venture with e-shops :). I hope you enjoyed reading this article. I recommend your valuable comments and suggestions on this.
Have a Good Day!


