OpenCart is a free and open source web based eCommerce online store management system for a better shopping cart solution. It is a foundation for building an online store allowing the shop owners to make business to their products or shop with the power of
internet. It has a beautiful user interface making it pretty handy to anyone who is running their online store with
OpenCart. It has pretty bunches of awesome features and is highly extensible. It is one of the most popular eCommerce software out there in the internet. OpenCart features unlimited categories,
products, manufacturers, multi currency, language, product reviews, ratings, automatic image resize and more over 20+ payment gateways with 8+ shipping methods. There are pretty cool free documentation written by the OpenCart community with both free and commercial
technical support.
In this article, we'll learn how to setup OpenCart in our machine running Ubuntu and CentOS as operating system.
Installing LAMP Stack
OpenCart needs a webserver running to be available to the public via web browser, a database server to store its data and as its a PHP application, we'll surely require PHP modules to make it work. So, to fulfill all those needs, LAMP Stack is the best stack
to make everything working in place. LAMP stack is the collection of Apache Web Server, MySQL/MariaDB Databse Server and PHP5 with required PHP modules. To install LAMP Stack, we'll need to run the following commands with respect to the distribution of linux
we are running on our machine.
CentOS
First of all, we'll need to update our system's packages which will fetch the repository index from its mirrors.
# yum update
Once done, we'll need to add EPEL Repository to our CentOS machine so that we can install all those modules and packages necessary to setup OpenCart and then go ahead on the installation of those packages.
# yum install epel-release
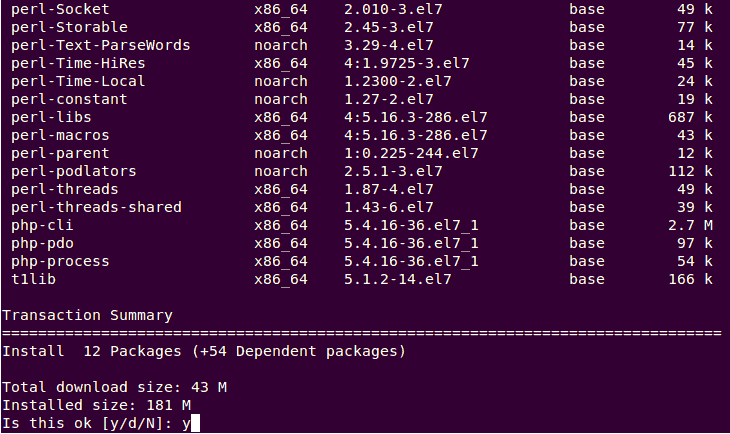
# yum install httpd mariadb-server php php-mysql php-pear php-gd php-xml php-curl php-mbstring php-mcrypt zlib-devel unzip
Ubuntu
# apt-get update
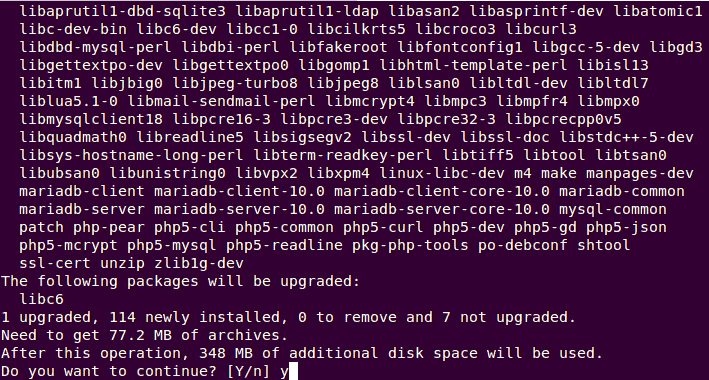
# apt-get install apache2 mariadb-server mariadb-client php5-mysql php-pear php5-gd libapache2-mod-php5 php5-curl php5-dev php5-mcrypt zlib1g-dev unzip
Configuring MariaDB server
As its our first time we have installed MariaDB,we'll need to configure a root password for our MariaDB server. To configure MariaDB, we'll first need to restart our MariaDB server by running the following command.
On Systemd
If we're running a distribution of linux like CentOS 7, Ubuntu 15.04/15.10 shipped with systemd as an init system, we'll need to run the following systemctl command to restart MariaDB.
On CentOS# systemctl restart mariadb
On Ubuntu# systemctl restart mysql
On SysVinit
But if we're running a distribution of linux like Ubuntu 14.04, we'll need to run the following service command to restart it.
# service mysql restart
After its done, we'll configure our MariaDB and assign a root password. To do so, we’ll need to run the following command.
# mysql_secure_installation
This will ask us to enter the password for root but as we haven’t set any password before and its our first time we’ve installed mariadb, we’ll simply press enter and go further. Then, we’ll be asked to set root password, here we’ll hit Y and enter our password
for root of MariaDB. Then, we’ll simply hit enter to set the default values for the further configurations.
….
so you should just press enter here.
Enter current password for root (enter for none):
OK, successfully used password, moving on…
Setting the root password ensures that nobody can log into the MariaDB
root user without the proper authorisation.
Set root password? [Y/n] y
New password:
Re-enter new password:
Password updated successfully!
Reloading privilege tables..
… Success!
…
installation should now be secure.
Thanks for using MariaDB!
Note: Please note that, we'll need the above entered root password later inorder to create a new database for our OpenCart installation.Creating a MariaDB Database
Next, we’ll login to the MariaDB command prompt as root. Here, we’ll need to enter the password of the MariaDB root account that we had set above.
# mysql -u root -p
After we’re logged in into the mariadb command prompt, we’ll gonna create the database.
> CREATE DATABASE opencartdb;
> CREATE USER 'opencartuser'@'localhost' IDENTIFIED BY 'Pa$$worD';
> GRANT ALL PRIVILEGES ON opencartdb.* TO 'opencartuser'@'localhost';
> FLUSH PRIVILEGES;
> EXIT;
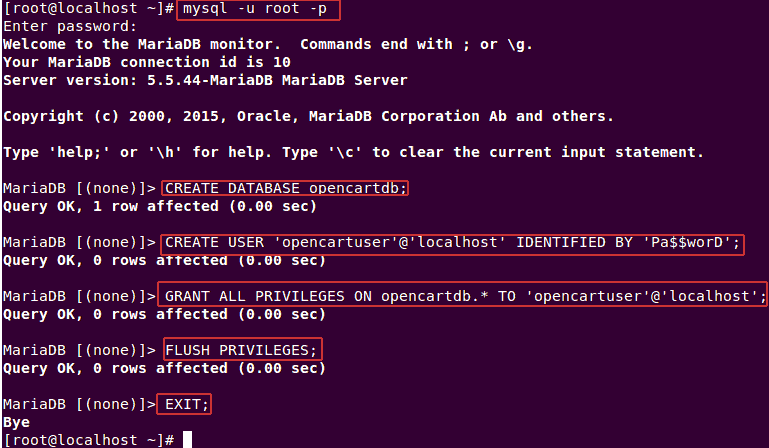
Finally, we’ve successfully created a database named
opencartdb with username
opencartuser and password as
Pa$$worD .
Note: It is strongly recommended to replace the above variables as your desire for the security issue and please note them down somewhere so that we can use those details later while installing OpenCart.
Downloading OpenCart
Now, we'll go for downloading the latest release (during the time of writing this article) of OpenCart ie version 2.1.0.2. We can download the latest release from the
official download page but as we're gonna download it via console or terminal, we'll simply get the link from the site and download it using the following wget command.
# cd /tmp
# wgethttps://codeload.github.com/opencart/opencart/zip/2.1.0.2 -O opencart.2.1.0.2.zip
--2016-02-16 17:10:30--https://codeload.github.com/opencart/opencart/zip/2.1.0.2
Resolving codeload.github.com (codeload.github.com)... 192.30.252.161
Connecting to codeload.github.com (codeload.github.com)|192.30.252.161|:443... connected.
HTTP request sent, awaiting response... 200 OK
Length: 12090195 (12M) [application/zip]
Saving to: ‘opencart.2.1.0.2.zip’
100%[===========================================>] 12,090,195 2.39MB/s in 5.3s
2016-02-16 17:10:37 (2.18 MB/s) - ‘opencart.2.1.0.2.zip’ saved [12090195/12090195]
Once the download is completed, we'll simply extract the compressed zip file by running the following unzip command.
# unzip opencart.2.1.0.2.zip
We'll then move the extracted files and directories to /var/www/opencart/ directory where we'll store our opencart website files and make it as the webroot for our domain using apache web server.
# mkdir -p /var/www/opencart
# mv /tmp/opencart-2.1.0.2/upload/ /var/www/opencart/
Configuring Apache Web Server
Next, we'll create a new apache configuration file named opencart.conf under /etc/httpd/conf.d/ directory using a text editor. To do so, we'll need to execute the following command in a terminal or console.
On CentOS
# nano /etc/httpd/conf.d/opencart.conf
Then, we'll gonna add the following lines of configuration into the file.
<VirtualHost *:80>
ServerAdmin info@opencart.linoxide.com
DocumentRoot /var/www/opencart/upload
ServerName opencart.linoxide.com
ServerAlias www.opencart.linoxide.com
<Directory /var/www/opencart/upload>
Options FollowSymLinks
AllowOverride All
</Directory>
ErrorLog /var/log/httpd/opencart.linoxide.com-error_log
CustomLog /var/log/httpd/opencart.linoxide.com-access_log common
</VirtualHost>
Once done, we'll need to simply save the file and exit the text editor.
On Ubuntu
# touch /etc/apache2/sites-available/opencart.conf
# ln -s /etc/apache2/sites-available/opencart.conf /etc/apache2/sites-enabled/opencart.conf
# nano /etc/apache2/sites-available/opencart.conf
Now, we'll gonna add the following lines of configuration into the opened file.
<VirtualHost *:80>
ServerAdmin info@opencart.linoxide.com
DocumentRoot /var/www/opencart/upload
ServerName opencart.linoxide.com
ServerAlias www.opencart.linoxide.com
<Directory /var/www/opencart/upload>
Options FollowSymLinks
AllowOverride All
</Directory>
ErrorLog /var/log/apache2/opencart.linoxide.com-error_log
CustomLog /var/log/apache2/opencart.linoxide.com-access_log common
</VirtualHost>
After done, we'll gonna save the file and exit the text editor. Then, we'll need to make sure that mod is enabled. To enable it, we'll need to execute the following command.
# a2enmod rewrite
Fixing Ownership
Our version of OpenCart requires us to create a configuration file for it. To do so, we can simply rename the existing config-dist.php files to config.php located under the OpenCart's directory. We can execute the following command to rename config-dist.php
files to config.php in the respective directories.
# cd /var/www/opencart/upload
# mv config-dist.php config.php
# mv admin/config-dist.php admin/config.php
We'll now need to change the ownership of the directory where our opencart files are extracted to apache user so that apache process owner can have full read/write access over that directory.
On CentOS
# chown -R apache: /var/www/opencart/upload
On Ubuntu
# chown -R www-data: /var/www/opencart/upload
Restarting and Enabling Services
Once all the configuration and setup is done, we'll need to restart our apache web server and mariadb and make it able to start automatically in every boot of the system. To do so, we'll need to execute the following commands with respect to the distribution we
are running.
On CentOS
# systemctl restart httpd mariadb
# systemctl enable httpd mariadb
On Ubuntu 15.04/15.10
# systemctl restart apache2 mysql
# systemctl enable apache2 mysql
On Ubuntu 14.04
# service apache2 restart
# service mysql restart
# update-rc.d apache2 enable
# update-rc.d mysql enable
Allowing Firewall
In order to expose our OpenCart online store on the internet or inside the same network, we'll need to make port 80 open from the firewall program. To allow port 80 or http service, we'll need to run the following commands according to the firewall program
installed and running in our system.
On Firewalld
As linux distributions like Ubuntu 15.04/15.10, CentOS 7 are shipped with systemd, firewalld are popular firewall programs installed. So, we'll need to run the following firewall-cmd commands to open http services.
# firewall-cmd --permanent --add-service=http
success
# firewall-cmd --reload
success
On Iptables
Distributions like Ubuntu 14.04 are shipped with sysvinit as init system so, iptables are used as firewall program so, we'll need to open port 80 by running the following.
# iptables -I INPUT -p tcp --dport 80 -j ACCEPT
# sh -c "iptables-save > /etc/iptables.rules"
Web Installation
Finally after everything is set as expected above, we'll now go for the OpenCart web based installation process. To do so, first we'll need to point our web browser to our server's ip address or domain name ashttp://ip-address/ orhttp://domain.com/ according
to our configuration. Here, in this tutorial, we'll point our web browser tohttp://opencart.linoxide.com/ and start the installation process as shown below.
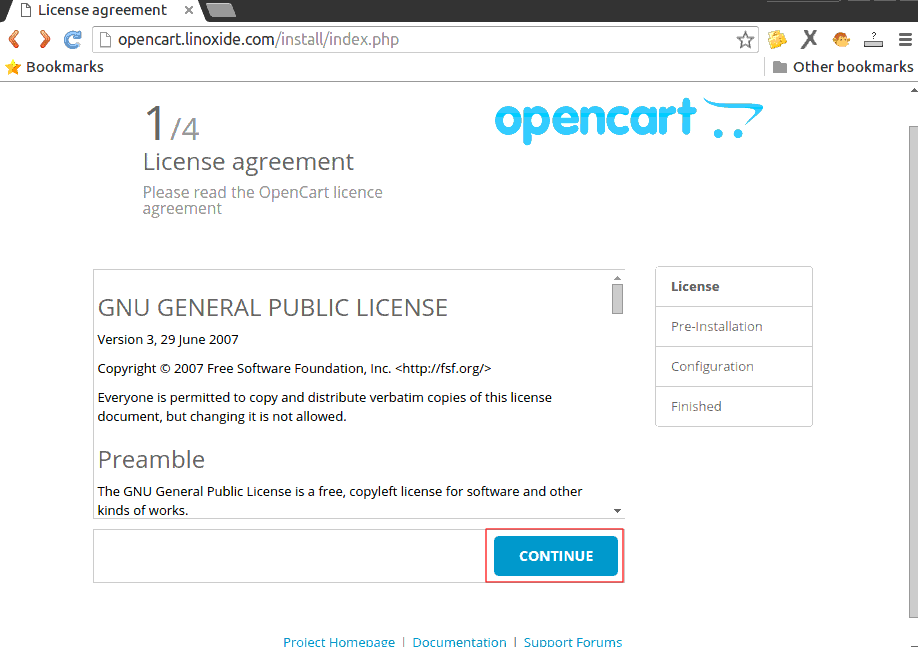
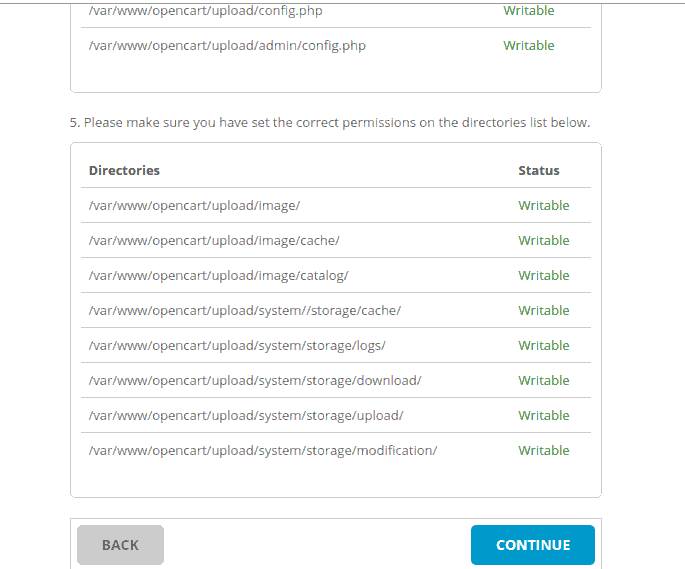
To continue the installation further, we'll click on
CONTINUE button as shown in the above image. This will load another page of installation where every pre-installation configurations are checked. As we have fulfilled every requirements
to run OpenCart, we'll see every status in green color as shown below.
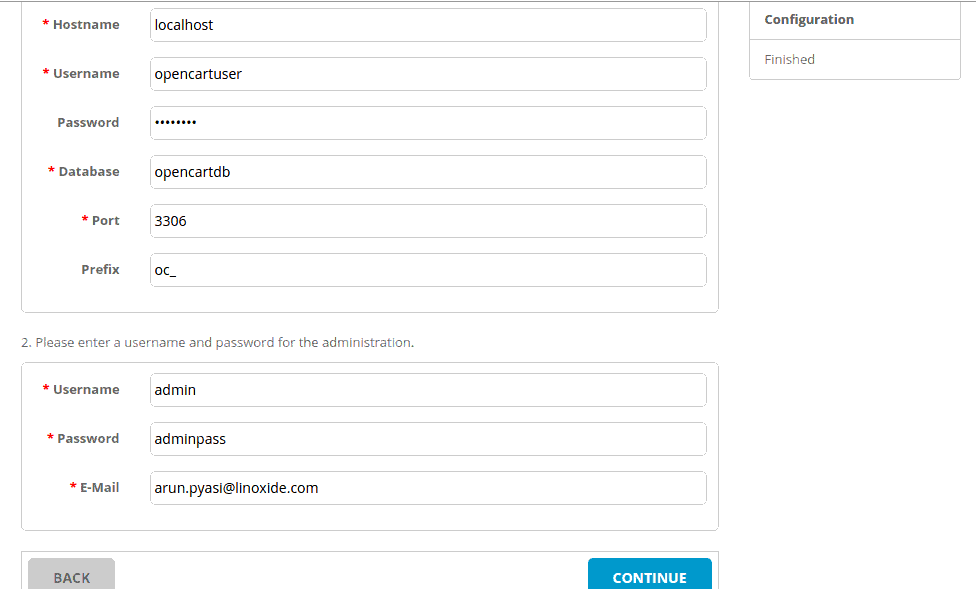
Next, we'll click on Continue to move ahead towards the Configuration page. Here, we'll need to enter the required
database login credentials we had set above while creating the database for our OpenCart installation. Then, we'll set an username, password and email which we'll require further to login into the admin panel.
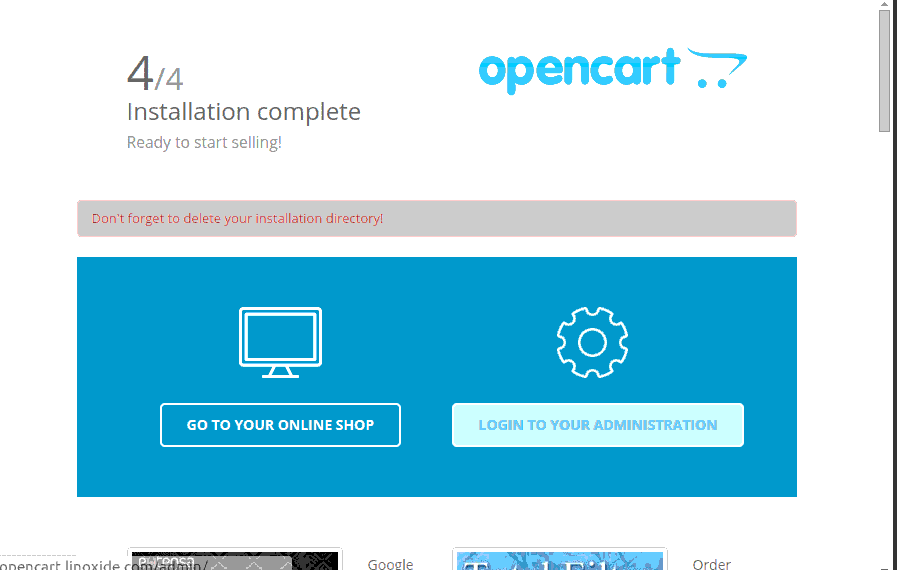
Once done, we'll go further to complete the installation. Then, we'll be welcomed by a
Installation Complete page as shown below where we'll be asked whether to go to the Store page or to the administration panel.
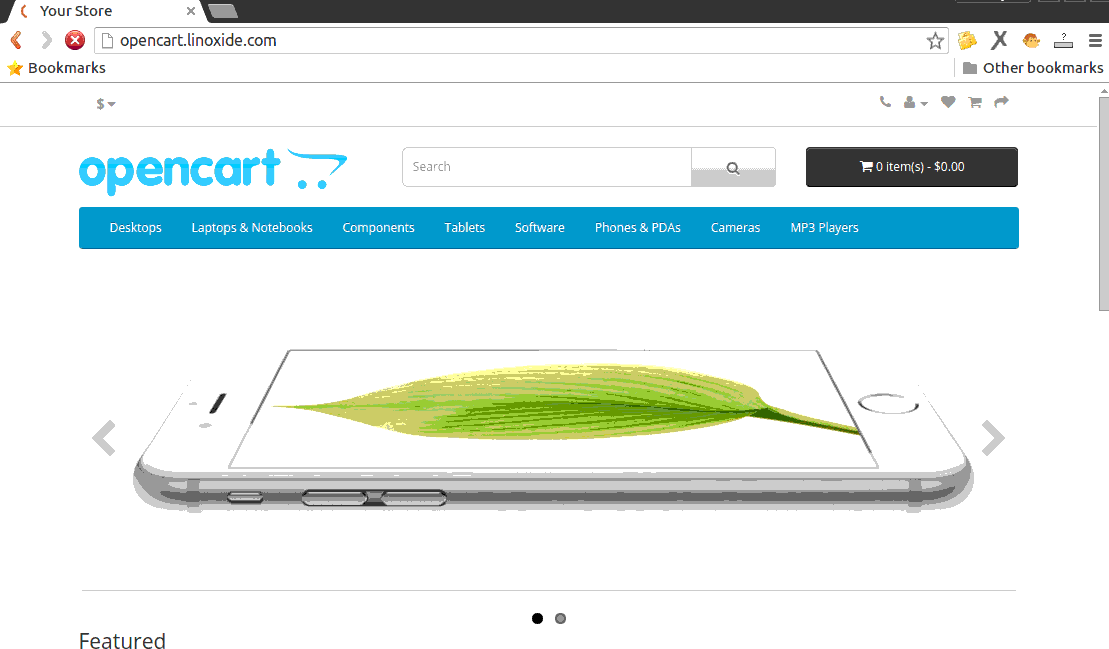
Now, to goto our Online Store, we can point our browser to our domain or the path where we had installed it ie.
http://opencart.linoxide.com/ . Then, we'll see the first screen of our store powered by OpenCart.
In order to login to the administration panel, we'll need to point our browser to admin path ie.
http://opencart.linoxide.com/admin . Then, we'll need to enter the login details of the panel which we had set above.
Issue with Ubuntu
If you encountered missing extension under mCrypt section while performing the OpenCart Pre-installation check, we'll need to run the following command to fix it.
# php5enmod mcrypt
Then, we'll need to restart the webserver by running the following command.
# service apache2 restart
Once done, we'll need to continue the web based installation as shown above.
Post-installation
Finally, as the installation process is complete, we'll now need to remove the install directory as per the security reasons. In order to completely remove the directory, we'll need to run the following command.
# rm -rf /var/www/opencart/upload/install/
Installing vQmod
vQmod for OpenCart lets us to add extension modules to our store without modifying the core OpenCart code. To install vQmod in our OpenCart, we'll need to download the latest release of vQmod built for OpenCart from its
Official Github Repository. To do so, we'll simply run the following wget command to download the latest compressed zip file of vQmod ie version 2.5.1 using its link.
# cd /tmp/
# wgethttps://github.com/vqmod/vqmod/releases/download/v2.5.1-opencart.zip/vqmod-2.5.1-opencart.zip
Then, we'll simply extract the file and move to the root of our opencart installation.
# unzip vqmod-2.5.1-opencart.zip
# mv /tmp/vqmod /var/www/opencart/upload/
As vQmod recommends index.php and admin/index.php to be writable, we'll need to set their file permission to 755.
# cd /var/www/opencart/upload
# chmod 755 index.php admin/index.php
Once done, we'll need to install it by pointing our browser to the install directory of vQmod iehttp://opencart.linoxide.com/vqmod/install/ in this tutorial. Unlike, the install directory of OpenCart, we shouldn't delete the install directory of vQmod.
Conclusion
We had successfully installed the latest release of OpenCart in our machine running Ubuntu and CentOS distributions of GNU/Linux. There are both free/community support as well as commercial support by OpenCart. It's
Documentation site contains one of the best documentation available for an online store software. It was pretty easy and simple to setup OpenCart. We don't require much technical knowledge
to setup it with basic configuration by following this tutorial. We have covered installation for Ubuntu 15.04/15.10 and CentOS 7 in this tutorial. If you have any questions, suggestions, feedback please write them in the comment box below so that we can improve
or update our contents. Thank you ! Enjoy :-)


