系統引導流程:
固件firmware(CMOS/BIOS) ——> POST加電自檢
↓
自舉程序BootLoader(GRUB) ——> 載入內核
↓
載入內核Kernel ——> 驅動硬件
↓
啟動init進程
↓
讀取執行配置文件/etc/inittab
1、init進程
在UNIX系統中,init是第一個可以存在的進程,它的PID恆為1,但它也必須向一個更高級的功能負責:PID為0的內核調度器(kernel scheduler),從而獲得CPU時間。
2、inittab 配置文件
[root@localhost ~]# cat /etc/inittab
# inittab is only used by upstart for the default runlevel.
#
# ADDING OTHER CONFIGURATION HERE WILL HAVE NO EFFECT ON YOUR SYSTEM.
#
# System initialization is started by /etc/init/rcS.conf
#
# Individual runlevels are started by /etc/init/rc.conf
#
# Ctrl-Alt-Delete is handled by /etc/init/control-alt-delete.conf
#
# Terminal gettys are handled by /etc/init/tty.conf and /etc/init/serial.conf,
# with configuration in /etc/sysconfig/init.
#
# For information on how to write upstart event handlers, or how
# upstart works, see init(5), init(8), and initctl(8).
#
# Default runlevel. The runlevels used are:
#   0 - halt (Do NOT set initdefault to this)
#   1 - Single user mode
#   2 - Multiuser, without NFS (The same as 3, if you do not have networking)
#   3 - Full multiuser mode
#   4 - unused
#   5 - X11
#   6 - reboot (Do NOT set initdefault to this)
#
id:3:initdefault:
[root@localhost ~]# runlevel
N 3
[root@localhost ~]# init 2
[root@localhost ~]# runlevel
3 2
[root@localhost ~]# init 2
id:run-level:action:process
id:3:initdefault:
#System initialization
si::sysinit:/etc/rc.d/rc.sysinit
l0:0:wait:/etc/rc.d/rc 0
l1:1:wait:/etc/rc.d/rc 1
l2:2:wait:/etc/rc.d/rc 2
l3:3:wait:/etc/rc.d/rc 3
l4:4:wait:/etc/rc.d/rc 4
l5:5:wait:/etc/rc.d/rc 5
l6:6:wait:/etc/rc.d/rc 6
[root@localhost ~]# ls /etc/rc.d
init.d  rc0.d  rc2.d  rc4.d  rc6.d     rc.sysinit
rc      rc1.d  rc3.d  rc5.d  rc.local
[root@localhost ~]# ls /etc/rc.d/rc3.d
K01smartd      K75quota_nld     S10network      S22messagebus    S80postfix
K10psacct      K87restorecond   S11auditd       S24avahi-daemon  S82abrt-ccpp
K10saslauthd   K89rdisc         S11portreserve  S25cups          S82abrtd
K15httpd       K99rngd          S12rsyslog      S25netfs         S82abrt-oops
K20tomcat6     S01sysstat       S13cpuspeed     S26acpid         S90crond
K50netconsole  S02lvm2-monitor  S13irqbalance   S26haldaemon     S95atd
K74ntpd        S08ip6tables     S15mdmonitor    S26udev-post     S99local
K75ntpdate     S08iptables      S20kdump        S55sshd
[root@localhost ~]# ls /etc/rc.d/init.d
abrt-ccpp     crond      irqbalance    netfs        rdisc        sshd
abrtd         cups       kdump         network      restorecond  sysstat
abrt-oops     functions  killall       ntpd         rngd         tomcat6
acpid         haldaemon  lvm2-lvmetad  ntpdate      rsyslog      udev-post
atd           halt       lvm2-monitor  portreserve  sandbox
auditd        httpd      mdmonitor     postfix      saslauthd
avahi-daemon  ip6tables  messagebus    psacct       single
cpuspeed      iptables   netconsole    quota_nld    smartd
[root@localhost ~]# /etc/rc.d/init.d/sshd start
[root@localhost ~]# /etc/rc.d/init.d/sshd stop
4、設置自啟動程序
1)方式一:使用ln -s
如寫了一個簡單的腳本msg.script
date >> /root/msg.today
who >> /root/msg.today
free >> /root/msg.today
[root@localhost ~]# chmod u+x /etc/rc.d/init.d/msg.script
[root@localhost ~]# ln -s /etc/rc.d/init.d/msg.script /etc/rc.d/rc3.d/S100msg.scriptS100msg.script S-start;100-啟動順序;msg.script-要啟動的腳本
[root@localhost ~]# chkconfig --list
abrt-ccpp       0:關閉  1:關閉  2:關閉  3:啟用  4:關閉  5:啟用  6:關閉
abrt-oops       0:關閉  1:關閉  2:關閉  3:啟用  4:關閉  5:啟用  6:關閉
abrtd           0:關閉  1:關閉  2:關閉  3:啟用  4:關閉  5:啟用  6:關閉
acpid           0:關閉  1:關閉  2:啟用  3:啟用  4:啟用  5:啟用  6:關閉
atd             0:關閉  1:關閉  2:關閉  3:啟用  4:啟用  5:啟用  6:關閉
auditd          0:關閉  1:關閉  2:啟用  3:啟用  4:啟用  5:啟用  6:關閉
avahi-daemon    0:關閉  1:關閉  2:關閉  3:啟用  4:啟用  5:啟用  6:關閉
cpuspeed        0:關閉  1:啟用  2:啟用  3:啟用  4:啟用  5:啟用  6:關閉
crond           0:關閉  1:關閉  2:啟用  3:啟用  4:啟用  5:啟用  6:關閉
cups            0:關閉  1:關閉  2:啟用  3:啟用  4:啟用  5:啟用  6:關閉
haldaemon       0:關閉  1:關閉  2:關閉  3:啟用  4:啟用  5:啟用  6:關閉
httpd           0:關閉  1:關閉  2:關閉  3:關閉  4:關閉  5:關閉  6:關閉
ip6tables       0:關閉  1:關閉  2:啟用  3:啟用  4:啟用  5:啟用  6:關閉
iptables        0:關閉  1:關閉  2:啟用  3:啟用  4:啟用  5:啟用  6:關閉
irqbalance      0:關閉  1:關閉  2:關閉  3:啟用  4:啟用  5:啟用  6:關閉
kdump           0:關閉  1:關閉  2:關閉  3:啟用  4:啟用  5:啟用  6:關閉
lvm2-monitor    0:關閉  1:啟用  2:啟用  3:啟用  4:啟用  5:啟用  6:關閉
mdmonitor       0:關閉  1:關閉  2:啟用  3:啟用  4:啟用  5:啟用  6:關閉
messagebus      0:關閉  1:關閉  2:啟用  3:啟用  4:啟用  5:啟用  6:關閉
netconsole      0:關閉  1:關閉  2:關閉  3:關閉  4:關閉  5:關閉  6:關閉
netfs           0:關閉  1:關閉  2:關閉  3:啟用  4:啟用  5:啟用  6:關閉
network         0:關閉  1:關閉  2:啟用  3:啟用  4:啟用  5:啟用  6:關閉
ntpd            0:關閉  1:關閉  2:關閉  3:關閉  4:關閉  5:關閉  6:關閉
ntpdate         0:關閉  1:關閉  2:關閉  3:關閉  4:關閉  5:關閉  6:關閉
portreserve     0:關閉  1:關閉  2:啟用  3:啟用  4:啟用  5:啟用  6:關閉
postfix         0:關閉  1:關閉  2:啟用  3:啟用  4:啟用  5:啟用  6:關閉
psacct          0:關閉  1:關閉  2:關閉  3:關閉  4:關閉  5:關閉  6:關閉
quota_nld       0:關閉  1:關閉  2:關閉  3:關閉  4:關閉  5:關閉  6:關閉
rdisc           0:關閉  1:關閉  2:關閉  3:關閉  4:關閉  5:關閉  6:關閉
restorecond     0:關閉  1:關閉  2:關閉  3:關閉  4:關閉  5:關閉  6:關閉
rngd            0:關閉  1:關閉  2:關閉  3:關閉  4:關閉  5:關閉  6:關閉
rsyslog         0:關閉  1:關閉  2:啟用  3:啟用  4:啟用  5:啟用  6:關閉
saslauthd       0:關閉  1:關閉  2:關閉  3:關閉  4:關閉  5:關閉  6:關閉
smartd          0:關閉  1:關閉  2:關閉  3:關閉  4:關閉  5:關閉  6:關閉
sshd            0:關閉  1:關閉  2:啟用  3:啟用  4:啟用  5:啟用  6:關閉
sysstat         0:關閉  1:啟用  2:啟用  3:啟用  4:啟用  5:啟用  6:關閉
tomcat6         0:關閉  1:關閉  2:關閉  3:關閉  4:關閉  5:關閉  6:關閉
udev-post       0:關閉  1:啟用  2:啟用  3:啟用  4:啟用  5:啟用  6:關閉
[root@localhost ~]# chkconfig --list sshd
sshd            0:關閉  1:關閉  2:啟用  3:啟用  4:啟用  5:啟用  6:關閉
[root@localhost ~]# chkconfig --levels 2345 sshd offsshd在所有運行級別都關閉後,想讓sshd服務只在運行級別3啟動,可按如下設置
[root@localhost ~]# chkconfig --level 3 sshd on
[root@localhost ~]# ntsysv --level 3
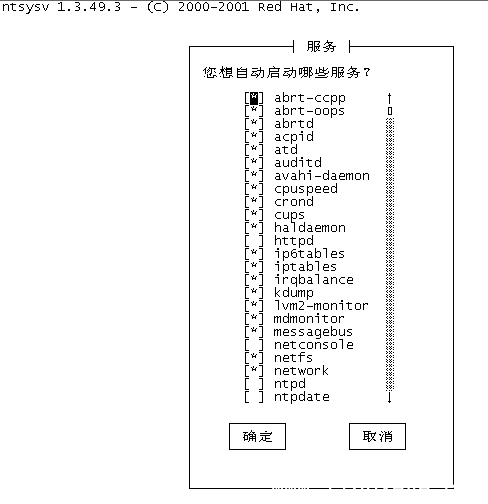
* 表示是要啟動的,沒有*表示不啟動,用空格鍵選擇是否要啟動
5、使用dmesg檢查引導期間的錯誤
比如想查看在啟動的時候是否識別到網卡:
[root@localhost ~]# dmesg | grep eth0
eth0: registered as PCnet/PCI II 79C970A
eth0: link up
eth0: no IPv6 routers present
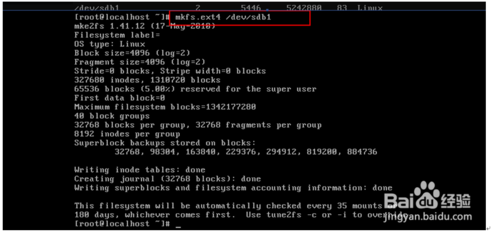
[root@localhost ~]# dmesg | grep sda
sd 2:0:0:0: [sda] 41943040 512-byte logical blocks: (21.4 GB/20.0 GiB)
sd 2:0:0:0: [sda] Write Protect is off
sd 2:0:0:0: [sda] Mode Sense: 61 00 00 00
sd 2:0:0:0: [sda] Cache data unavailable
sd 2:0:0:0: [sda] Assuming drive cache: write through
sd 2:0:0:0: [sda] Cache data unavailable
sd 2:0:0:0: [sda] Assuming drive cache: write through
 sda: sda1 sda2 sda3 sda4 < sda5 >
sd 2:0:0:0: [sda] Cache data unavailable
sd 2:0:0:0: [sda] Assuming drive cache: write through
sd 2:0:0:0: [sda] Attached SCSI disk
EXT4-fs (sda1): mounted filesystem with ordered data mode. Opts:
dracut: Mounted root filesystem /dev/sda1
SELinux: initialized (dev sda1, type ext4), uses xattr
EXT4-fs (sda5): mounted filesystem with ordered data mode. Opts:
SELinux: initialized (dev sda5, type ext4), uses xattr
EXT4-fs (sda2): mounted filesystem with ordered data mode. Opts:
SELinux: initialized (dev sda2, type ext4), uses xattr
Adding 2047992k swap on /dev/sda3.  Priority:-1 extents:1 across:2047992k
6、檢查系統日志/var/log/messages,查找可能被dmesg忽略的應用程序錯誤
如查看是否有關於sshd的錯誤信息
[root@localhost ~]# grep sshd /var/log/messages
7、GRUB
GRUB的配置文件默認為:
/boot/grub/grub.conf
[root@localhost ~]# cat /etc/grub.conf
# grub.conf generated by anaconda
#
# Note that you do not have to rerun grub after making changes to this file
# NOTICE:  You do not have a /boot partition.  This means that
#          all kernel and initrd paths are relative to /, eg.
#          root (hd0,0)
#          kernel /boot/vmlinuz-version ro root=/dev/sda1
#          initrd /boot/initrd-[generic-]version.img
#boot=/dev/sda
default=0
timeout=5
splashimage=(hd0,0)/boot/grub/splash.xpm.gz
hiddenmenu
title CentOS (2.6.32-279.el6.i686)
        root (hd0,0)
        kernel /boot/vmlinuz-2.6.32-279.el6.i686 ro root=UUID=1782302e-7804-4b32-9e59-04aac3651342 nomodeset rd_NO_LUKS  KEYBOARDTYPE=pc KEYTABLE=us rd_NO_MD crashkernel=auto LANG=zh_CN.UTF-8 rd_NO_LVM rd_NO_DM rhgb quiet
        initrd /boot/initramfs-2.6.32-279.el6.i686.img
8、單用戶模式應用
1)root密碼忘記
進入單用戶模式重新設置root密碼,方法如下:
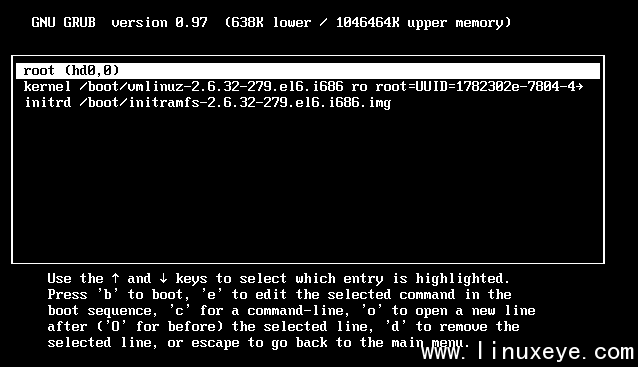
開機按Esc鍵進入GRUB界面,按e鍵進入編輯行模式,選中kernel行,再次按e鍵,在新的界面的最後一行輸入1,即可進入單用戶模式。
GRUB界面如下:

功能鍵:
e 編輯當前的啟動菜單項
c 進入GRUB的命令行方式
b 啟動當前的菜單項
d 刪除當前行
Esc 返回GRUB啟動菜單界面,取消對當前單項所做的任何修改
在GRUB界面按e鍵,進入如下界面
選擇第二行kernel,按e鍵,進入如下界面:
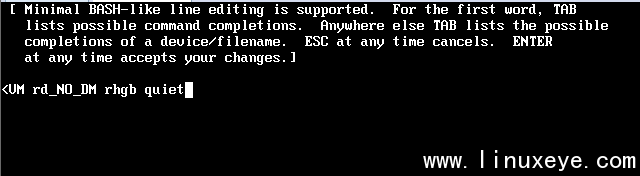
我們要進入運行級別為1的單用戶模式,在rhgb quiet後面輸入空格,再輸入1,然後回車,運行級別就會被保存
回車後,出現以下界面
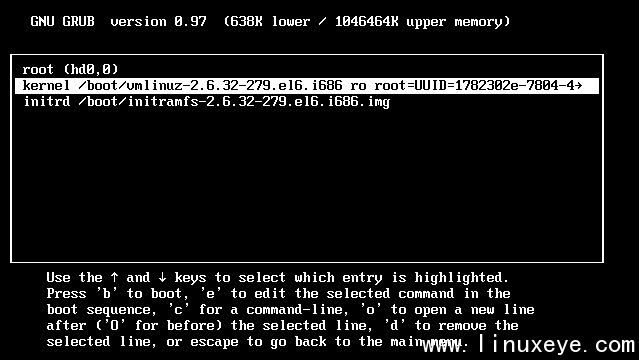
然後按b鍵啟動內核,就可以進入到單用戶模式,單用戶只有root可以登錄,不需要密碼

進入到單用戶模式,就可以進行系統修復,修改密碼等操作,現在對root密碼進行更改就行了
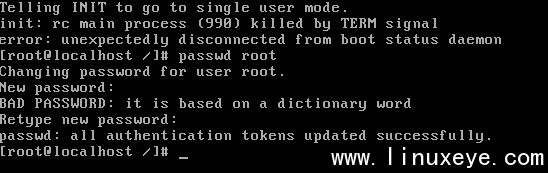
最後我們切換到運行級別3,多用戶模式,用新密碼重新登陸系統。

2)設置GRUB密碼
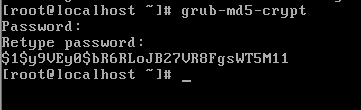
方式一:使用GRUB自帶的grub-md5-crypt,輸入密碼就會得到密文
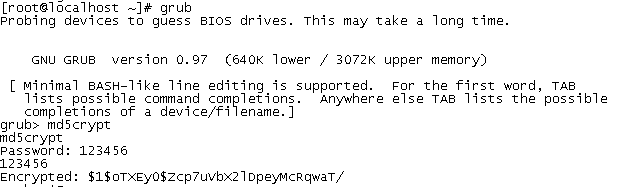
方式二:在GRUB交互命令界面使用md5crypt,輸入密碼就會得到密文
得到密文後,將密文復制到/etc/grub.conf文件中,放到title上面
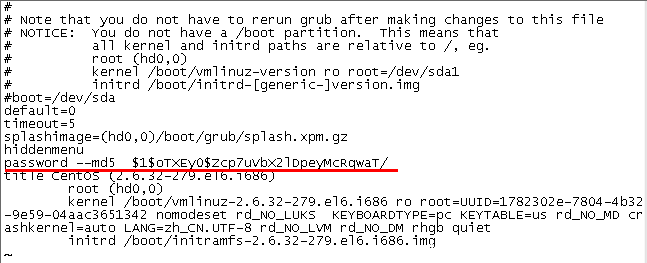
以後進入GRUB就需要輸入密碼了
2)GRUB修復
當開機進入grub界面但沒有菜單,只剩下一個grub>提示符,解決辦法可以嘗試手動引導
grub>cat /boot/grub/grub.conf (查看參數)
grub>root(hd0,0)
grub>kernel 參數
grub>initrd 參數
grub>boot