1.Cobbler介紹
Cobbler是一個快速網絡安裝linux的服務,而且在經過調整也可以支持網絡安裝windows。該工具使用python開發,小巧輕便(才15k行代碼),使用簡單的命令即可完成PXE網絡安裝環境的配置,同時還可以管理DHCP,DNS,以及yum包鏡像。
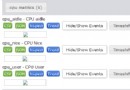
Cobbler支持命令行管理,web界面管理,還提供了API接口,可以方便二次開發使用。
650) this.width=650;" border=0>
和Kickstart不同的是,使用cobbler不會因為在局域網中啟動了dhcp而導致有些機器因為默認從pxe啟動在重啟服務器後加載tftp內容導致啟動終止。
2.開始安裝cobbler
注:默認的CentOS6沒有cobbler包,需要到其它鏡像去下載
wget http://download.Fedora.RedHat.com/pub/epel/6/i386/epel-release-xx..noarch.rpm
epel-release-xx..noarch.rpm 下載對應的系統包,centos6 對應的是 epel-release-6-5.noarch.rpm
rpm –Uvh epel-release-6-5.noarch.rpm
yum install cobbler cobbler-web tftp rsync httpd dhcp xinetd
3.開始配置
#service httpd start
#service cobblerd start
#cobbler check
The following are potential configuration items that you may want to fix: 1 : The 'server' field in /etc/cobbler/settings must be set to something other than localhost,or kickstarting features will not work. This should be a resolvable hostname or IP for the boot server as reachable by all machines that will use it. 2 : For PXE to be functional, the 'next_server' field in /etc/cobbler/settings must be set to something other than 127.0.0.1, and should match the IP of the boot server on the PXE network. 3 : you need to set some SELinux content rules to ensure cobbler works correctly in your SELinux environment, run the following: /usr/sbin/semanage fcontext -a -t public_content_t "/tftpboot/.*" && \ /usr/sbin/semanage fcontext -a -t public_content_t "/var/www/cobbler/images/.*" 4 : some network boot-loaders are missing from /var/lib/cobbler/loaders, you may run 'cobbler get-loaders' to download them, or, if you only want to handle x86/x86_64 netbooting, you may ensure that you have installed a *recent* version of the syslinux package installed and can ignore this message entirely. Files in this directory, should you want to support all architectures, should include pxelinux.0, menu.c32, elilo.efi, and yaboot.The 'cobbler get-loaders' command is the easiest way to resolve these requirements. 5 : change 'disable' to 'no' in /etc/xinetd.d/tftp 6 : change 'disable' to 'no' in /etc/xinetd.d/rsync 7 : since iptables may be running, ensure 69, 80, and 25151 are unblocked 8 : debmirror package is not installed, it will be required to manage debian deployments and repositories 9 : The default password used by the sample templates for newly installed machines (default_password_crypted in /etc/cobbler/settings) is still set to 'cobbler' and should be changed, try: "openssl passwd -1 -salt 'random-phrase-here' 'your-password-here'" to generate new one Restart cobblerd and then run 'cobbler sync' to apply changes.上面這段信息大意就是:
1. 編輯/etc/cobbler/settings文件,找到 server選項,修改為適當的ip地址,本實例配置ip為:192.168.1.13(這個根據自己的可以設置);
2. 編輯/etc/cobbler/settings文件,找到 next_server選項,修改為適當的ip地址,本實例配置ip為:192.168.1.13;
3. SELinux的設置。如果上面已經關閉了SELinux就不用管了;
4. 執行 cobbler get-loaders,系統將自動下載loader程序,完成提示4的修復工作;
5. 編輯/etc/xinetd.d/tftp文件,將文件中的disable字段的配置由yes改為no;
6. 編輯/etc/xinetd.d/rsync文件,將文件中的disable字段的配置由yes改為no;
7. 在iptables中將69,80,25151端口打開。如果僅僅只是在內部環境中使用,建議直接將防火牆關掉;
8. 提示說debmirror沒安裝。如果不是安裝 debian之類的系統,此提示可以忽略,如果需要安裝,下載地址為;
http://rpmfind.net/linux/rpm2html/search.php?query=debmirror
CentOS 6使用RHEL 5的包就可以。
9. 修改cobbler用戶的默認密碼,可以使用如下命令生成密碼,並使用生成後的密碼替換/etc/cobbler/settings中的密碼。生成密碼命令:
openssl passwd -1 -salt 'random-phrase-here' 'your-password-here' 其中“random-phrase-here”為干擾碼 (默認的用戶名和密碼都是cobbler);