本文適用於32位機器ATI顯卡用戶安裝ATI Catalyst 8.8 & 8.9 For Linux。如果需要查詢64位機器的安裝方法,參見原文(鏈接見上文)。
首先先從ATI官網上將驅動文件包下載到電腦上。
本例使用的是ati-driver-installer-8-9-x86-x86_64.run
在終端中執行:
sudo apt-get install build-essential cdbs fakeroot dh-make debhelper debconf libstdc++5 dkms linux-headers-$(uname -r)
切換目錄到你下載的安裝包位置,在終端中執行:
sh ati-driver-installer-8-9-x86.x86_64.run --buildpkg Ubuntu/hardy
在/usr/lib中找到一個名為libGL.so的文件。
然後在終端中執行:
sudo ln -s /usr/lib/libGL.so /usr/lib/libGL.so.1
可能需要重新執行:(一般跳過這一步)
sh ati-driver-installer-8-9-x86.x86_64.run --buildpkg Ubuntu/hardy

然後對文件進行設置:
sudo gedit /etc/default/linux-restricted-modules-common
將 DISABLED_MODULES="" 改為 DISABLED_MODULES="fglrx"
按照原文在這裡的意思,是說修改完上一句後,可以在受限驅動管理器中看到,受限驅動雖沒有被選中,但在安裝的後期,可發現狀態是“使用中”。這說明受限驅動中的fglrx模塊雖被禁用,但你下載的安裝包中的fglrx模塊正在起作用。
然後對文件進行設置:
sudo gedit /etc/modprobe.d/blacklist-restricted
sudo gedit /etc/modprobe.d/blacklist-local
上兩個文件可能不存在,如果不存在的話就不用新建再更改。以我的電腦為例,我只有第2個文件,即blacklist-local文件。在其中可發現有“blacklist fglrx”字樣,在這前面加上一個#字。保存退出。
好,接下來可以安裝剛剛生成的五個DEB包了:
sudo dpkg -i xorg-driver-fglrx_*.deb fglrx-kernel-source_*.deb fglrx-amdcccle_*.deb
最後進入掃尾階段:
先修改xorg.conf中的設置:
sudo gedit /etc/X11/xorg.conf
在其中找到Section "Device"字段,其中有個Driver,把它後面的參數改為"fglrx"。如果沒有找到改字段,直接將下段代碼復制到文件中:
Section "Device" [...]
Driver "fglrx"
[...]
EndSection
保存退出。
在終端中執行:
sudo aticonfig --initial -f
sudo aticonfig --input=/etc/X11/xorg.conf --tls=1
重啟。
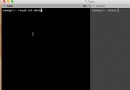
可以使用DISPLAY=:0 glxinfo | grep render 命令查看結果,如果顯示的是direct rending為yes。那麼恭喜你,你已經安裝成功了。如果仍為no,請繼續閱讀下文。
首先刪除xserver-xgl
sudo apt-get remove xserver-xgl
再把這一段加進/etc/X11/xorg.conf裡:
Section "Extensions"
   Option "Composite" "Enable"
EndSection
最後這一步非常重要,我的機器就是在加上這一段後,direct rending終於變為了yes。至此,大功告成了!