這個是linux下安裝配置Nagios和Cacti的第一個步驟,即配置一個web的環境,這裡采用的是lamp的架構!
這裡采用的linux平台是RHEL 5.4的版本
首先是mysql的編譯安裝(GCC和MAKE都要安裝上,其他的套件按需安裝)
免費下載地址在 http://linux.linuxidc.com/
用戶名與密碼都是www.linuxidc.com
[root@localhost httpd]# useradd mysql
[root@localhost ~]# ll mysql-5.1.59.tar.gz
-rw-r--r-- 1 root root 24325443 Oct 14 22:38 mysql-5.1.59.tar.gz
[root@localhost ~]# tar zxvf mysql-5.1.59.tar.gz
[root@localhost mysql-5.1.59]# ./configure --prefix=/usr/local/mysql --enable-local-infile --with-charset=gbk --with-extra-charsets=all --with-low-memory --with-mysqld-user=mysql --enable-thread-safe-client
[root@localhost mysql-5.1.59]# make && make install
[root@localhost mysql-5.1.59]# cd /usr/local/mysql/
[root@localhost mysql]# chown -R mysql.mysql .
[root@localhost mysql]# ./bin/mysql_install_db --user=mysql
[root@localhost mysql]# chown -R root .
[root@localhost mysql]# chown -R mysql /var/
[root@localhost mysql]# ./bin/mysqld_safe --user=mysql &
[root@localhost mysql]# netstat -tulnp|grep 3306
tcp 0 0 0.0.0.0:3306 0.0.0.0:* LISTEN 20438/mysqld
[root@localhost mysql]# cd ~(這部分是制作mysql的開機啟動項)
[root@localhost ~]# echo "/usr/local/mysql/lib/mysql" >> /etc/ld.so.conf
[root@localhost ~]# ldconfig -v
[root@localhost ~]# ln -s /usr/local/mysql/bin/mysql /usr/local/bin/mysql
[root@localhost ~]# cp mysql-5.1.59/support-files/mysql.server /etc/init.d/mysqld
[root@localhost ~]# chmod 775 /etc/init.d/mysqld
[root@localhost ~]# cp mysql-5.1.59/support-files/my-medium.cnf /etc/my-cnf
[root@localhost ~]# chkconfig --add mysqld
[root@localhost ~]# chkconfig mysqld on
[root@localhost ~]# chkconfig --list|grep mysqld
mysqld 0:off 1:off 2:on 3:on 4:on 5:on 6:of
接著是apache的編譯安裝
[root@localhost ~]# ll httpd-2.2.6.tar.gz
-rw-r--r-- 1 root root 6028951 Sep 6 2007 httpd-2.2.6.tar.gz
[root@localhost ~]# tar zxvf httpd-2.2.6.tar.gz
[root@localhost ~]# cd httpd-2.2.6
[root@localhost httpd-2.2.6]# ./configure --prefix=/usr/local/httpd --enable-so --enable-rewrite --enable-ssl --with-ssl=/usr/local/openssl
--with-zlib --enable-mods-shared=all --enable-track-vars --with-mysql=/usr/local/mysql
[root@localhost httpd-2.2.6]# make && make install
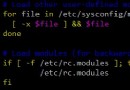
[root@localhost httpd-2.2.6]# echo "/usr/local/httpd/bin/apachectl start" >> /etc/rc.local
[root@localhost httpd-2.2.6]# /usr/local/httpd/bin/apachectl start
[root@localhost httpd-2.2.6]# netstat -tulnp|grep 80
tcp 0 0 :::80 :::* LISTEN 19055/httpd
接著添加php的支持
[root@localhost ~]# cd /usr/local/httpd/conf/
[root@localhost conf]# cp httpd.conf httpd.conf.bak
[root@localhost conf]# vi httpd.conf (紅色字體為修改部分)
DocumentRoot "/var/www"
<Directory />
Options FollowSymLinks
AllowOverride None
Order deny,allow
Allow from all
</Directory>
AddType application/x-httpd-php .php
AddType application/x-httpd-php-source .phps
最後是php的編譯安裝
[root@localhost ~]# ll php-5.2.5.tar.gz
-rw-r--r-- 1 root root 9972372 Jan 3 2008 php-5.2.5.tar.gz
[root@localhost ~]# tar zxvf php-5.2.5.tar.gz
[root@localhost php-5.2.5]# ./configure --prefix=/usr/local/php \
> --with-config-file-path=/etc \
> --with-apxs2=/usr/local/httpd/bin/apxs \
> --enable-fastcgi --enable-safe-mode \
> --with-zlib --with-bz2 \
> --with-freetype-dir \
> --enable-mbstring \
> --with-mysql=/usr/local/mysql \
> --with-mysqli=/usr/local/mysql/bin/mysql_config \
> --with-gd --with-libxml-dir \
> --with-png-dir --with-jepg-dir --enable-sockets
[root@localhost php-5.2.5]# make && make install
如果本機已經rpm方式安裝php,那麼進行下邊紅色字體的動作
[root@localhost php-5.2.5]# yum -y remove php*
[root@localhost php-5.2.5]# cp php.ini-dist /etc/php.ini
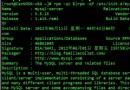
最後測試的部分
[root@localhost ~]# cd /var/www/
[root@localhost www]# vi info.php
<?
phpinfo();
?>
[root@localhost www]# cp /usr/local/httpd/htdocs/index.html .
重啟的服務就可以出來php那個經典的頁面,表示成功!
總結,這個實驗是為了搭建Nagios和Cacti需要的web環境,接下來的實驗就進入Nagios和Cacti的部分!